How to install Nudgify on your PrestaShop Store?
PrestaShop is a feature-rich open-source e-commerce platform that enables businesses to create and manage online stores efficiently.
Installing Nudgify with PrestaShop is really easy and only takes a couple of minutes. Our PrestaShop integration allows you to seamlessly connect Nudgify to your PrestaShop store to create Social Proof and FOMO Nudges.
If you have a PrestaShop store, you can install the Nudgify Module. When you configure our PrestaShop Module, we automatically:
– install the Nudgify Pixel on your PrestaShop store
– track your page visits
– connect your orders
– connect your stock levels
– identify the cart value of your visitors
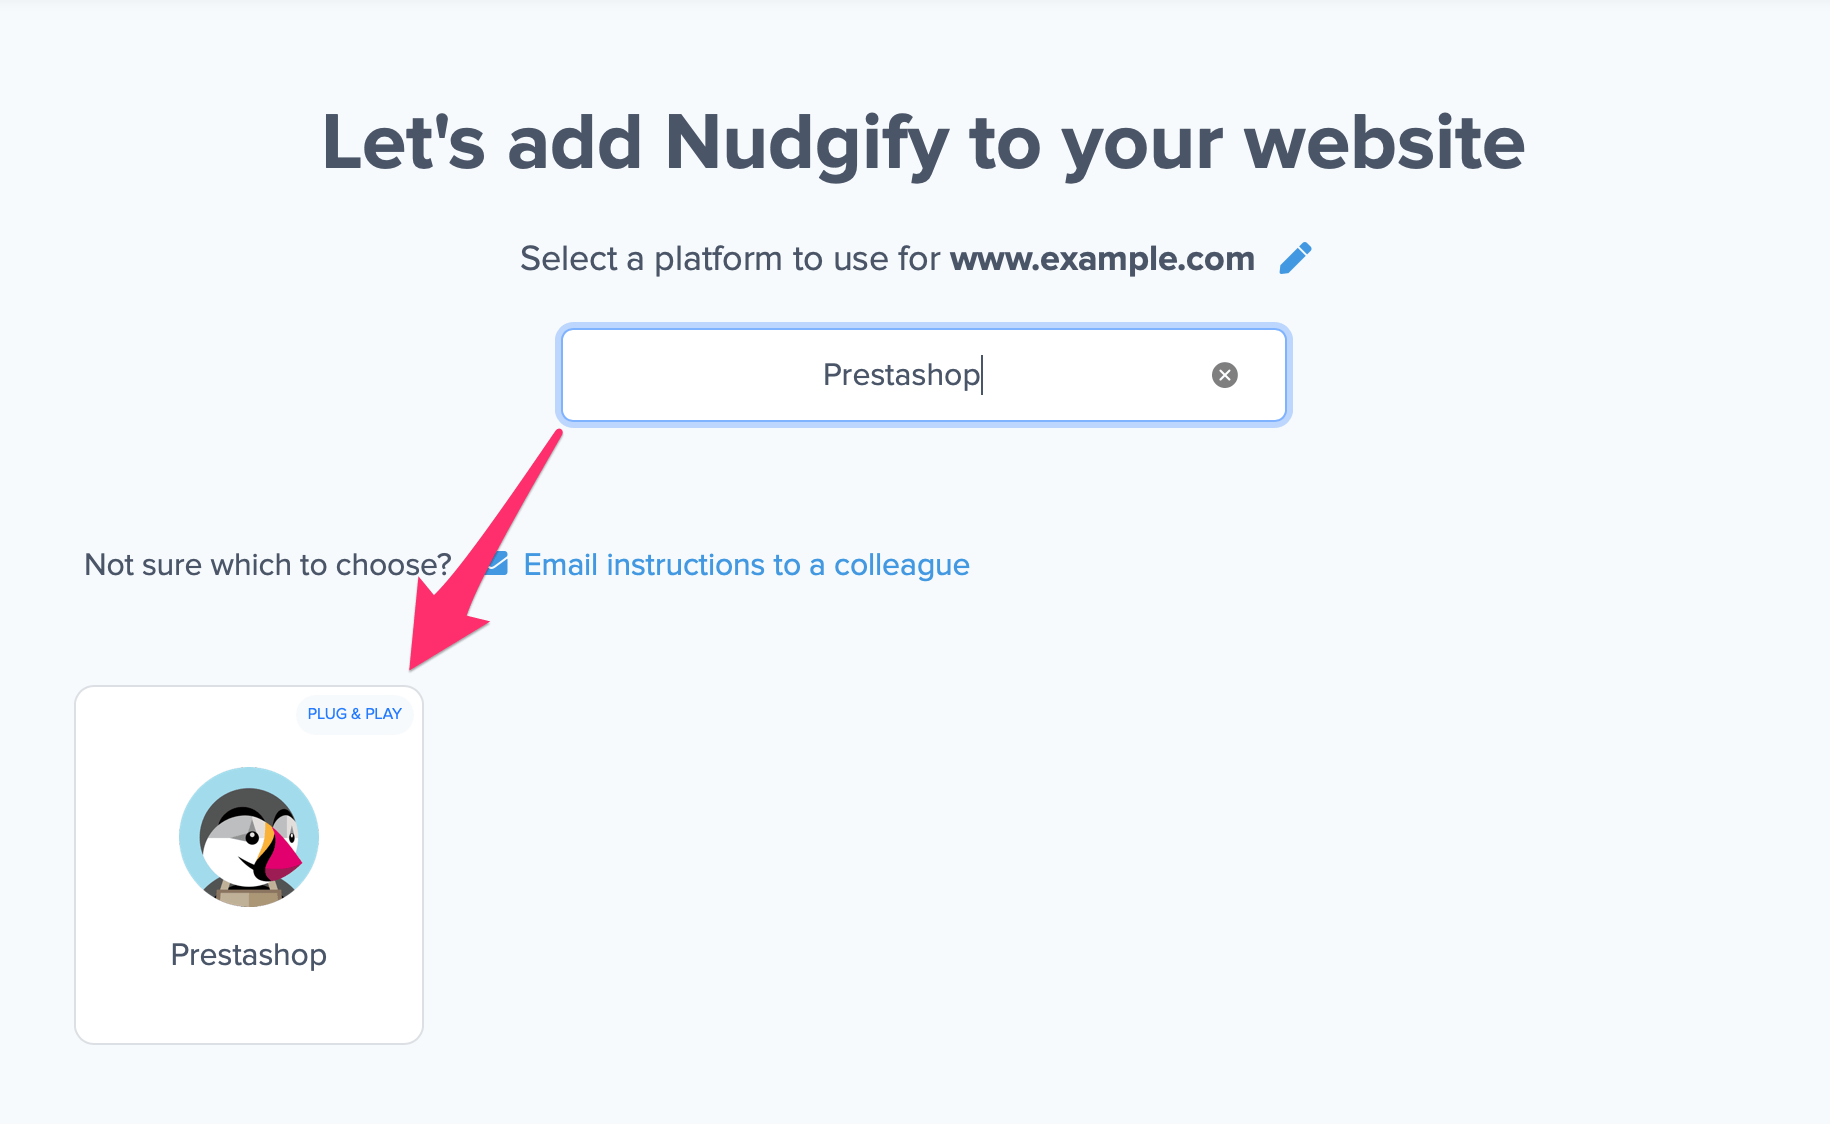
Step 1: Select PrestaShop in Nudgify
Just sign up for Nudgify and select PrestaShop as your integration.
Now a window will open in which you can see a step-by-step guide on how to install your Nudgify Pixel. This Pixel is nothing more than a small line of code that you need to copy and paste into the code of your website.
Step 2: Install the Nudgify PrestaShop Module
- Download the Nudgify PrestaShop Module
- In PrestaShop, go to Module Manager > Upload a module
- Upload the downloaded zip file and click Configure
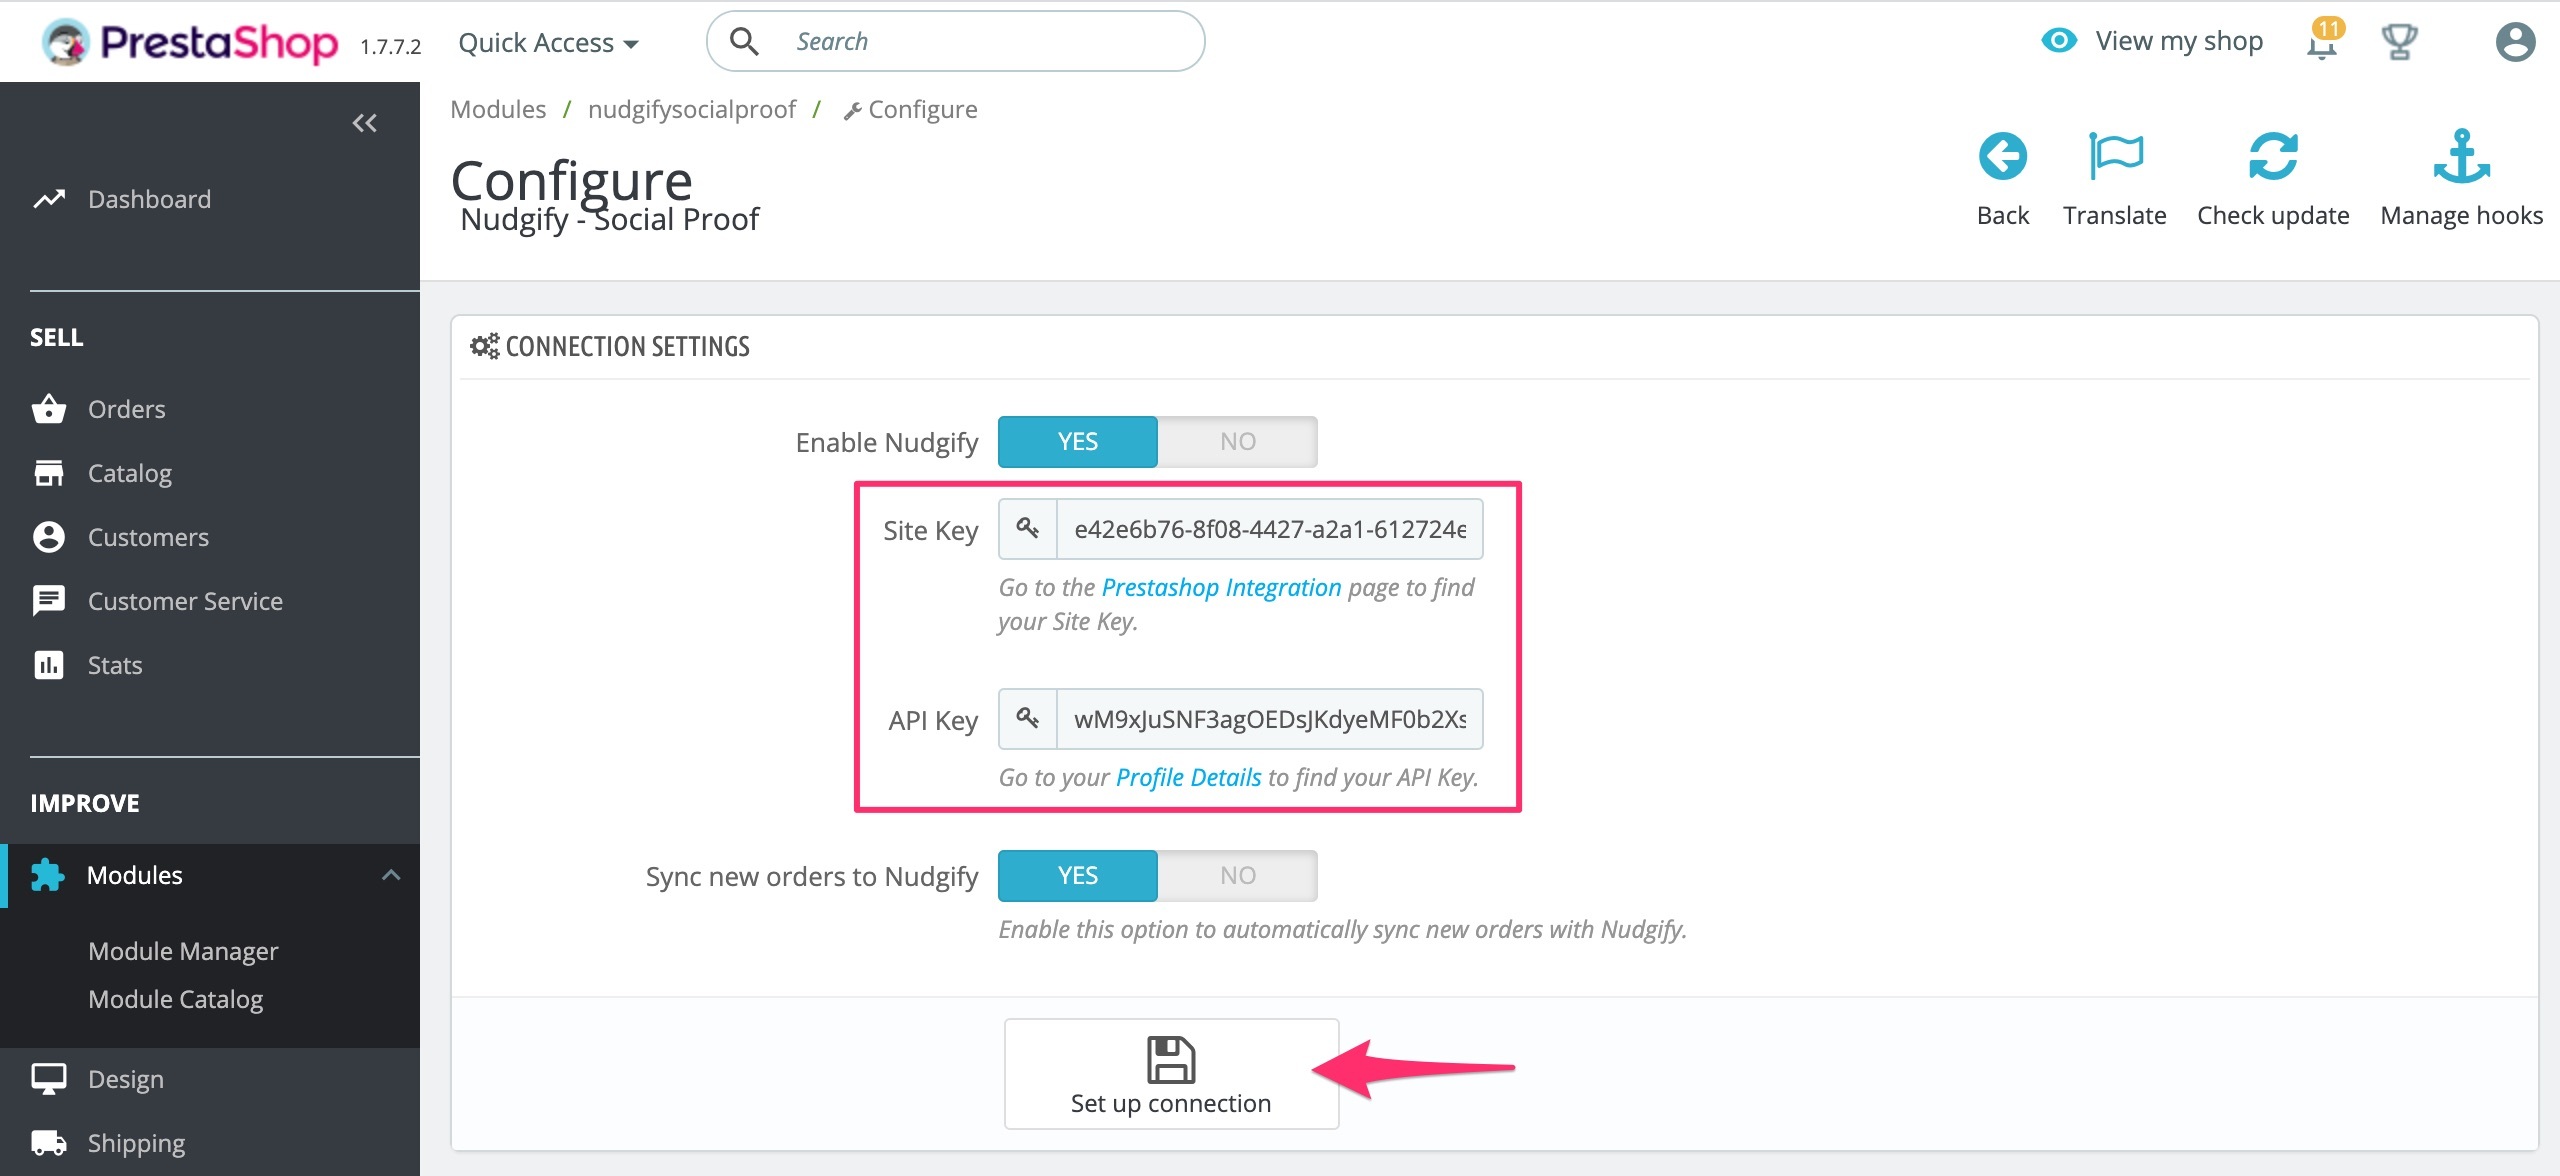
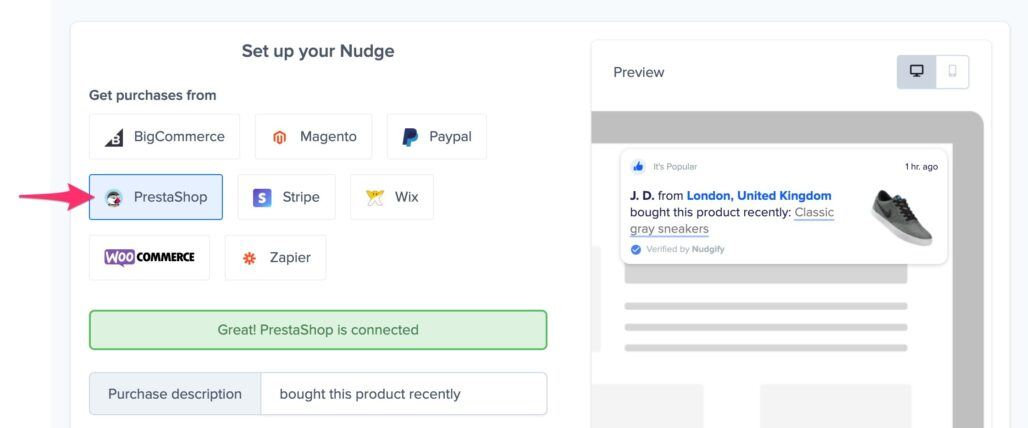
Step 3: Configure Nudgify in PrestaShop
- Copy and paste your Nudgify API and Site Keys into the fields in the module.
- You can find your Site and API keys on your PrestaShop integration page in your Nudgify account.
- To automatically sync new orders to Nudgify, you should set “Sync orders automatically” to “Yes”.
- Click Set up connection to complete the setup.
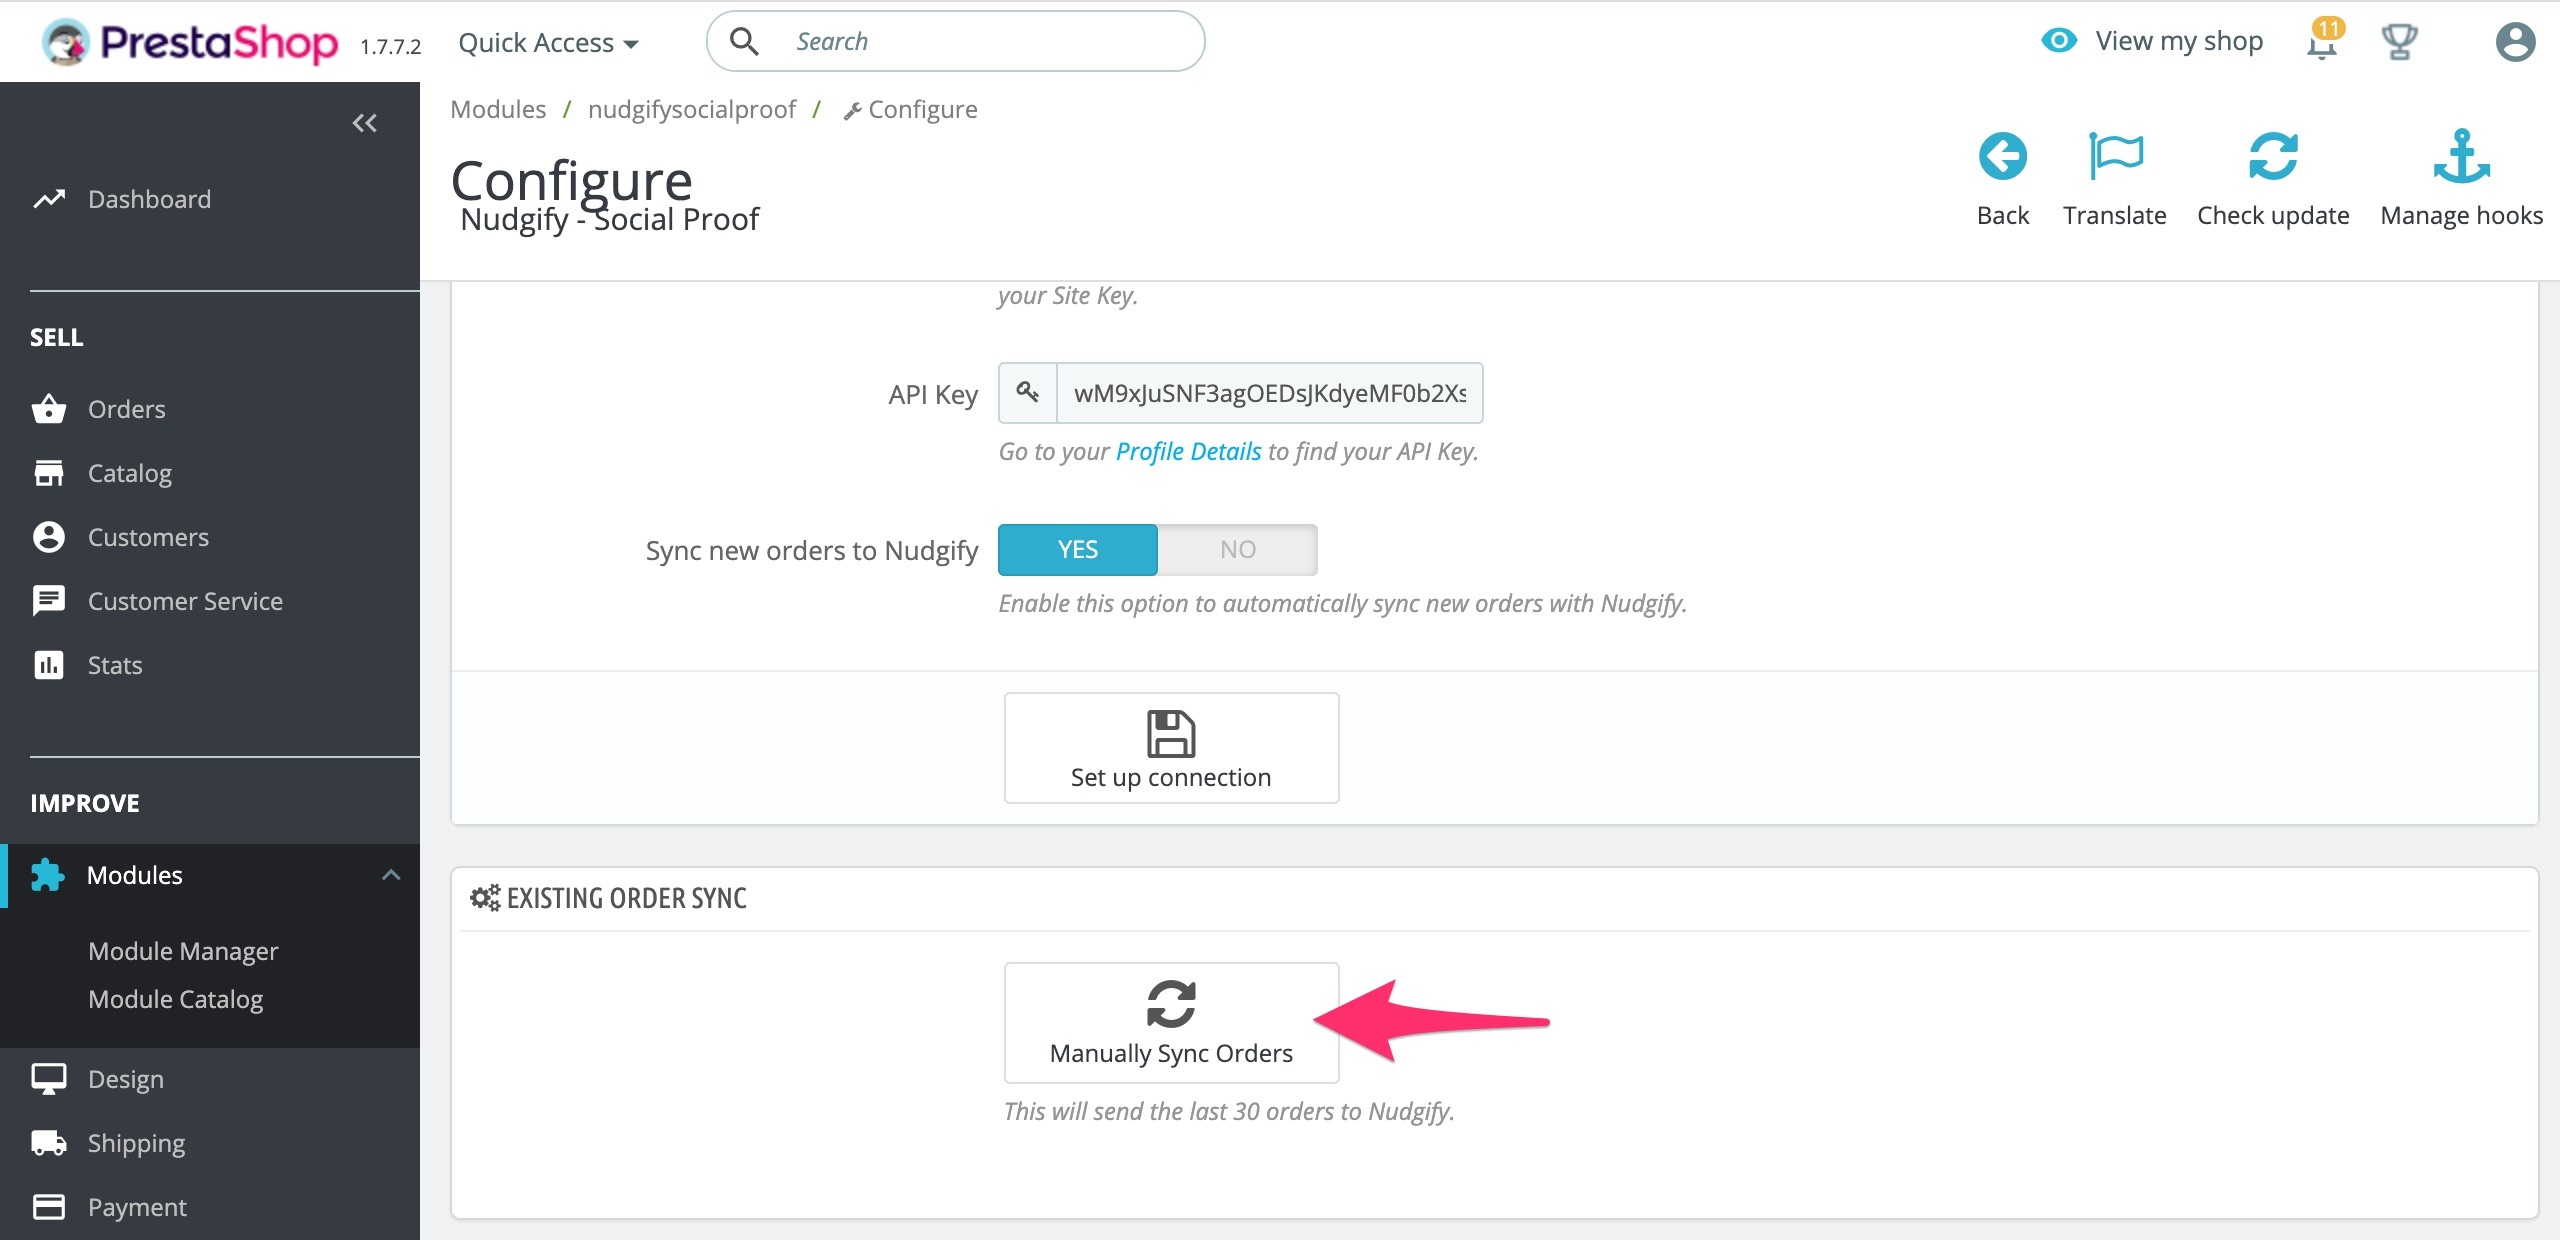
Show existing orders
If you would like to show existing orders, made before you set up the connection, you can click the manual sync button. This will fetch up to your 30 most recent orders, so that you can show recent purchases right away!
Check if your Pixel is installed
When you enter your Site and API keys, we automatically install your Nudgify Pixel for you. You can use the Pixel checker to double check whether the Nudgify was installed correctly on your PrestaShop store.
![]()
- Do you see the green “Pixel installed” message? Congratulations, your Nudgify Pixel is applied to all the pages of your website and you will be able to see the Nudges you create on the targeted pages.
- Do you not see the green “Pixel installed” message? This means that you haven’t yet installed your Pixel. Click the blue chat bubble in the app where we can assist you 1-on-1.
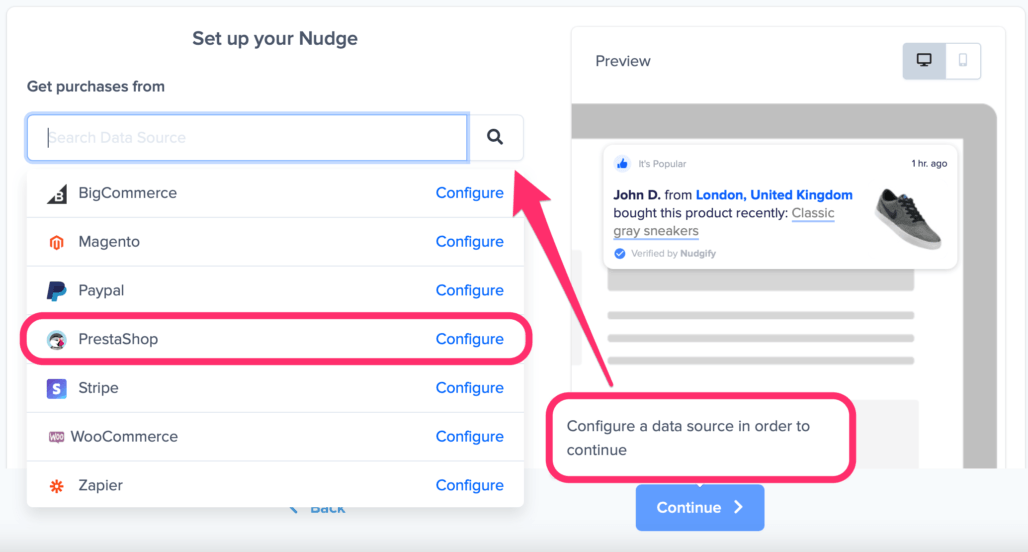
Step 4: Add Nudges and select PrestaShop as data source
Now that you’ve connected your PrestaShop data, you can use this data to show Nudges. Create the Nudges you want in you Nudgify account.
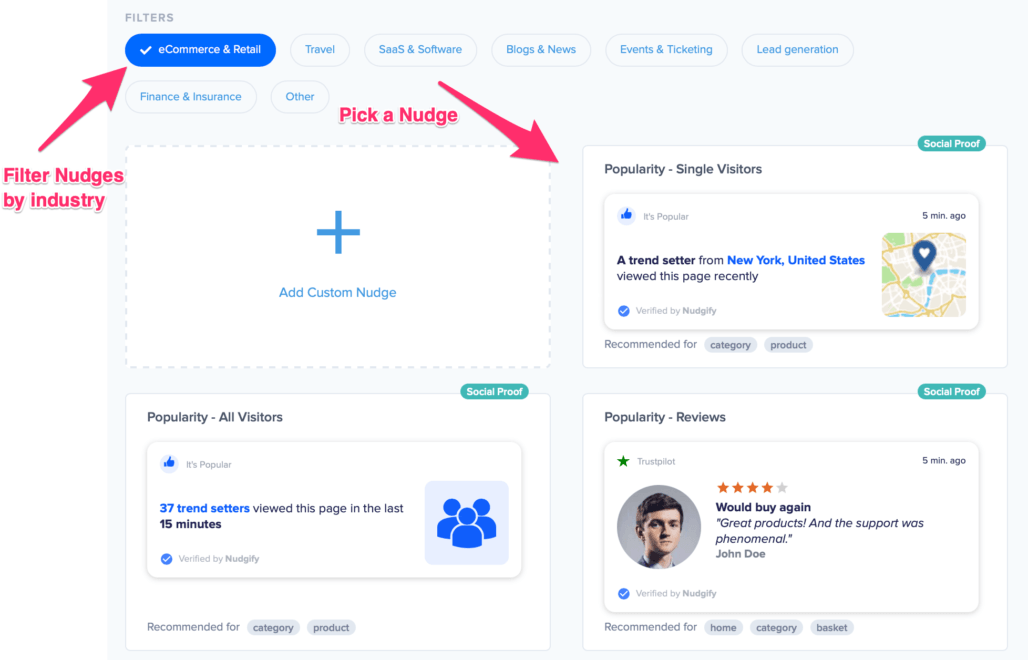
You can specifically select PrestaShop as the data source when you configure one of the following Nudges:
That’s it! You can now let your Social Proof and FOMO Nudges boost your PrestaShop sales 🙌