Pabbly is an all-in-one business management software that simplifies and automates various aspects of running a business, including email marketing, subscription billing, form building, and more.
Do you want to connect Nudgify to a tool we do not integrate with directly? Our Pabbly integration allows you to connect to 500+ tools! With Pabbly, you can turn the data you want into powerful Social Proof.
Show data from the apps you are using in your Recent Activity Nudges, such as Hubspot form submissions, Paypal payments and much, much more.
In order to create Social Proof on your site, Pabbly allows you to connect two tools via the REST API option. Each step consists of a ‘Trigger’ and an ‘Action’. It works as follows: when X happens (Trigger), do Y (Action).
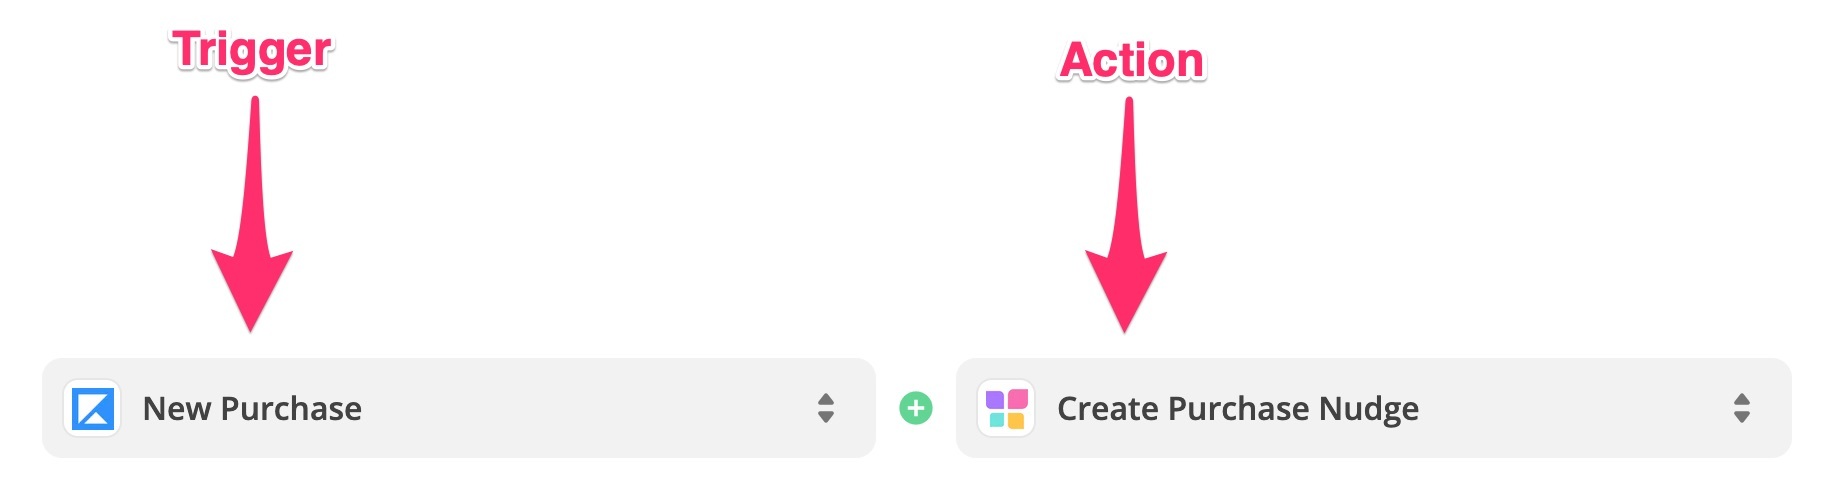
This allows you to use the app you want as the Trigger to create a Nudge (Action).
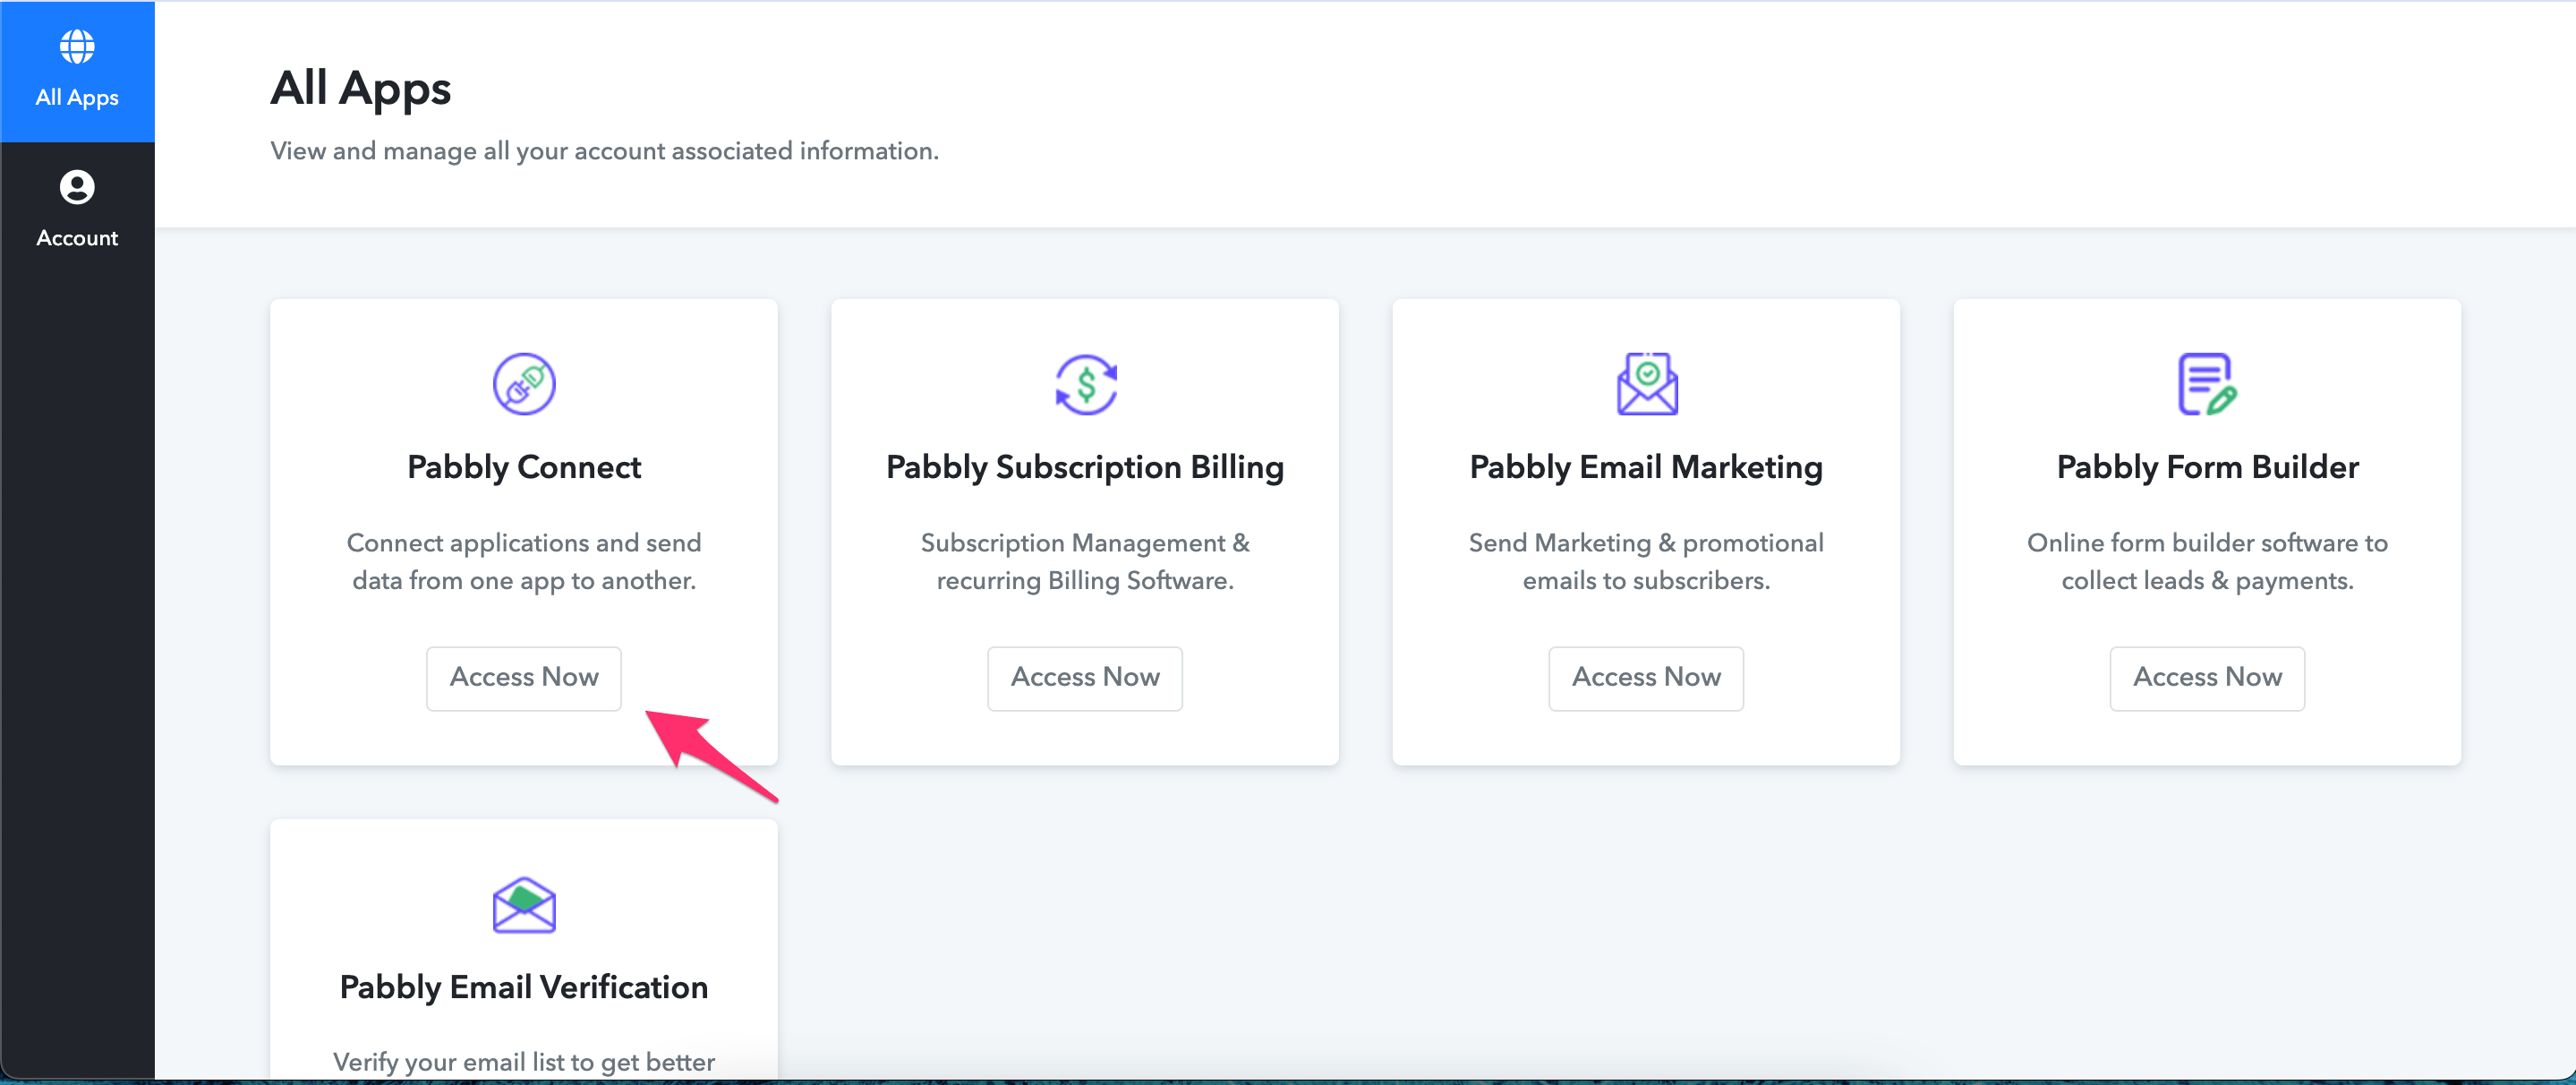
Step 1: Connect to Pabbly
- Login to your Pabbly account and navigate to “Pabbly Connect”. Click on the access Now Button.
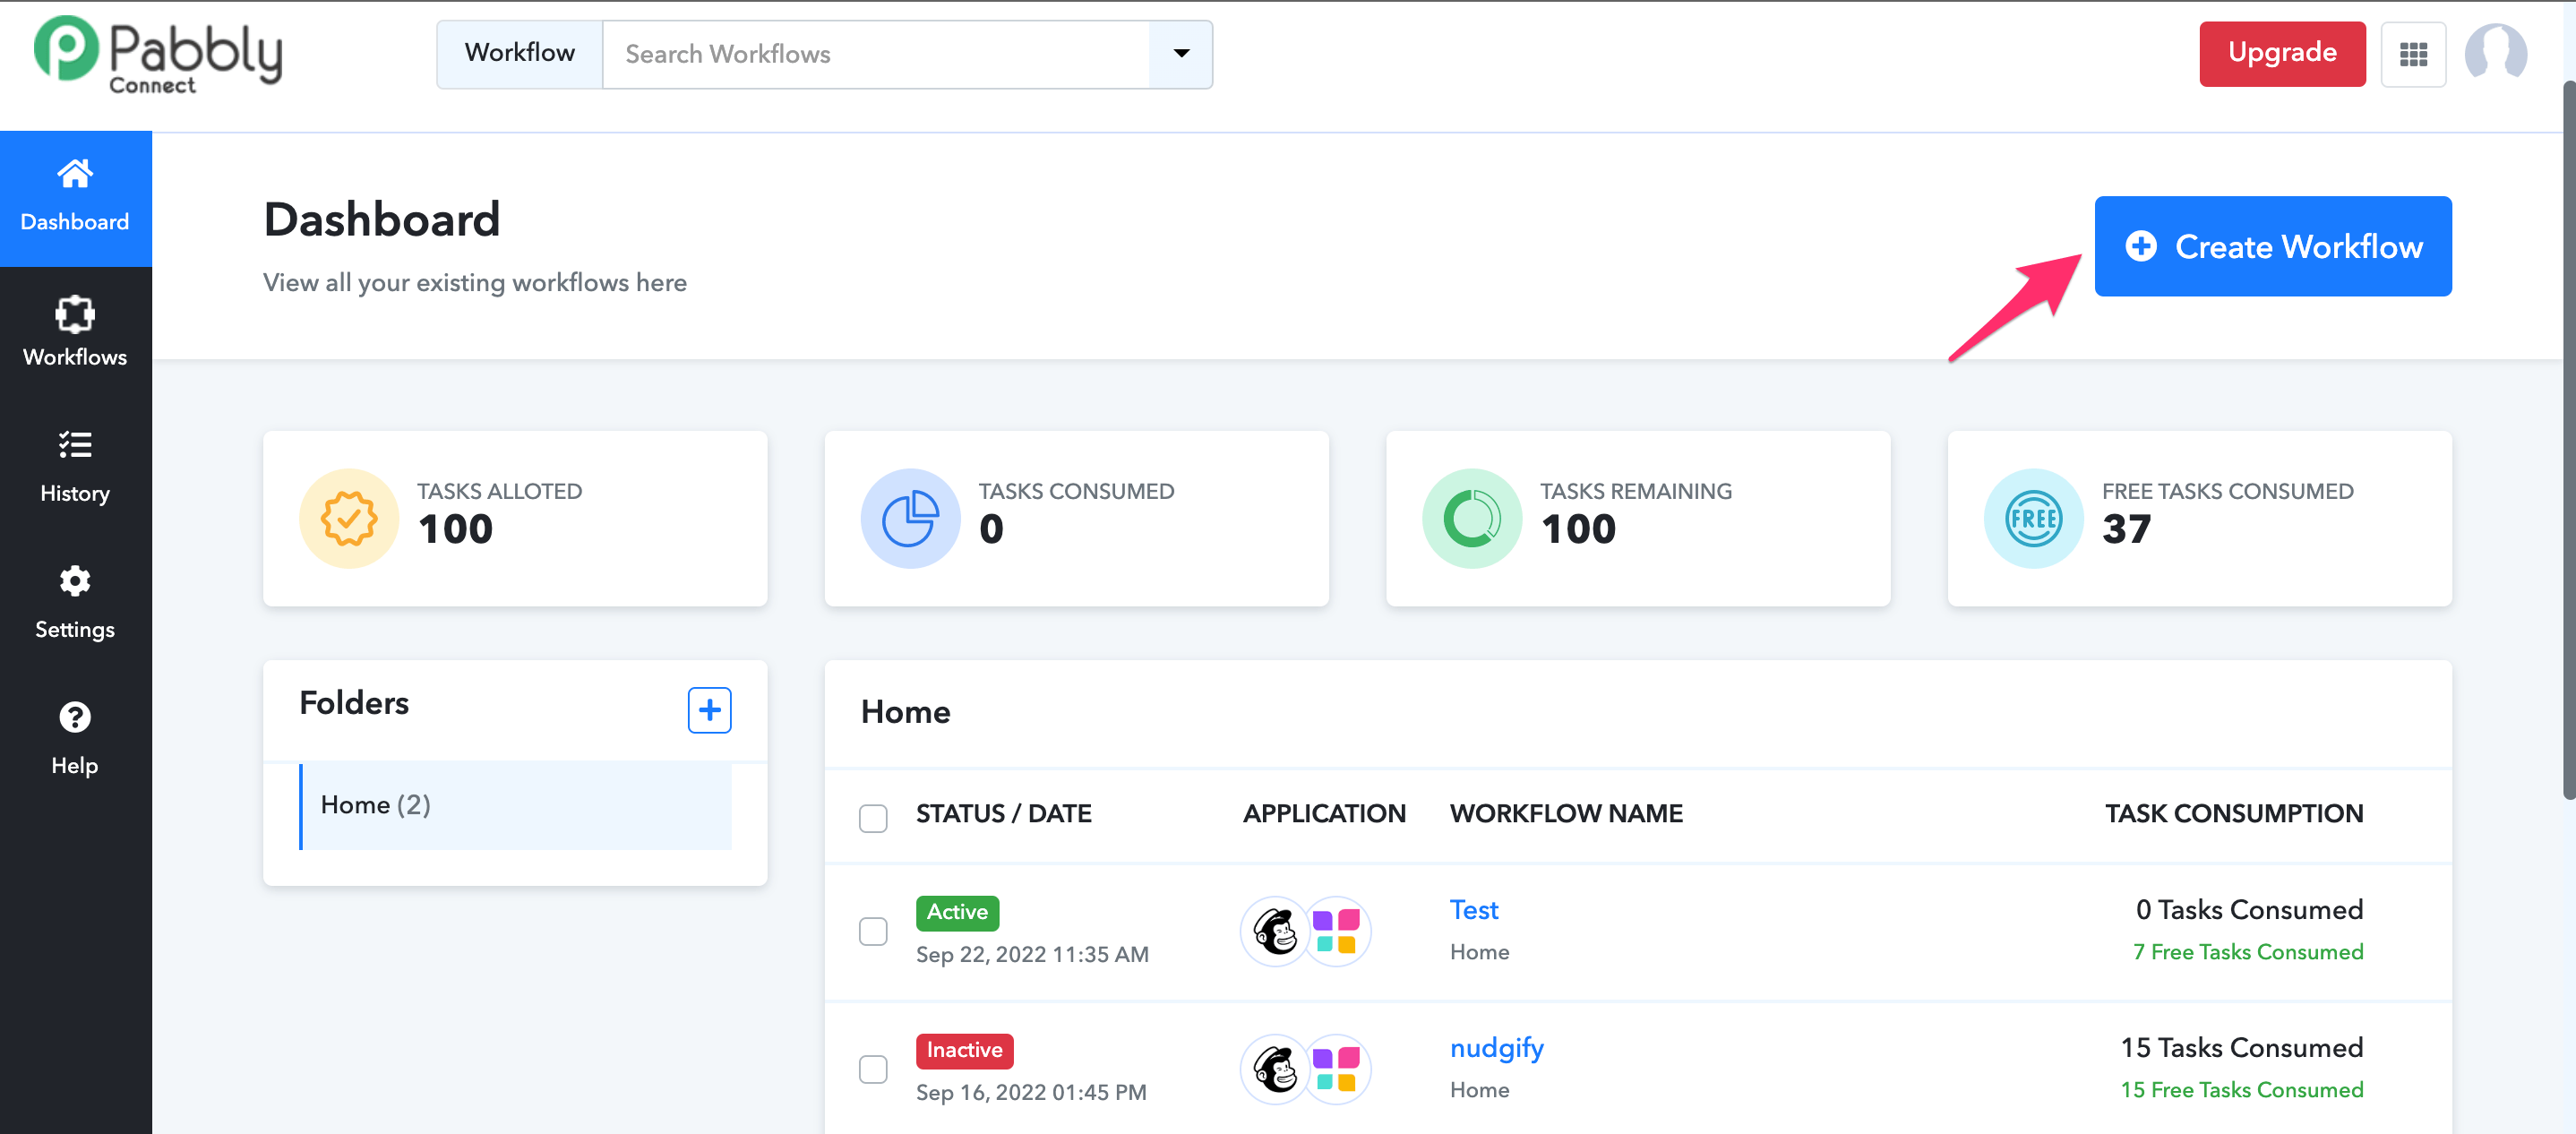
- You will be taken to your Pabbly dashboard where you can create a workflow.
Step 2: Create a workflow
Once connected to the Pabbly dashboard, click on the blue “Create Workflow” at the top right corner of the screen
Step 3: Select your Trigger and Action
Choose an App and Event for the Trigger you want for your Nudge.
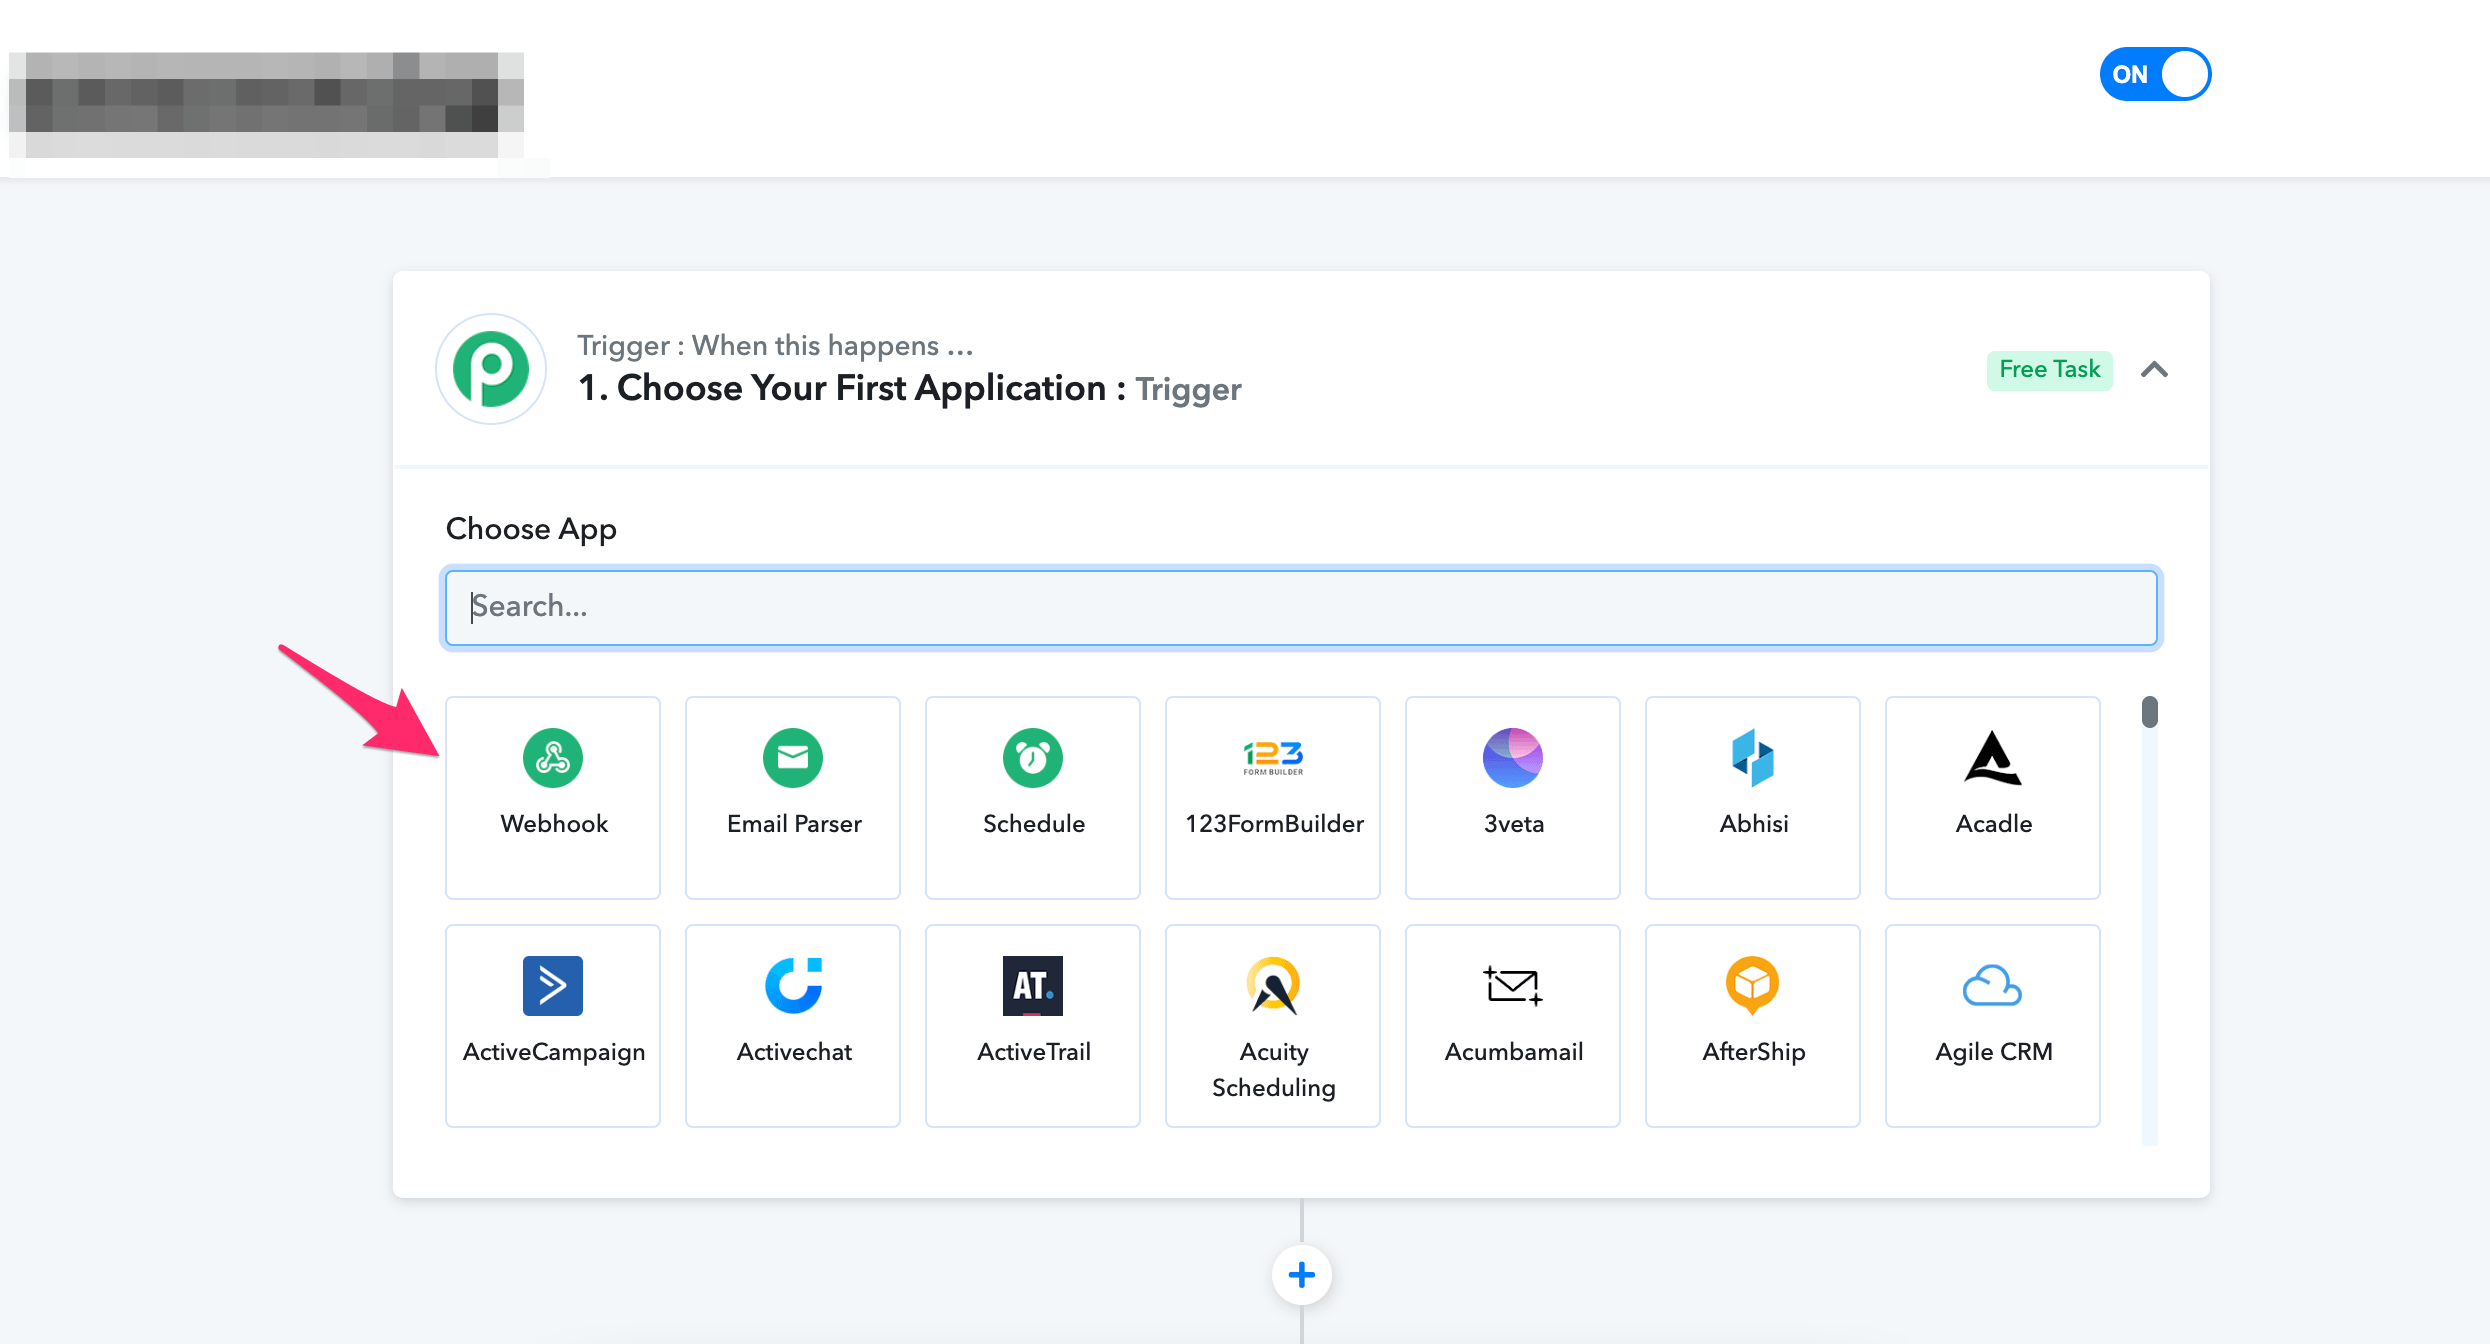
For example, a Trigger for a Kajabi order or a new ActiveCampaign or GetResponse contact. In the example we use, the Trigger is a New Sign Up on Mailchimp in your Pabbly dashboard.
For the Action, you can choose between two options:
- Create Sign-up Nudge: choose this option for Triggers that do not involve payment, e.g. a newsletter subscription or a free trial sign-up.
- Create Purchase Nudge: choose this option for Triggers that involve a payment, such as a purchase or paid subscription.
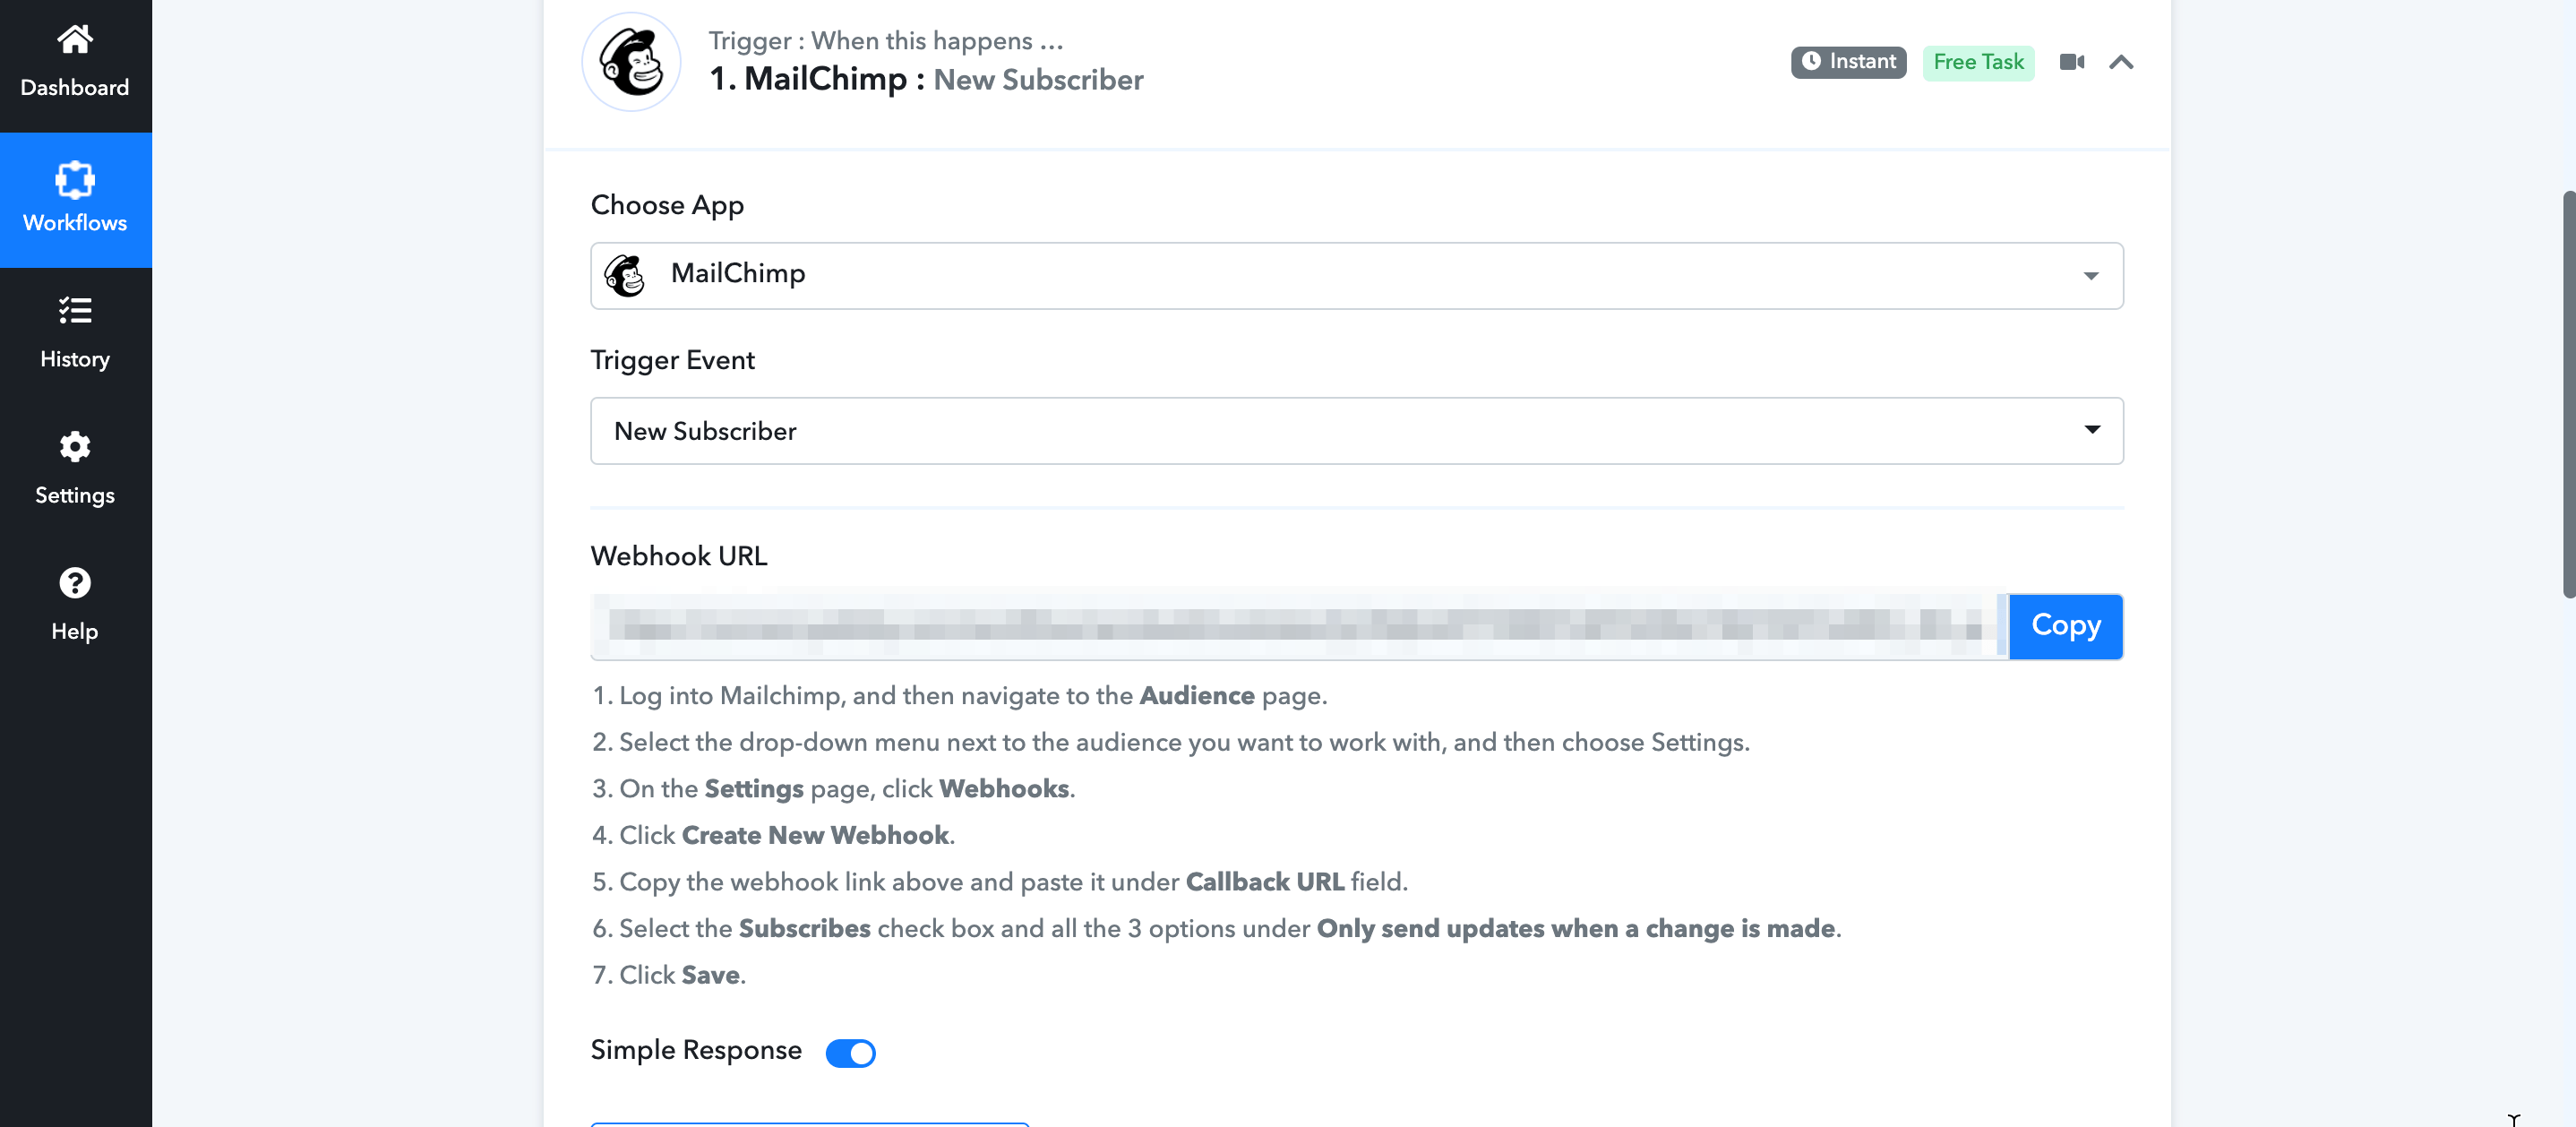
Step 4: Set up your Trigger
In order to set up the Trigger you picked, you need to connect the account of the app you chose. In the example here, you connect your Mailchimp account by following the detailed steps in the instructions.
You click “Capture Webhook Response” to check if you have New Subscribers in your Mailchimp account to show in your Nudges with Pabbly.
Step 5: Set up your Action in Pabbly
Choose App & Event: Purchase Nudge or Sign-up Nudge?
This is where you choose or change the App and Event you want to use for your Action. You have already selected Nudgify and chosen between the two options:
- Create Purchase Nudge:
The “Create Purchase Nudge” Event in Pabbly allows you to use data from your Trigger app for your Purchase Nudges in Nudgify. You should choose this event when you are sending data that involves a payment, such as a product purchase or a paid subscription. - Create Sign-up Nudge:
The “Create Sign-up Nudge” Event in Pabbly allows you to use data from your Trigger app for your Sign-up Nudges in Nudgify. You should choose this event when you are sending data that does not involve a payment, such as a newsletter subscription or a free trial sign-up.
If you want to change your Action Event, you can choose another option in the Choose App & Event step.
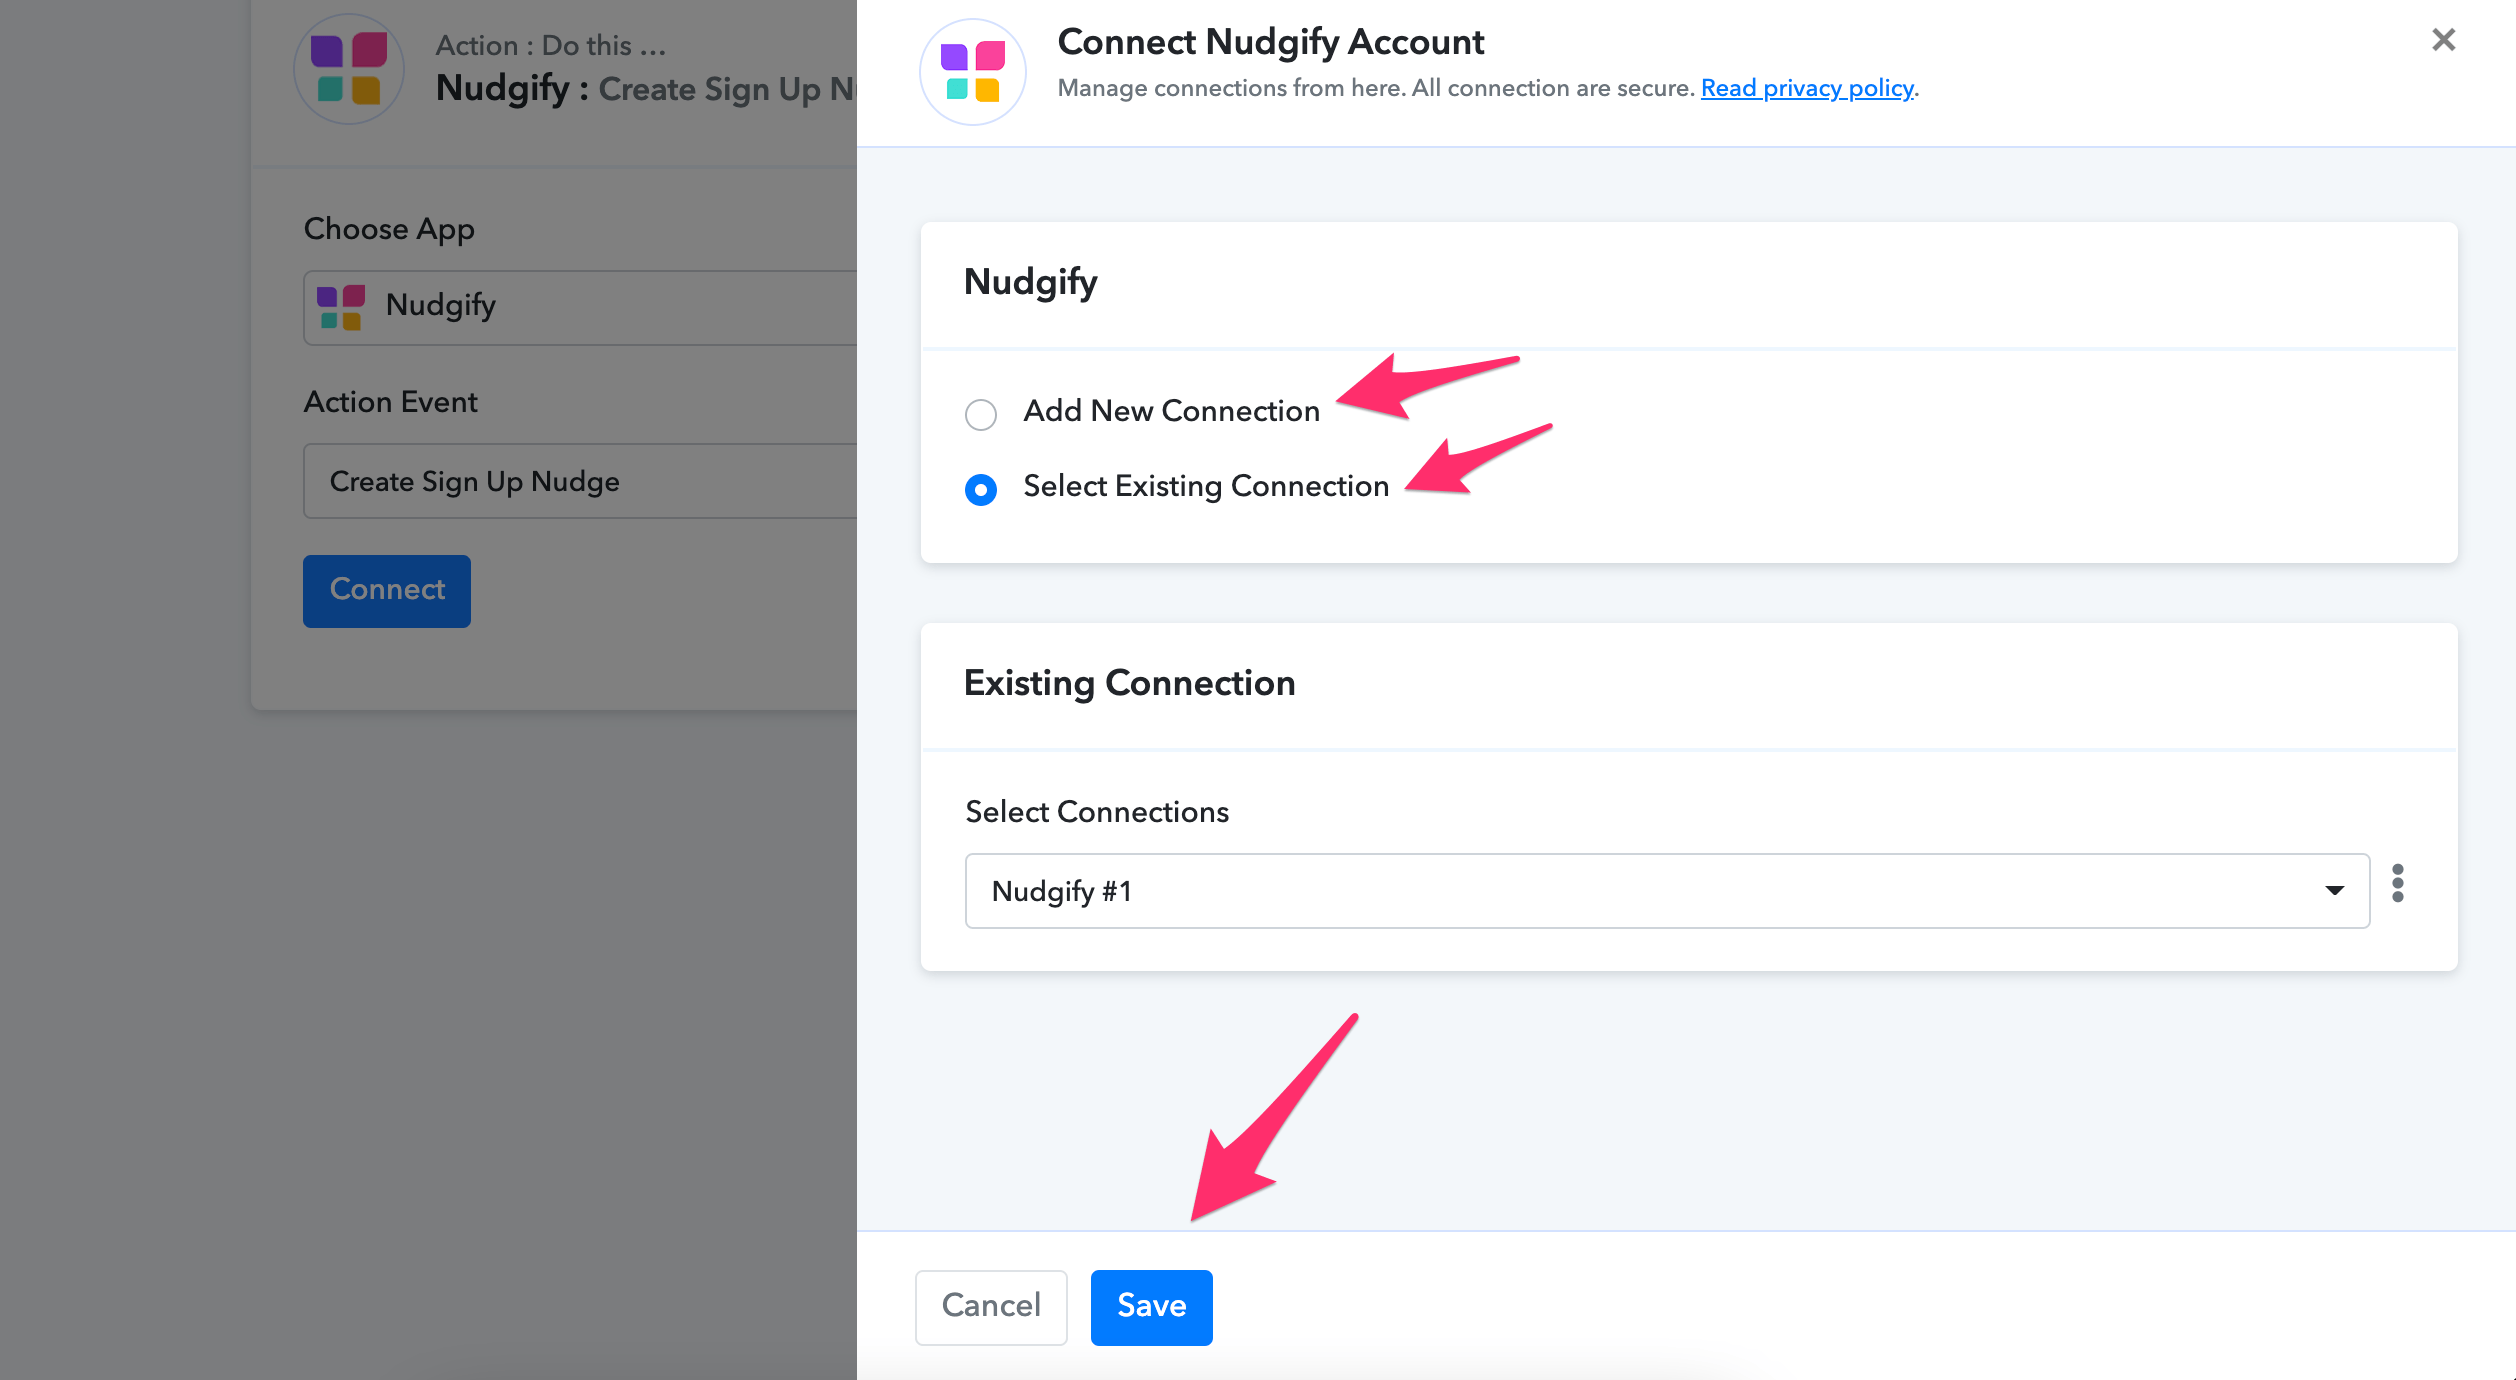
Choose Account: Connect your Nudgify Account to Pabbly
To connect your Nudgify account, click “Add New Connection” or “Select Existing Connection” if you have already connected your Nudgify account to Pabbly.
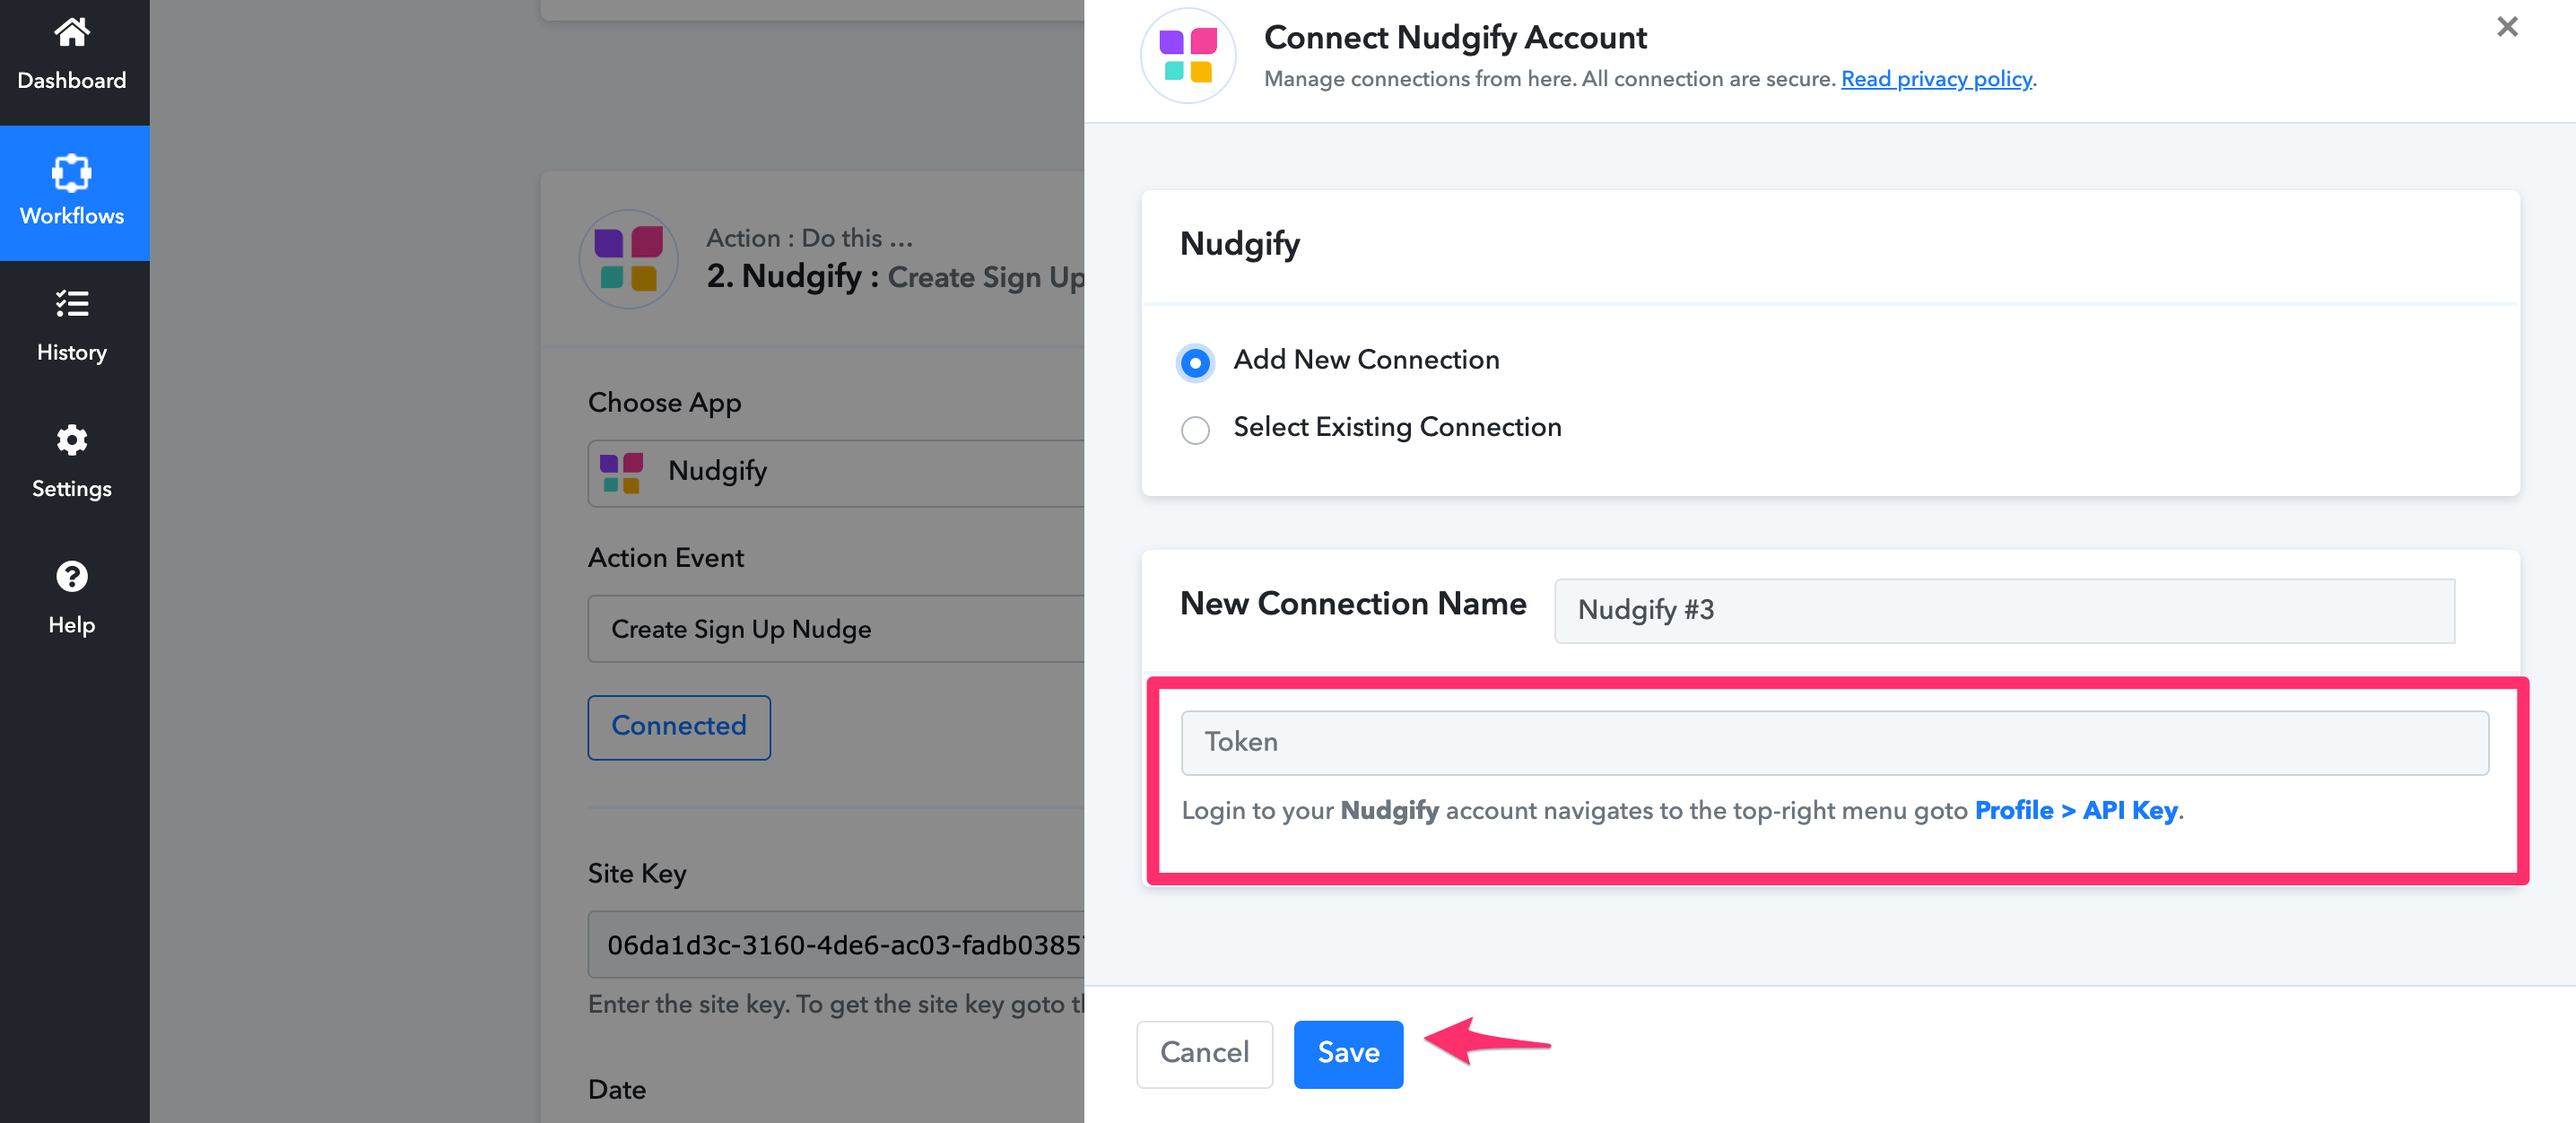
For New Connections, after clicking the “Add New Connection” button, navigate to your Nudgify account and get your API Key which you can get when you click on your Profile and copy it.
Paste it in the Pabbly in the box that says “Token”, save and then connect to Nudgify.
Customize your Nudge in Pabbly
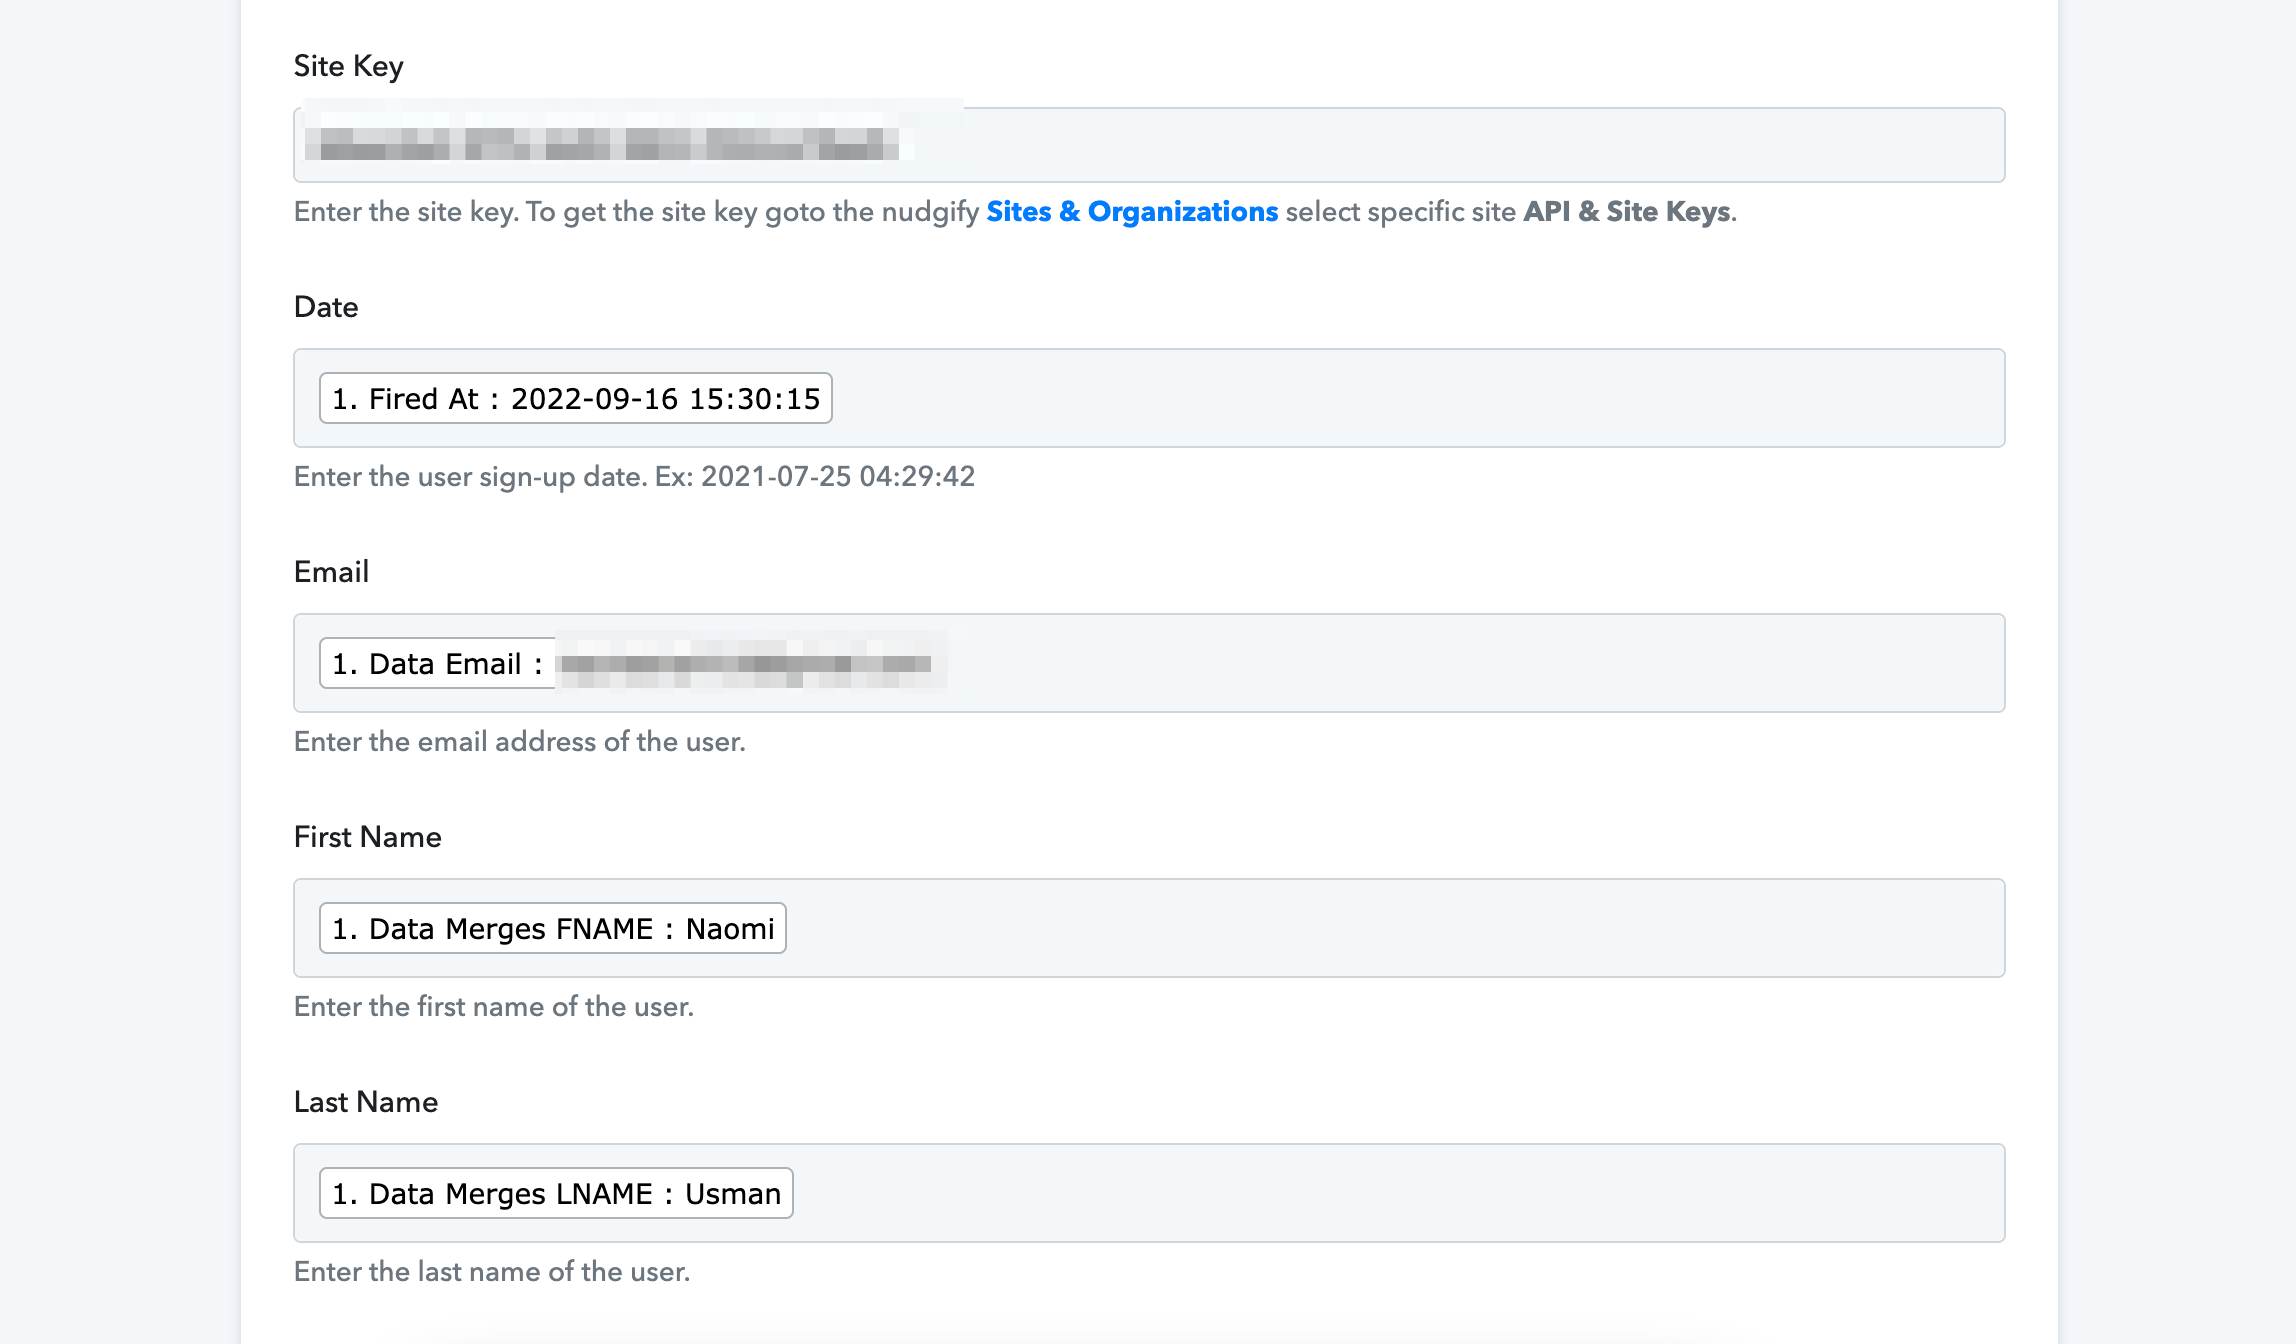
In this step, you select which Trigger data you send to Nudgify. This is data such as the email address, name, date, and product name. Some of this information will be displayed in the Nudge, and other information, such as the order ID, we use to identify that a new event has taken place.
The data fields to fill out are slightly different for the Purchase Nudge and the Sign-up Nudge. For the Purchase Nudge, there are some extra fields related to the product that was purchased, such as product name and product ID.

To send the relevant Trigger data to Nudgify, you need to fill out all, or at least the required fields. Instead of just typing things in the fields, you should click on each field. When you click on a field, a drop-down menu pops up with the data from the test Trigger you did in the Trigger step.
You will see example data from the test Trigger you did, but the data in the drop-down menu is dynamic data. This means that it will be different for each event. It allows you to show the name, location, product name etc. for each purchase or sign-up.
Copy your Site Key from Nudgify. You can get this from your Nudgify account and connect this to Pabbly.
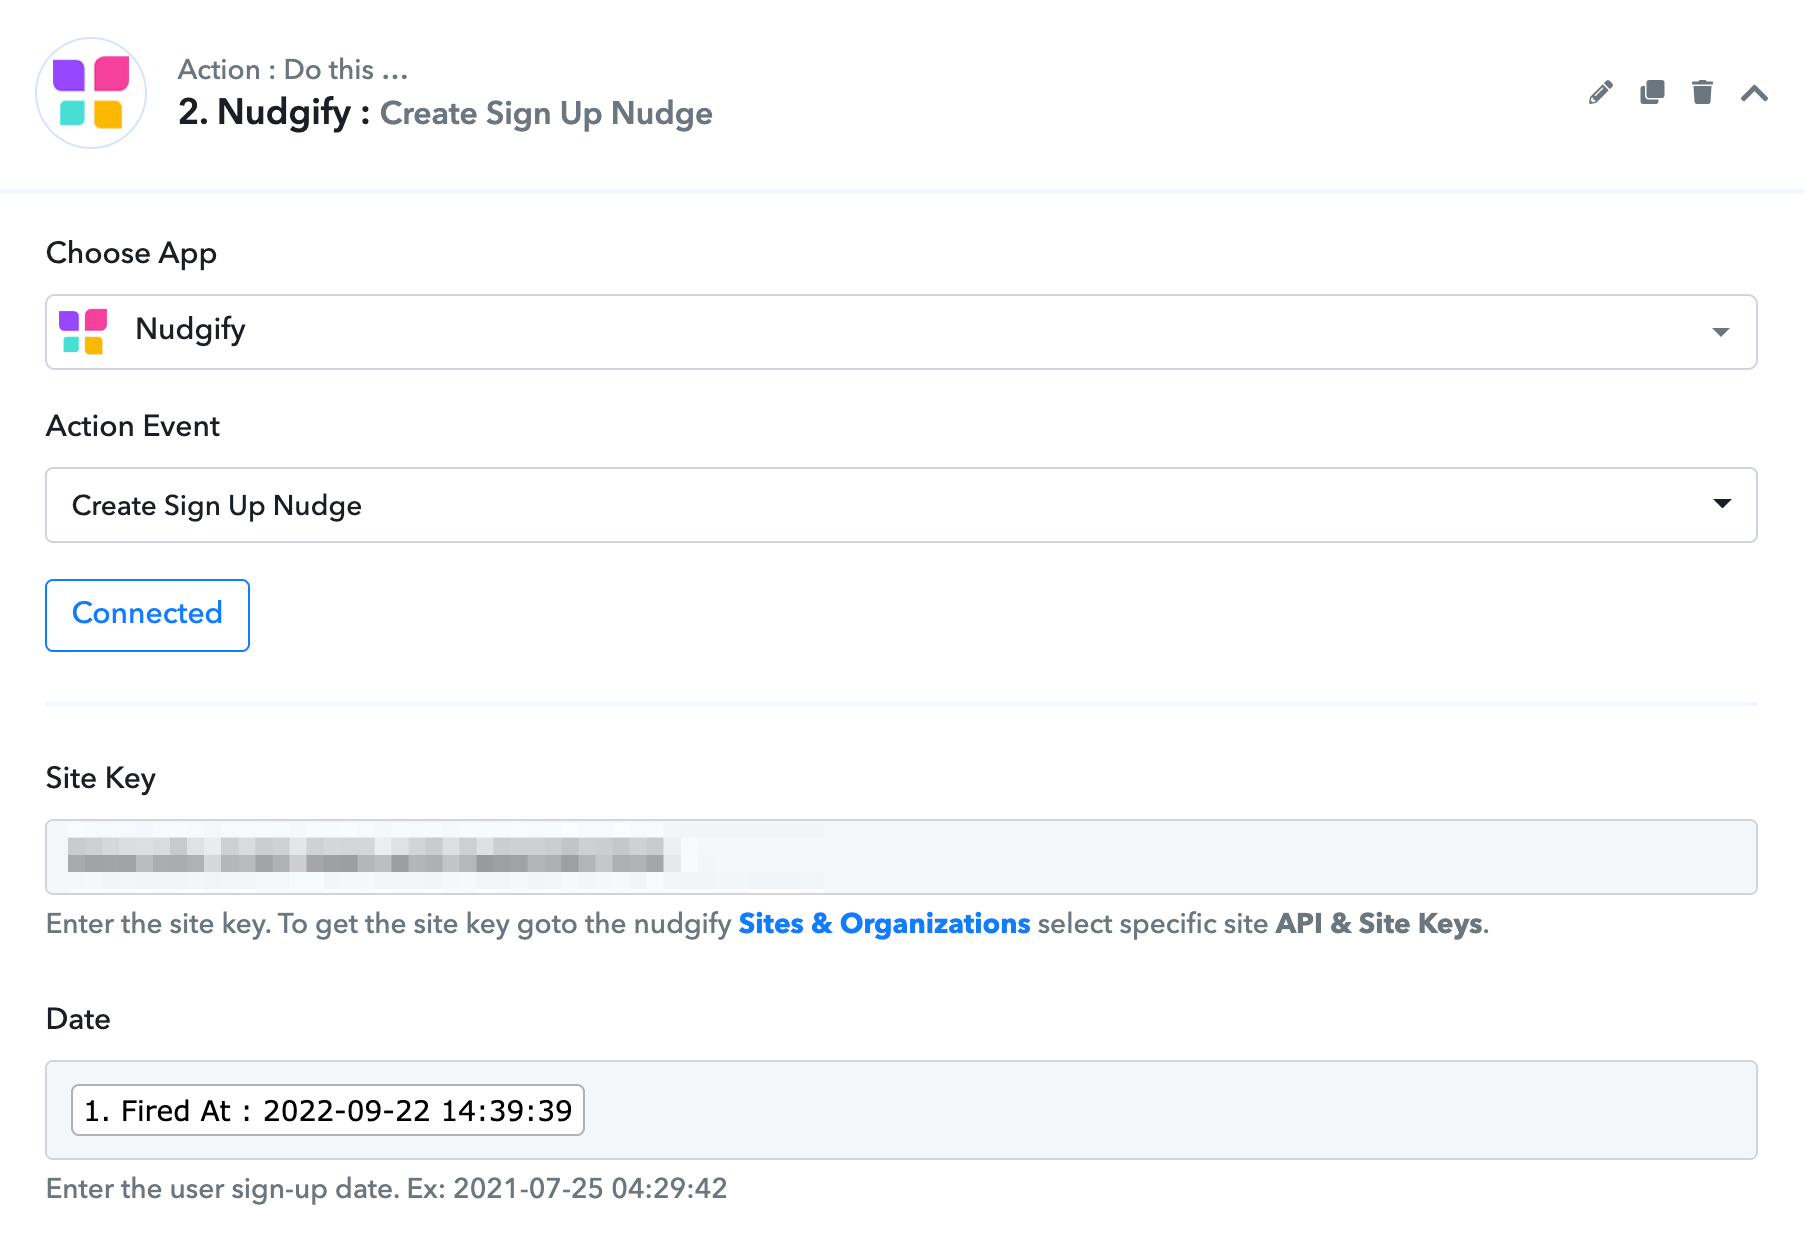
Click on a field and select the relevant data from the drop-down menu. Fill out all the fields you can this way, like so:
What if the data for a field is missing?
It can happen that some of the data is not available with the Trigger you chose. Don’t worry, as long as it is not a required field, a Nudge will still be created. The data from that field will then simply not show in your Nudge.
For example, if the name is not available, the Nudge will display ‘Someone from London, UK…..’, instead of ‘John D. from London, UK …..’
Overview of the fields to fill out
- Order ID REQUIRED (Purchase only)
We use this to define which order the purchase is part of. This helps us identify if multiple products were purchased in the same order - Customer Name
We use this to show the name of the customer in the Nudge. You can decide in your Nudge Setting how much detail of the name to show (at most, you can show first name + initial, so we never show the full name). If you leave this field empty, we will show “Someone” instead of the name. - Email REQUIRED
We use this to identify if a purchase or sign-up has been made before by the same person - Date REQUIRED
We use this to show how long ago the activity took place - IP
We use this to show the location of the customer. If you prefer to use the City/State/Country fields below to show the location, leave this field empty. If you do not leave this empty, the IP address will overrule the City/State/Country fields. - City
We use this to show the city of the customer - State
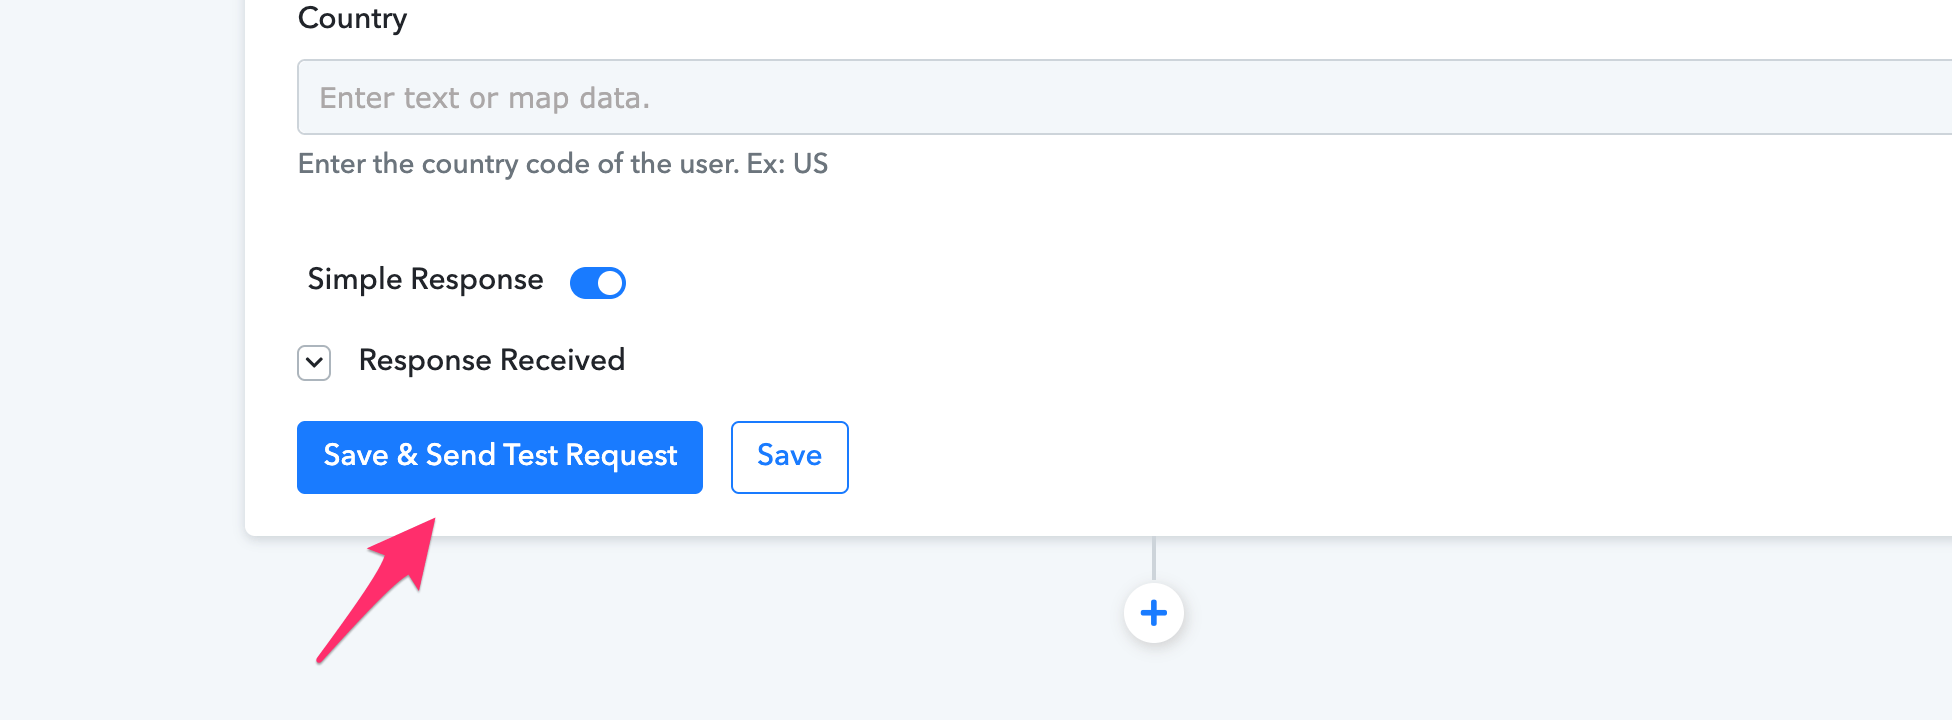
We use this to show the state (US only) of the customer. If the state is available, we show the state instead of the country. This allows you to show the state for customers from the US, while showing the country for customers elsewhere in the world. - Country
We use this to show the country of the customer - Product ID (Purchase only)
We use this to link the purchased product to the product page of that product. This allows us to only show recent purchases of that particular product on the product page. If you leave this empty, we show purchases of any product on any product page. - Product Variant ID (Purchase only)
We use this to identify which variant of a product was purchased, for example a certain colour or size - Product Name (Purchase only)
We use this to show the product name in the Nudge - Product Link (Purchase only)
We use this to link to the product page from the product name in the Nudge - Image Thumbnail URL (Purchase only)
We use this to show a product image in your Nudge. If you leave this blank, we will show a map of the location of the customer (if you have filled out the IP address or City/State/Country fields), or a pion icon.
Send test data
Click “Save and Send Test Response”
You can now see your Pabbly workflow in your dashboard.
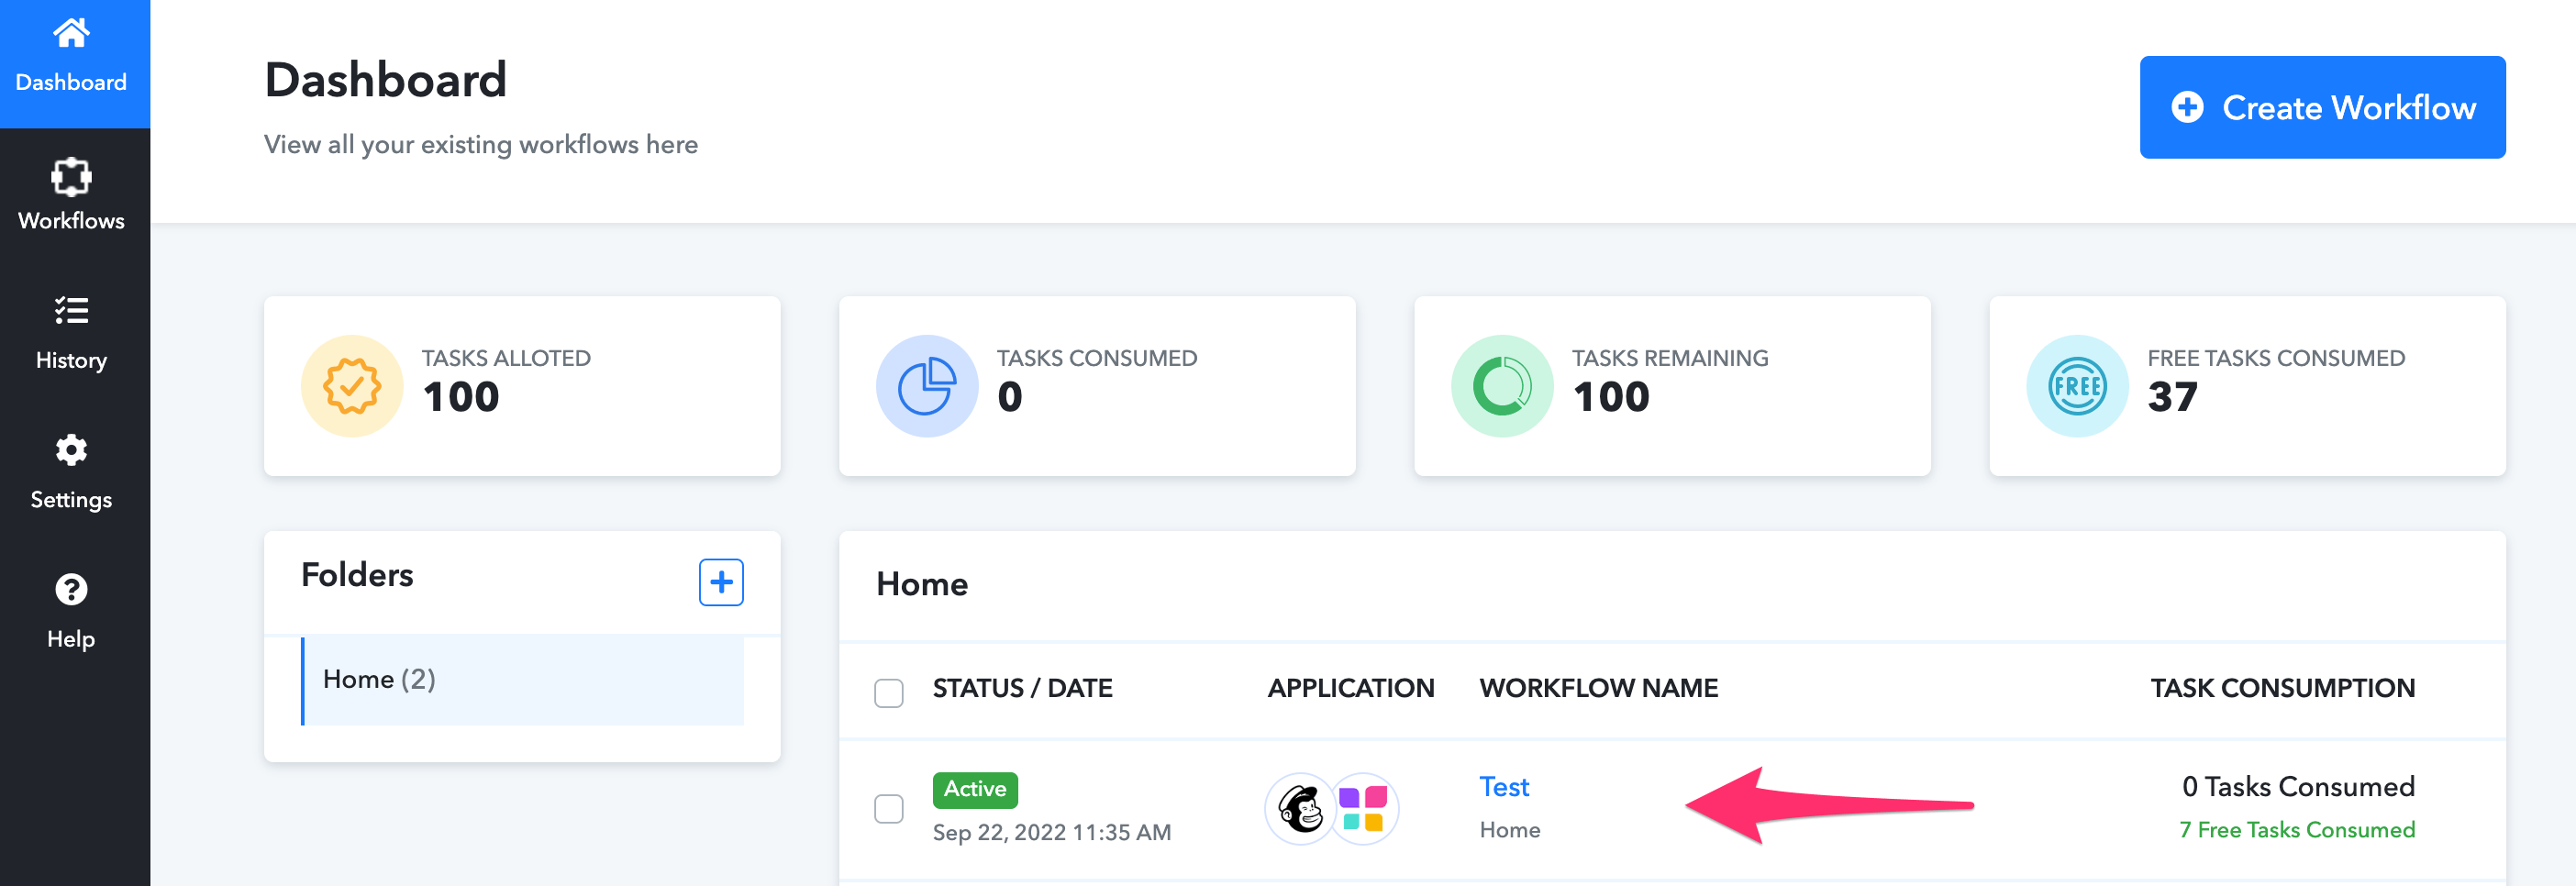
You should now see your active Workflow in your dashboard
Check if your Pabbly data is coming through to Nudgify
You can double-check whether your Pabbly data is connected successfully in the Purchase and Sign-up tabs of your Data Feeds. Your Data Feeds is where you can view the data of your integrations that has successfully come through to Nudgify. If your Pabbly data is connected successfully, you should be able to see your test Trigger. All new purchases/sign-ups come through there as REST API

Unfortunately, it is not possible to show purchases or sign-ups that were made before you activated Pabbly
Create a Purchase or Sign-up Nudge with your Pabbly data
You can now use your Pablly as data source for Purchase Nudges or Sign-up Nudges in your Nudgify account using REST API.
Check carefully which Action Event you used in Pabbly and choose the relevant Nudge.
- Did you choose “Create Purchase Nudge” in Pabbly? Choose a Purchase Nudge in your Nudgify account.
- Did you choose “Create Sign-up Nudge” in Pabbly? Choose a Sign-up Nudge in your Nudgify account.
When you set up your Nudge, you can now select “Get activity from REST API”. Give your activity a description that matches the Trigger you created in Pabbly, for example ‘bought this product’ or ‘subscribed to our newsletter’.
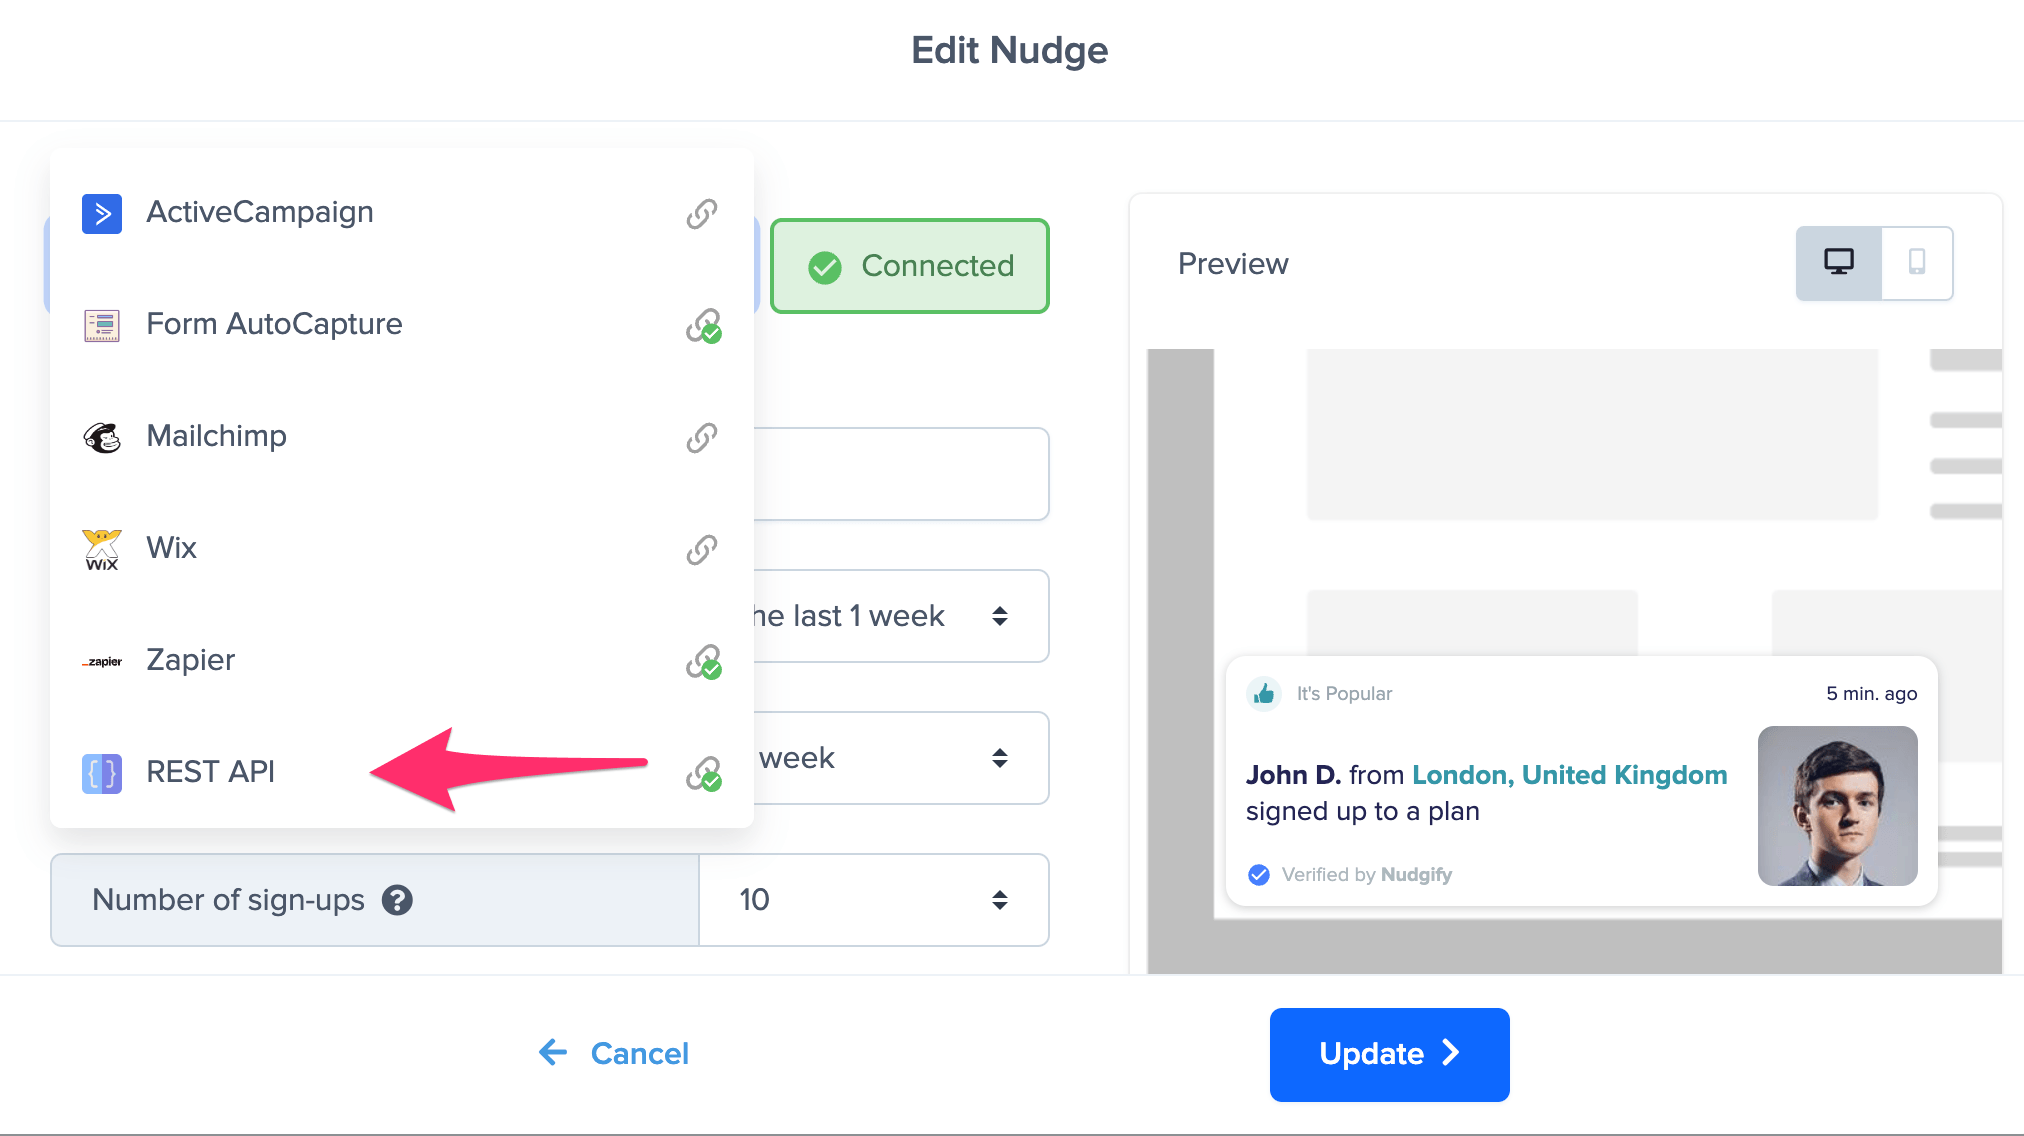
Click ‘Continue’ or ‘Update’ and that’s it. Congratulations, you have now created a Nudge using the Pably integration! New data that comes in from Pabbly is now automatically turned into Social Proof!