How to Install Nudgify on your ECWID store?
Installing Nudgify with ECWID is very easy and only takes a couple of minutes.
With Nudgify, you can add Social Proof, FOMO Nudges and many more to your ECWID website to boost your conversion rate.
Step 1: Copy your Nudgify Pixel code
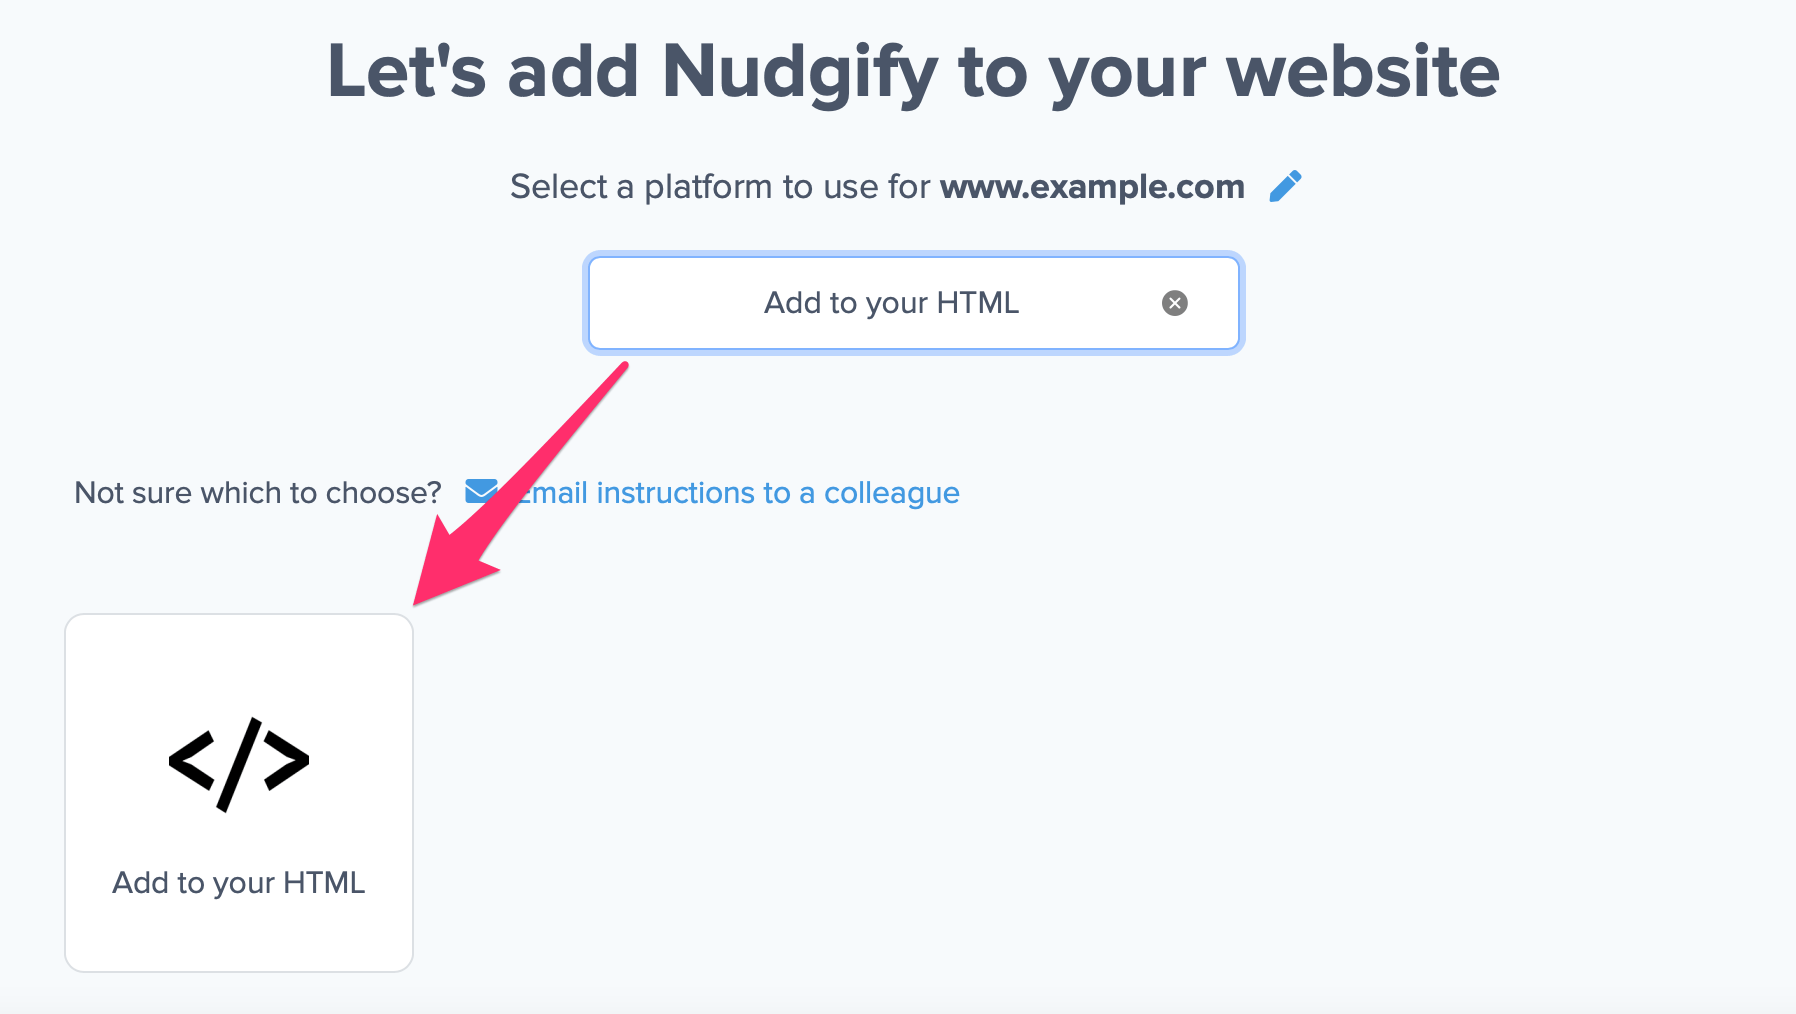
Just sign up for Nudgify and select Add to your HTML

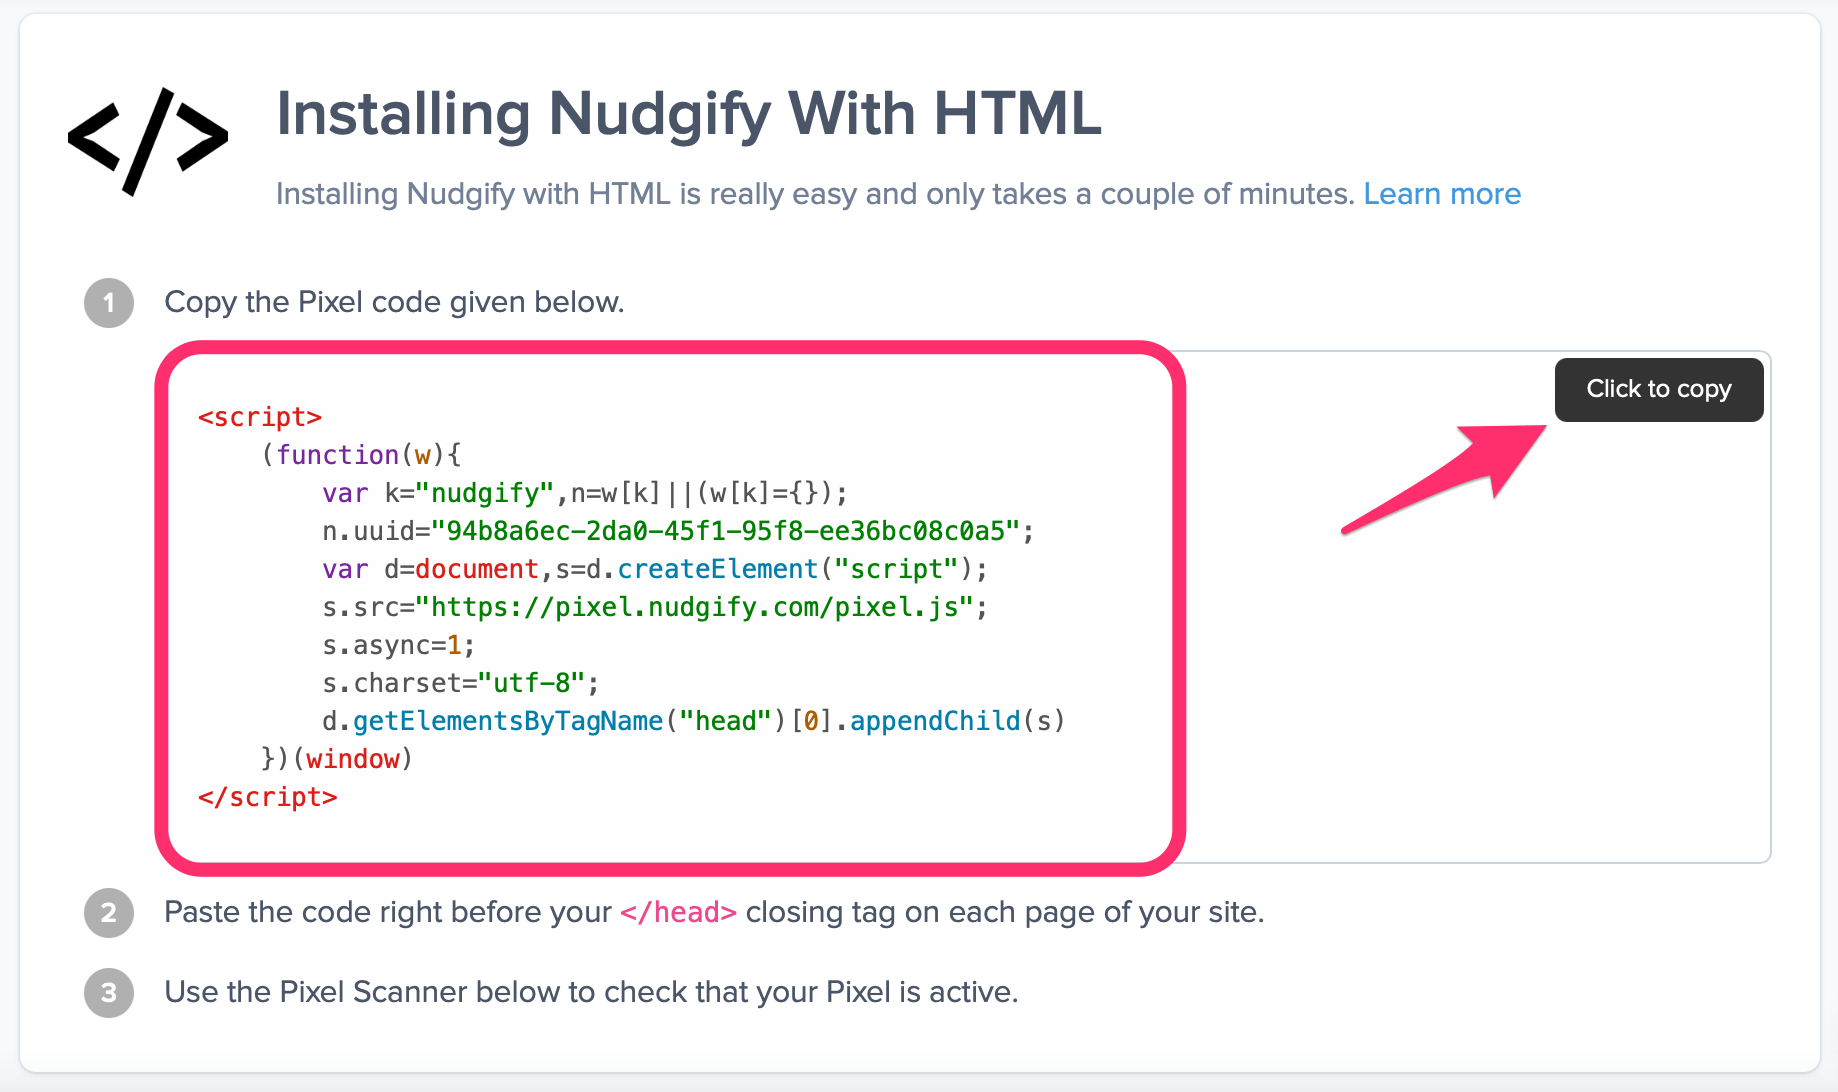
Now a window will open in which you can see a step-by-step guide on how to install your Nudgify Pixel. This Pixel is nothing more than a small line of code that you need to copy and paste into the code of your website.
Copy your Nudgify Pixel code:

Step 2: Add the Pixel to your ECWID site
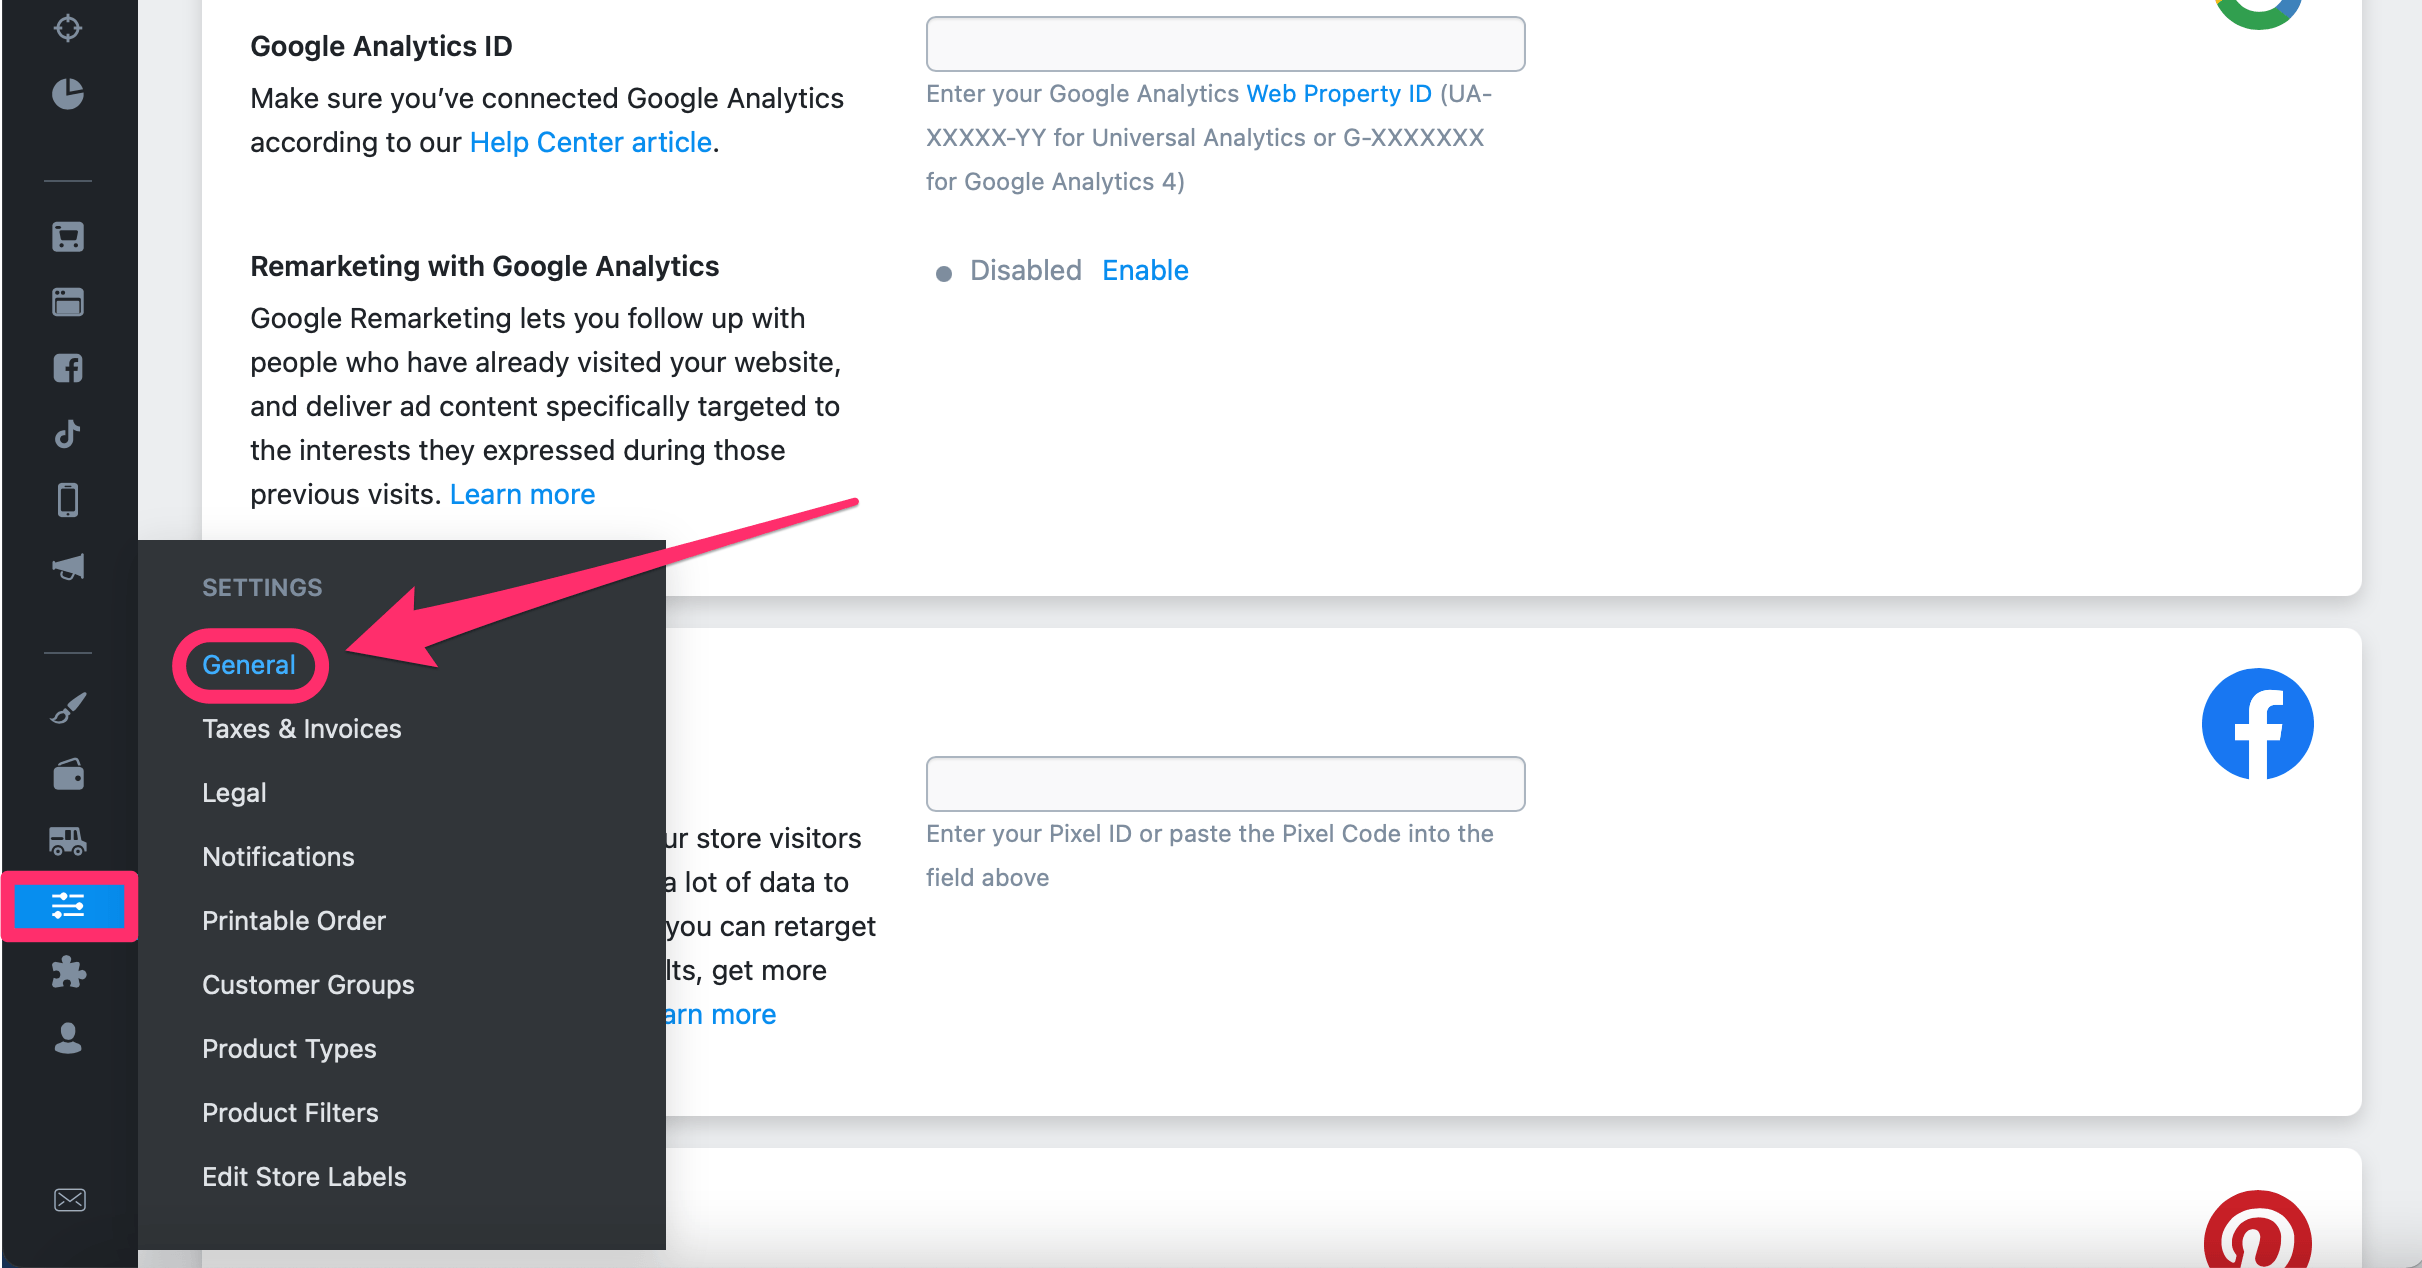
- Log in to your ECWID account and go to Settings in the menu bar on the left side.
- Select General.
 Now you will get to a new page. Select Tracking and Analytics to get to the next step.
 Scroll down past all other integrations until you get to the “Custom tracking code” field.
- Click on “Add custom tracking code” and follow the instructions to install the Nudgify Pixel on your ECWID site.

Step 3: Check if the Pixel is installed
- Go back to the Nudgify page where you began setting up your ECWID platform and click “Scan for Pixel” to see whether you have installed the Pixel correctly.
![]()
- Do you see the green “Pixel Active” message and the red dot in the top left corner turn green? Congratulations, you have added the Nudgify Pixel to your ECWID landing page!
![]()
- Do you not see the green “Pixel Active” message? This means that you haven’t yet installed your Pixel. Click the blue chat bubble in the app where we can assist you 1-on-1 on setting up your Pixel.
You can now start adding Social Proof and FOMO Nudges to your ECWID website!
