How to install Nudgify on WordPress?
Nudgify offers a WordPress plugin, allowing you to integrate Social Proof and FOMO notifications into your WordPress website easily. It enables you to display various types of notifications, such as recent sales and customer reviews, to build trust and boost conversions. With the plugin, you can customize and manage your notifications directly from your WordPress dashboard.
It takes only a few clicks to install the Nudgify WordPress plugin.
NOTE: If you use Woocommerce, please refer to our Woocommerce integration.
Step 1: Install the Nudgify WordPress Plugin
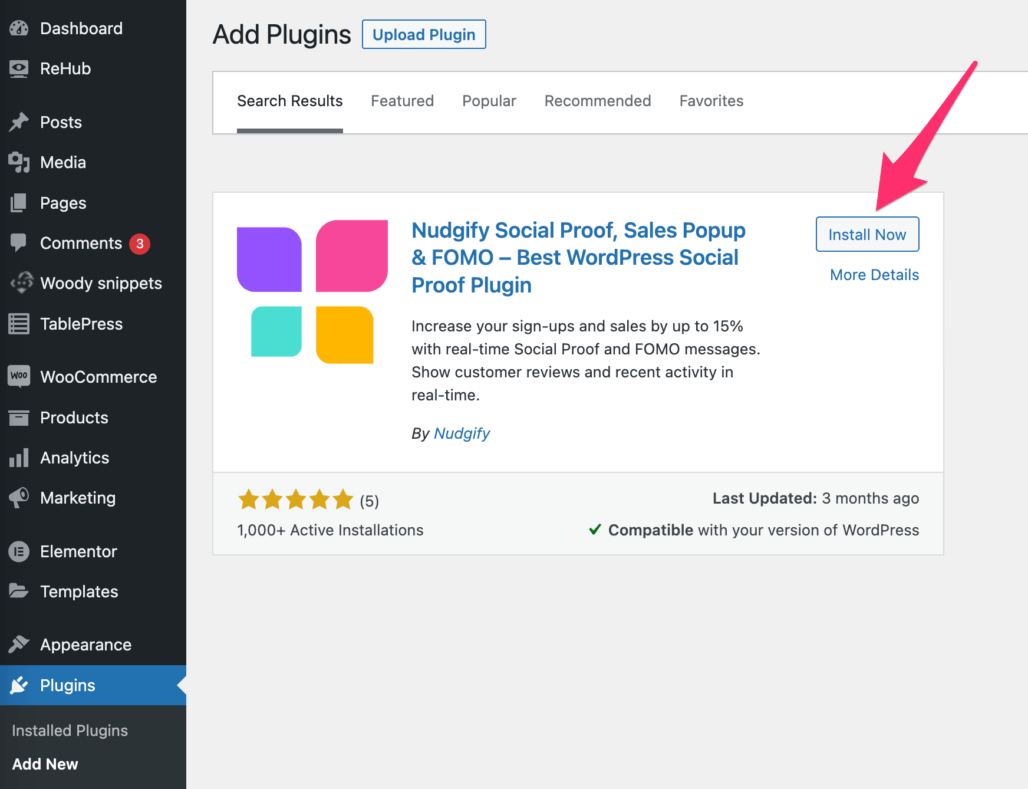
- Log in to your WordPress interface and Click on “Plugins” and “Add New”
- Use the search bar and type in “Nudgify” then click on “Install Now”.
 Once the Nudgify plugin is installed, click “Activate”.
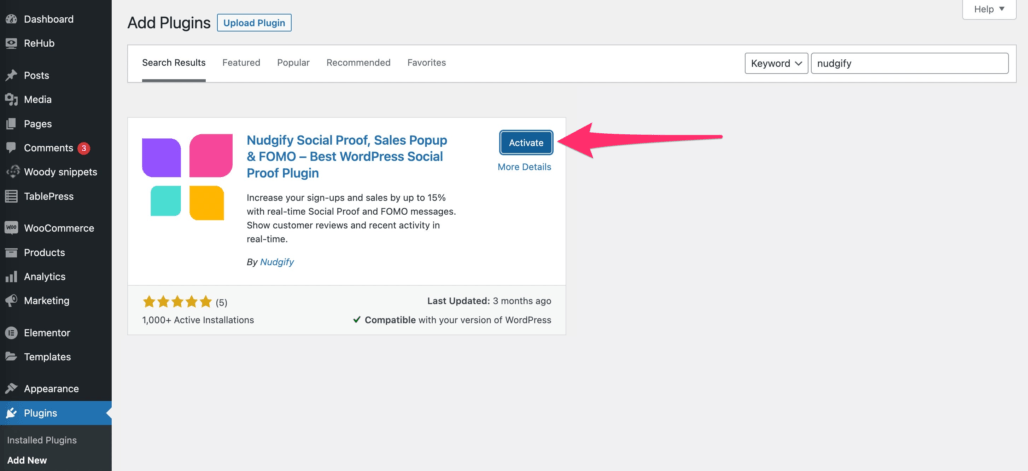 Click on the Nudgify button that has now appeared in the left-hand bar of your WordPress interface.
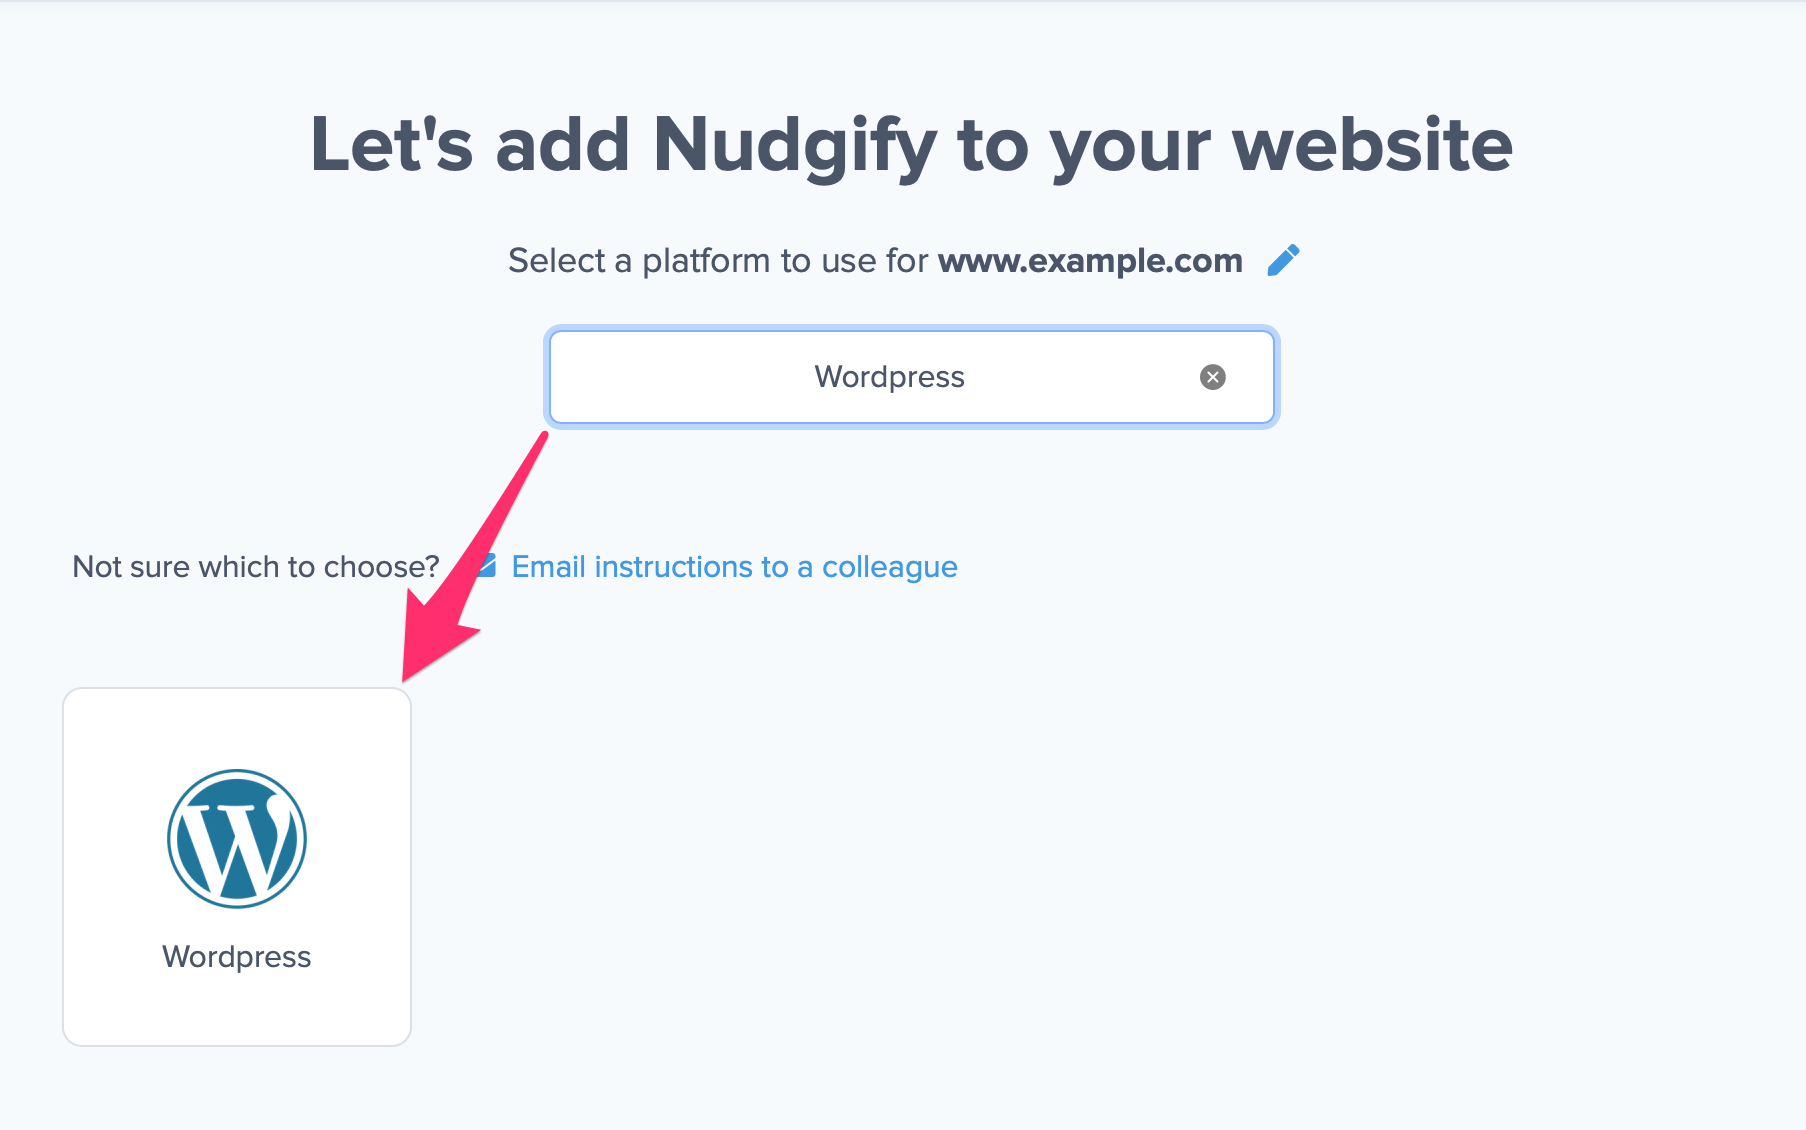
Step 2: Get your Site Key from Nudgify
Just sign up for Nudgify and select WordPress as your integration.
Now a window will open in which you can see a step-by-step guide on how to install Nudgify on WordPress.
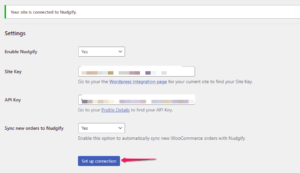
Copy the Site Key from the text box.
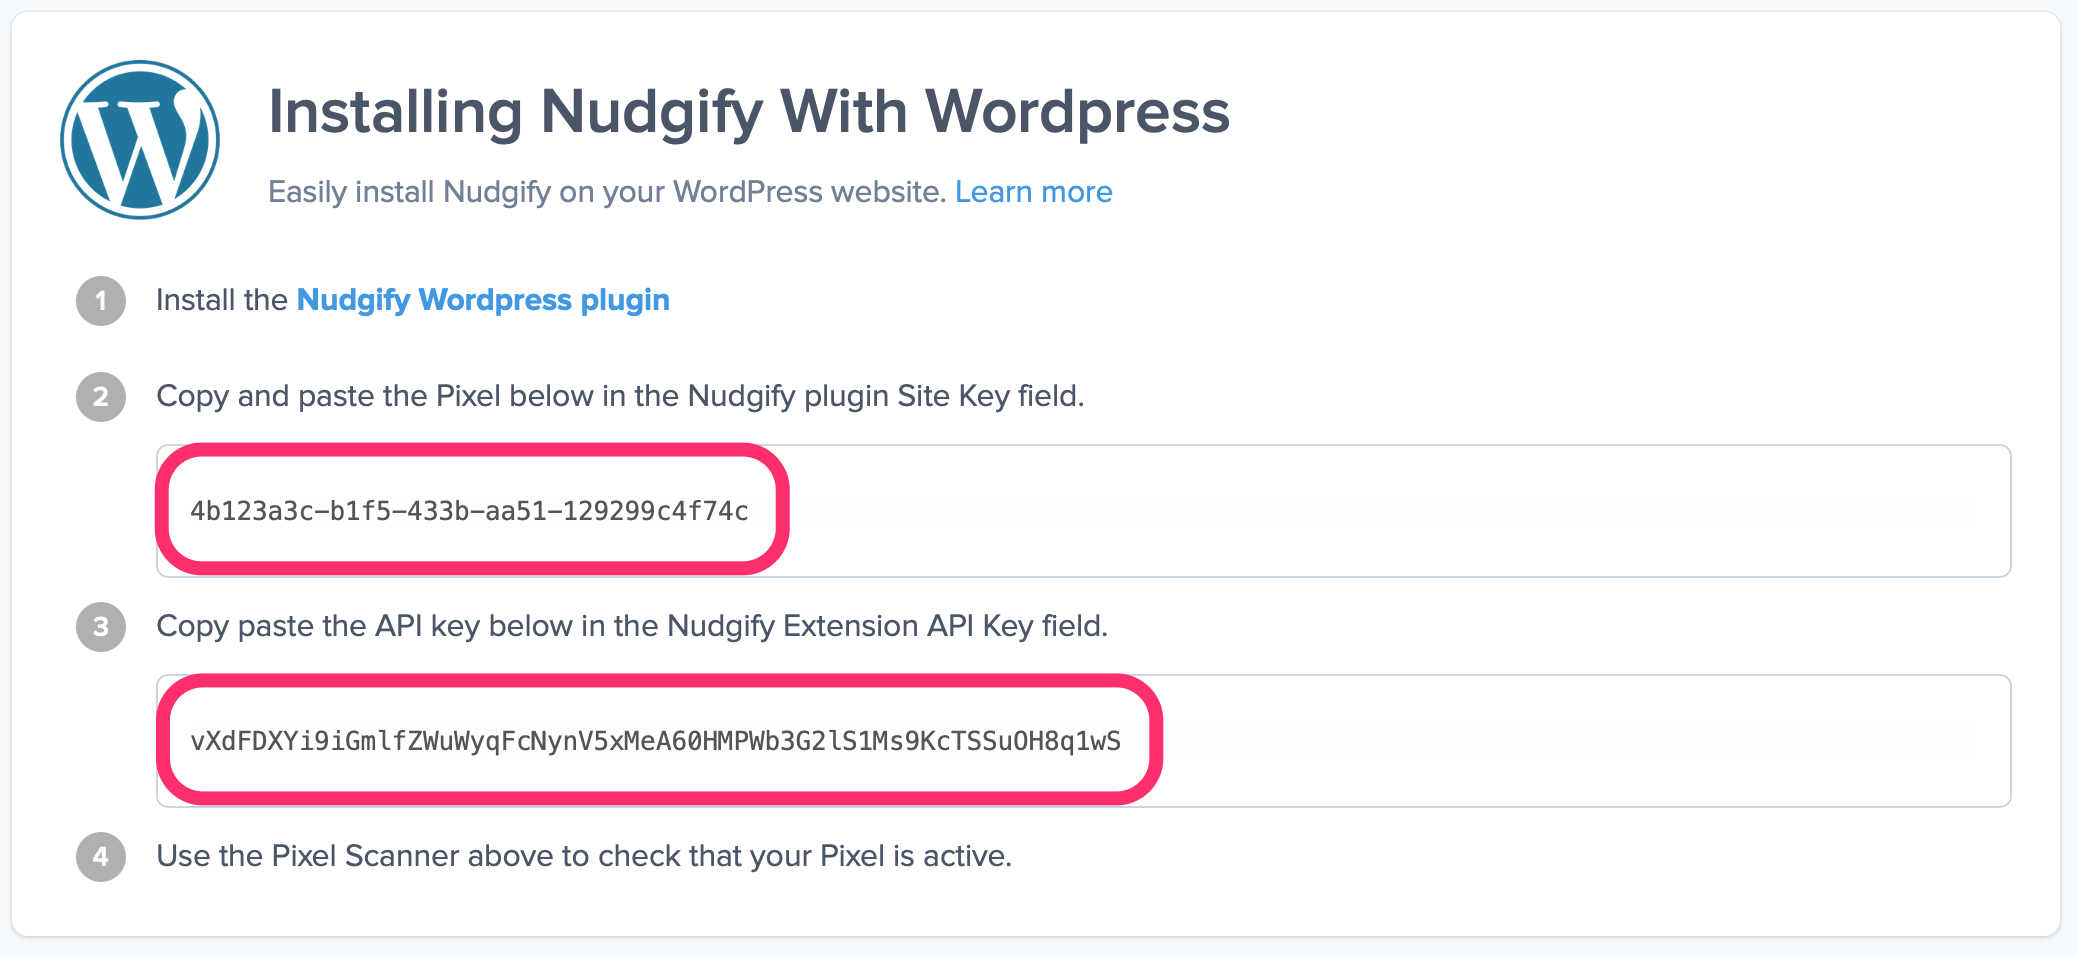
Paste the Site Key into the field and click “Set Up Connection”. You may ignore the API Key field, unless you have a WooCommerce store.
Make sure to clear your website cache and refresh your website home page to complete the installation.
Step 3: Check if the Pixel is installed
- Go back to the Nudgify page where you began setting up your WordPress platform and click “Scan for Pixel” to see whether you have installed the Pixel correctly.
![]()
- Do you see the green “Pixel Active” message and the red dot in the top left corner turn green? Congratulations, you have added the Nudgify Pixel to your WordPress landing page!
![]()
- Do you not see the green “Pixel Active” message? This means that you haven’t yet installed your Pixel. Click the blue chat bubble in the app where we can assist you 1-on-1 on setting up your Pixel.
You can now start adding Social Proof and FOMO Nudges to your WordPress website 🙌
WordPress common issues
If you still can’t see the Nudges on your website after installing the Nudgify plugin for WordPress, please read: I use WordPress, but I can’t see the Nudges on my website
You can also send us a chat message (in the bottom right) 👋