Turn your Thinkific Users and Course Enrollments into Social Proof
Thinkific is an online platform that enables individuals and businesses to create and sell their own online courses.It provides a user-friendly interface that allows course creators to design and customize their courses, upload multimedia content such as videos and presentations, and manage student enrollments and progress
You can easily connect your Thinkific course enrollment to Nudgify via our Thinkific integration to showcase Social Proof notifications (Sales Pop) on your website, in real-time.
Notes: If you also want to install Nudgify on Thinkific and display Nudges directly on your Thinkific site, read Install Nudgify on your thinkific site.
Connect Thinkific Enrollments
The following data from Thinkific will be synced with Nudgify in order to build Nudges:
- First Name
- Last Name
- Date
- Order Id
- Course ID
- Course Name
Follow the steps below to connect your Thinkific sales to Nudgify and show new enrollments in Purchase Nudges.
Step 1. Copy Your Webhook URL
To manage your integrations, click the “Integrations” button on the left-hand sidebar. This will take you to the Integrations page, where you manage your integrations with other apps and software. Find Thinkific in the list and click “Connect”.

Click to copy your Nudgify Webhook URL

Step 2. Create a Webhook in Thinkific and paste your Webhook URL
You will now paste your Nudgify URL in the right place in your Thinkific account. With this Webhook URL, Thinkific will know to send each new course enrollment to your Nudgify account.
You can find here the Thinkific instructions for using Webhooks.
In your Thinkific dashboard, follow these steps:
-
- Go to Menu> Settings > Code & Analytics > Webhooks
- Click on New Webhook
- Select Model as Enrollment, Topic as enrollment.created.
- Paste the Nudgify URL in the Target URL field and Save
- Click on the Menu icon by the right of the new Webhook to send a test event
Go back to Nudgify and click the “I’ve done it” button.
Step 3. Create Purchase Nudges for new Thinkific enrollments
Congratulations! You have now linked your Thinkifc account to Nudgify. On your Data Feeds page, in the “purchase” tab, you will be able to see any new enrollments that are sent to Nudgify. It’s time to start showcasing new Thinkific enrollment in Social Proof Nudges!
You can create two types of Nudges with the Thinkific integration.
- Nudges that show single purchases
- Nudges that show a count of multiple purchases
Show Single Purchases
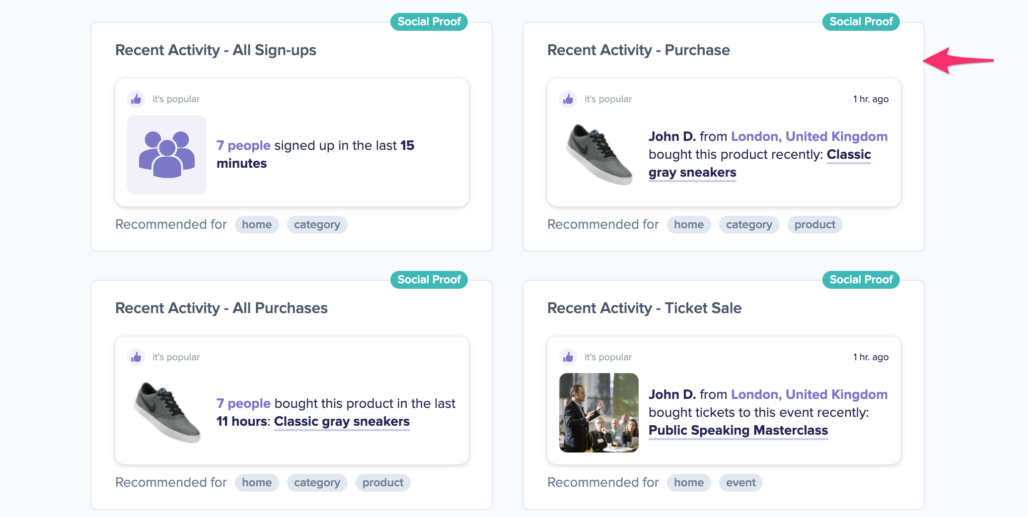
Go to the Nudges page and click “Add Nudge”. Choose the Recent Activity – Purchase Nudge from the Nudge Library.
You can now configure the selected Nudge. First of all, select “Thinkific” as the data source. This way, the Nudge will use your Thinkific data to show in the Nudge.
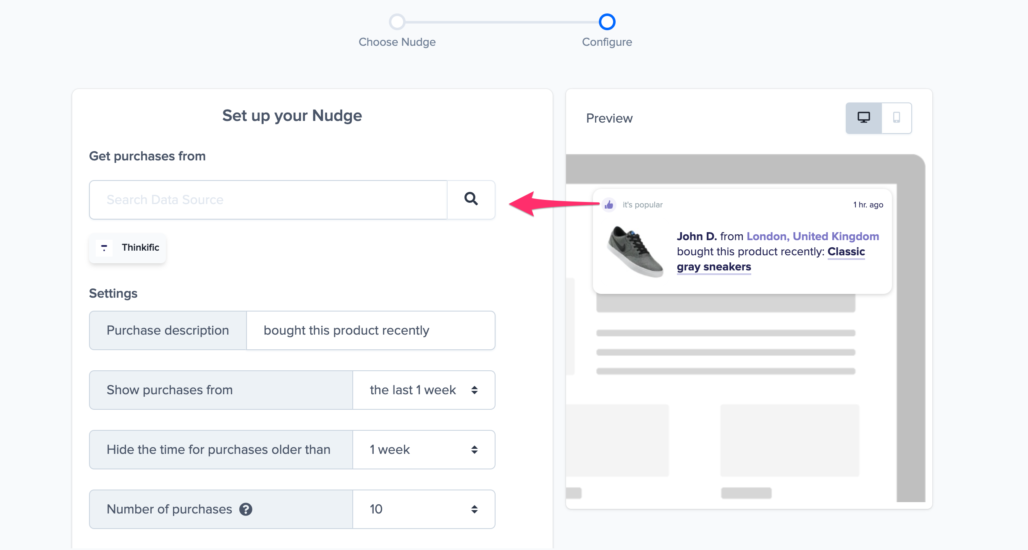
You can also customize the text of the Nudge here (“enrolled to this plan”, “purchased our offer”, or whatever else you want to put down). You can also select how recent the purchases need to be that you want to display. Find out more about the customization options for Sign-up Nudges.
Once you’re done, click “Continue”. The Nudge will now automatically capture and show individual recent purchases. You can track how your Nudges perform from your Statistics page.
Show All Purchases
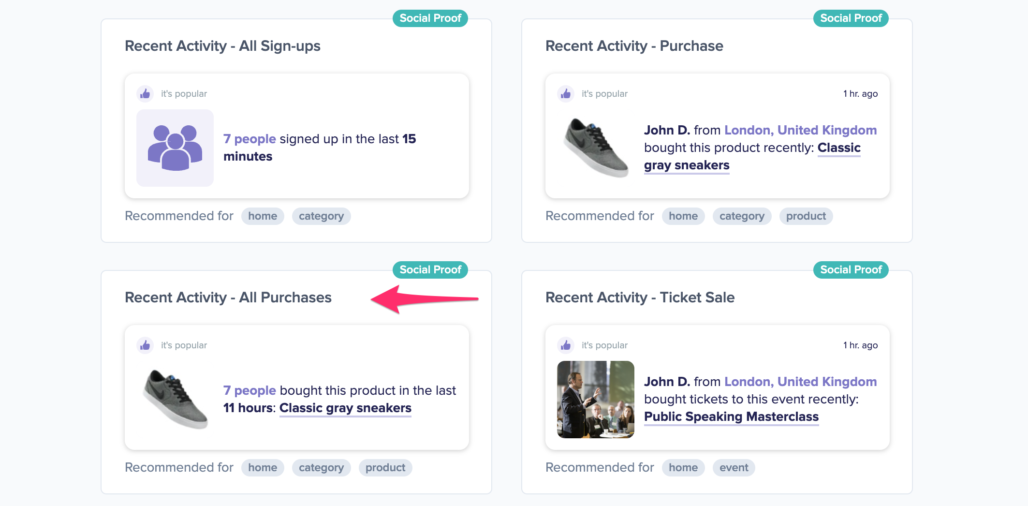
When creating a new Nudge, choose the All Purchases Nudge in the Social Proof Nudges category of the Nudge Library.
You can now configure this Nudge. First of all, select “Thinkific” as the data source. This way, the Nudge will use your Thinkific data to show in the Nudge.
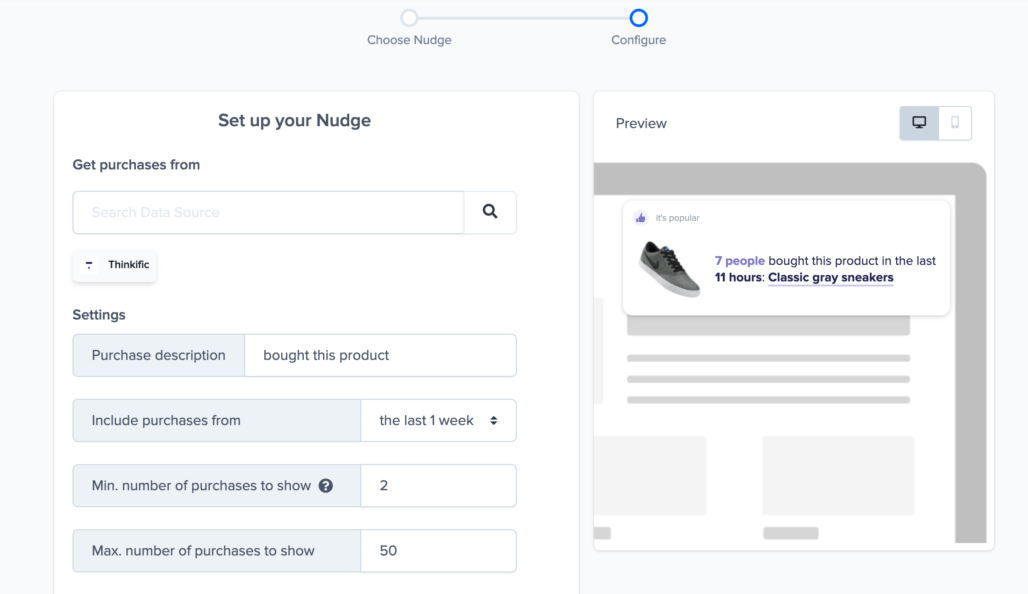
You can also customize the text of the Nudge here (“enrolled to this plan”, “purchased our offer”, or whatever else you want to put down. You can also select how recent the purchases need to be that you want to display and set a minimum and maximum number of purchases. Find more about the customization options for Purchase Nudges.
Click “Continue”. The Nudge will now automatically capture and show a summary of recent purchases. You can track how your Nudges perform from your Statistics page.
N.B. Unfortunately, Thinkific does not send the Location info through to Nudgify. Because of that, it’s not possible to show your Thinkific enrollee location in Nudges.
That’s it! All your new Thinkific enrollments will now be turned into powerful Social Proof automatically and display in Purchase Nudges on your site.🙌
Connect Thinkific Users
The following data from Thinkific will be synced with Nudgify in order to build Nudges:
- First Name
- Last Name
- Date
Follow the steps below to connect your Thinkific user data to Nudgify and show new Sign Ups in Sign-up Nudges.
Step 1. Copy Your Webhook URL
To manage your integrations, click the “Integrations” button on the left-hand sidebar. This will take you to the Integrations page, where you manage your integrations with other apps and software. Find Thinkific Sign-Ups in the list and click “Connect”.

Click to copy your Nudgify Webhook URL
Step 2. Create a Webhook in Thinkific and paste your Webhook URL
You will now paste your Nudgify Webhook URL in the right place in your Thinkific account so that new user data is sent automatically to your Nudgify account.
You can find here the Thinkific instructions for using Webhooks.
As a summary, follow these steps in your Thinkific dashboard:
- Go to Menu > Settings > Code & Analytics > Webhooks
- Click on New Webhook
- Select Model as User, Topic as user.signup..
- Paste the Nudgify URL in the Target URL field and Save
- Click on the Menu icon by the right of the Webhook to send a test event
Go back to Nudgify and click the “I’ve done it” button.

Any new Sign-up will be added to your Sign-ups Data Feed. To turn these data into Social Proof Nudges on your site, create a Sign-up Nudge and select Thinkific as the data source.
Congratulations! You have now linked your new Thinkific sign-ups to Nudgify 🙌
Step 3. Create Sign-ups Nudges for new Thinkific Users
On your Data Feeds page, in the “sign-ups” tab, you will be able to see any new user sign ups that are sent to Nudgify. It’s time to start showcasing new Thinkific sign-ups in Social Proof Nudges!
You can create two types of Nudges with the Thinkific sign-ups integration.
- Recent Sign-Ups Nudges that show single sign-ups
- All Sign-Ups Nudges that show a count of multiple sign-ups
Show Recent Activity – Single Sign-ups
Go to the Nudges page and click “Add Nudge”. Choose the Nudge labeled “Recent Activity – Single Sign-up” from the Nudge Library.
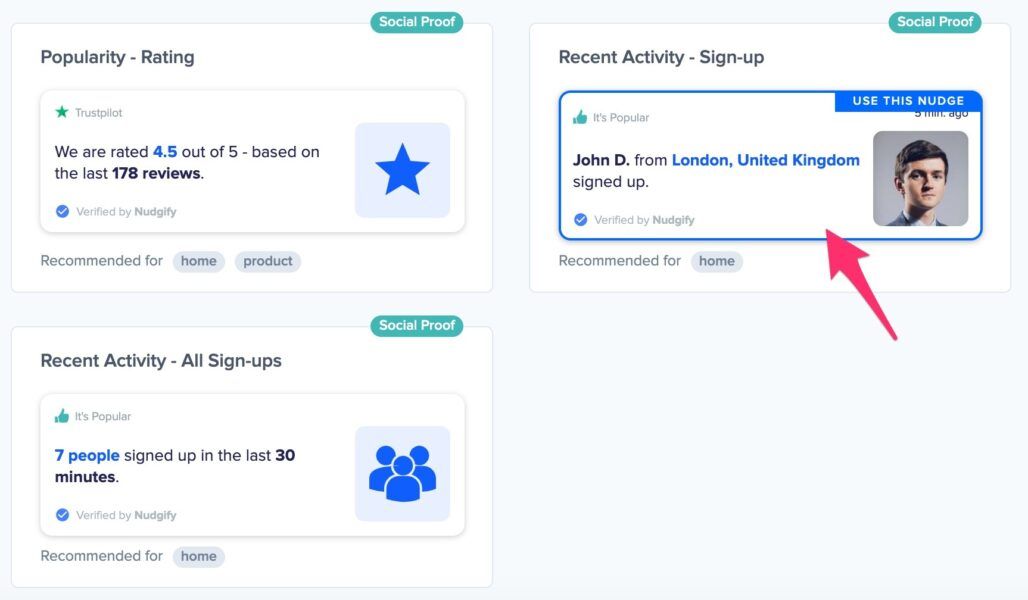
You can now configure the selected Nudge. First of all, select “Thinkific Sign-Ups” as the data source. This way, the Nudge will use your Thinkific data to show in the Nudge:
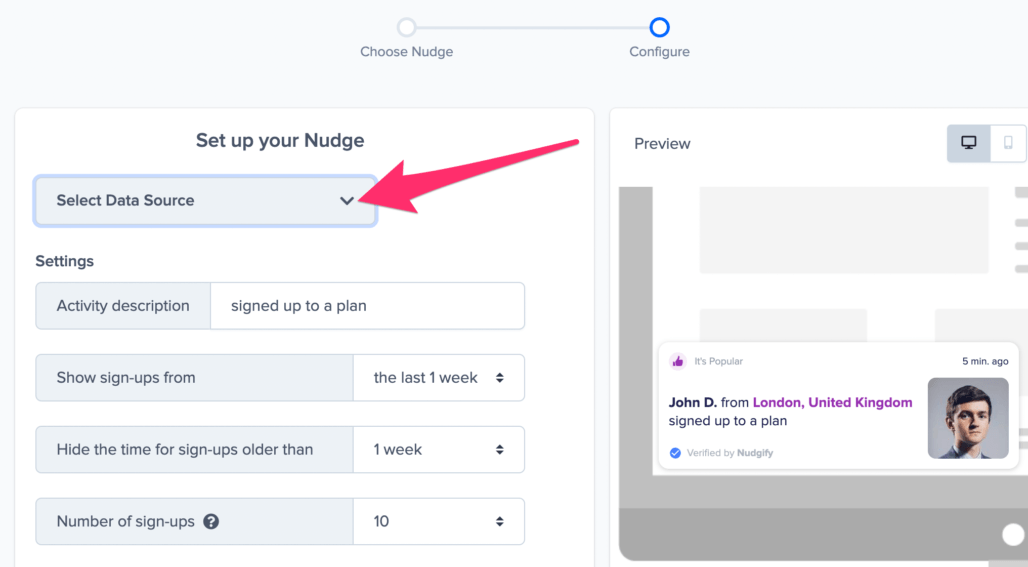
You can also customise the text of the Nudge here (“subscribed to our newsletter”, “signed-up to our mailing list”, or whatever you want to display). You can also select how recent the sign-ups need to be that you want to display. Find out more about the customisation options for Sign-up Nudges.
Once you’re done, click “Continue”. The Nudge will now automatically capture and show individual recent sign-ups. You can track how your Nudges perform from your Statistics page.
Show All Sign-ups
When creating a new Nudge, choose the “Recent Activity – All Sign-ups” Nudge in your Nudge Library:
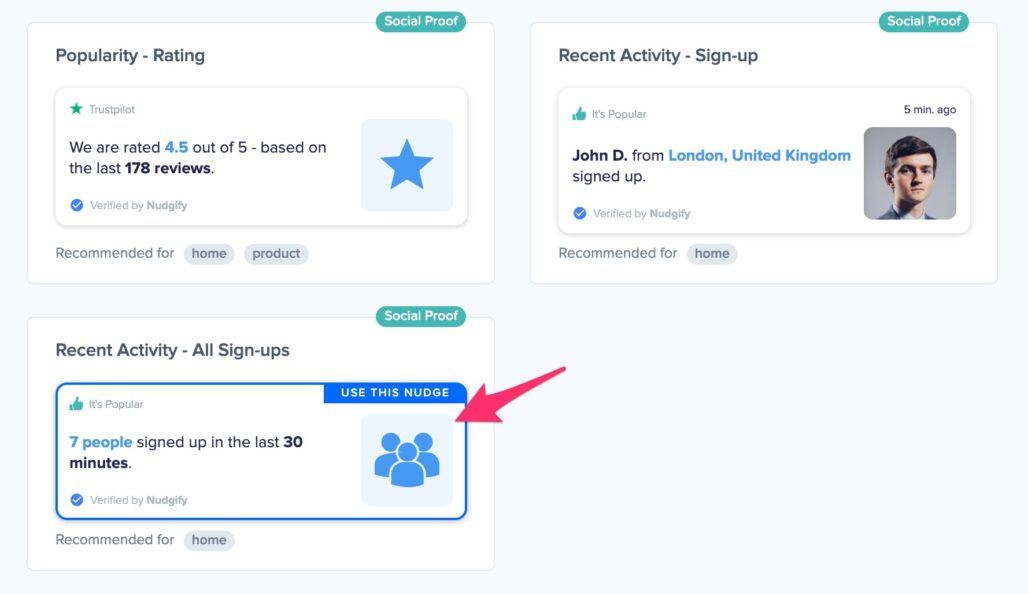
You can now configure the selected Nudge. First of all, select “Thinkific Sign-Ups” as the data source. This way, the Nudge will use your Thinkific data to show in the Nudge:
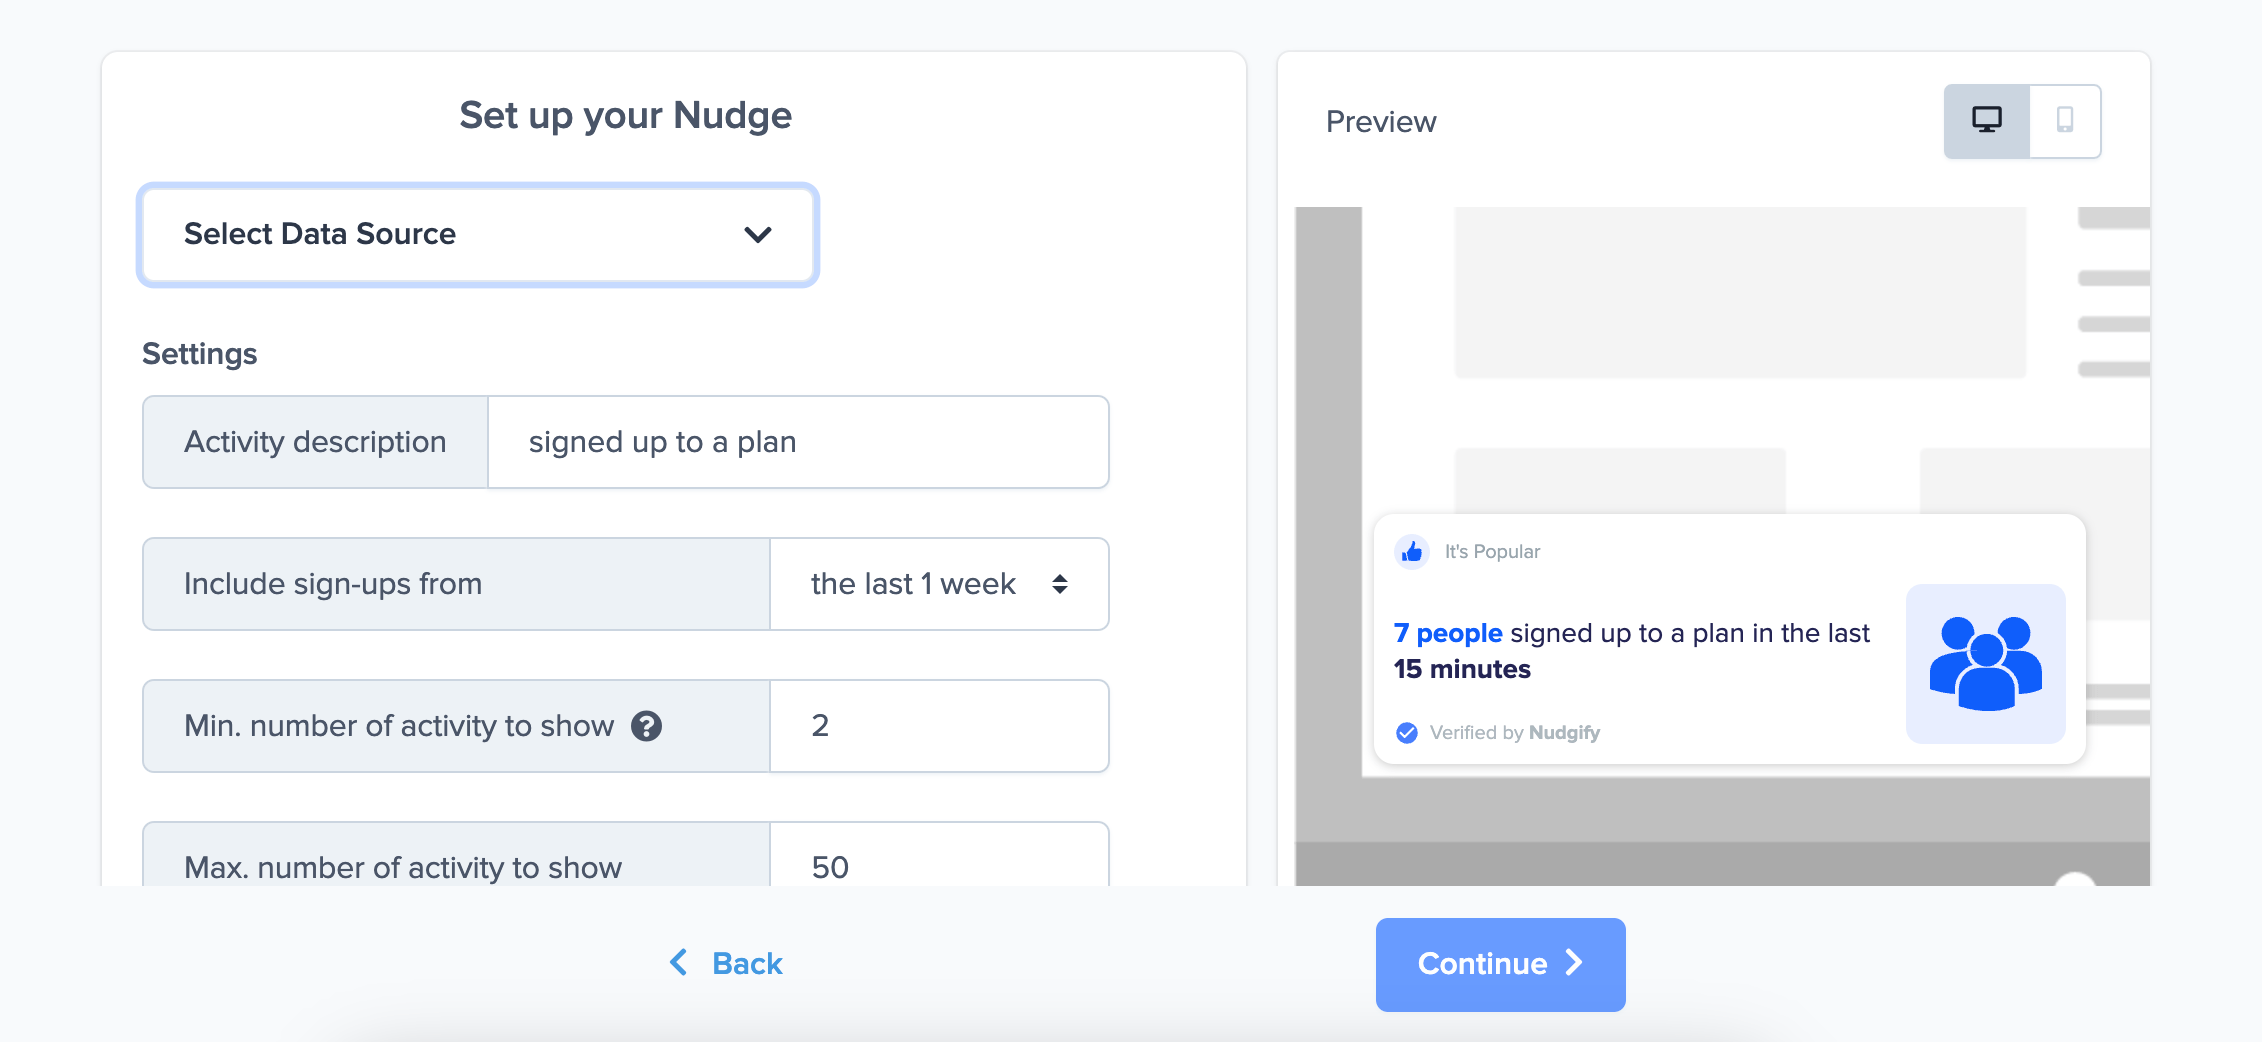
You can also customise the text of the Nudge here (“subscribed to our newsletter”, “signed-up to our mailing list”, or whatever else you want to put down). You can also select how recent the sign-ups need to be that you want to display, and set a minimum and maximum number of Sign-ups. Find more about the customization options for Sign-up Nudges.
Click “Continue”. The Nudge will now automatically capture and show a summary of recent subscriptions. You can track how your Nudges perform from your Statistics page.
That’s it! 🙌
All your new Thinkific Users will now be turned into powerful Social Proof automatically and display Nudges on your site.
