
 All posts

How to create shipping label on Shopify is a common question among store owners who want to simplify order fulfillment and get products delivered to customers efficiently. Whether you’re processing your first order or managing multiple shipments every day, creating and printing shipping labels correctly can save time and help prevent delivery mistakes.
Shopify allows eligible merchants to purchase shipping labels directly from their admin dashboard using supported shipping carriers. You can review shipping rates, enter package details, select a delivery service, purchase a label, and print it for your order.
However, Shopify Shipping is not available in every country. If your fulfillment location isn’t supported, you can still create shipping labels using third-party shipping apps or directly through a shipping carrier.
Boost Your Conversion Instantly with Nudgify: Turn your website visitors into customers with real-time Social Proof and FOMO Nudges. Get Started Now →
This guide explains how to create a shipping label on Shopify, how to print labels, how much they cost, and how to manage shipping when Shopify’s built-in service isn’t available.
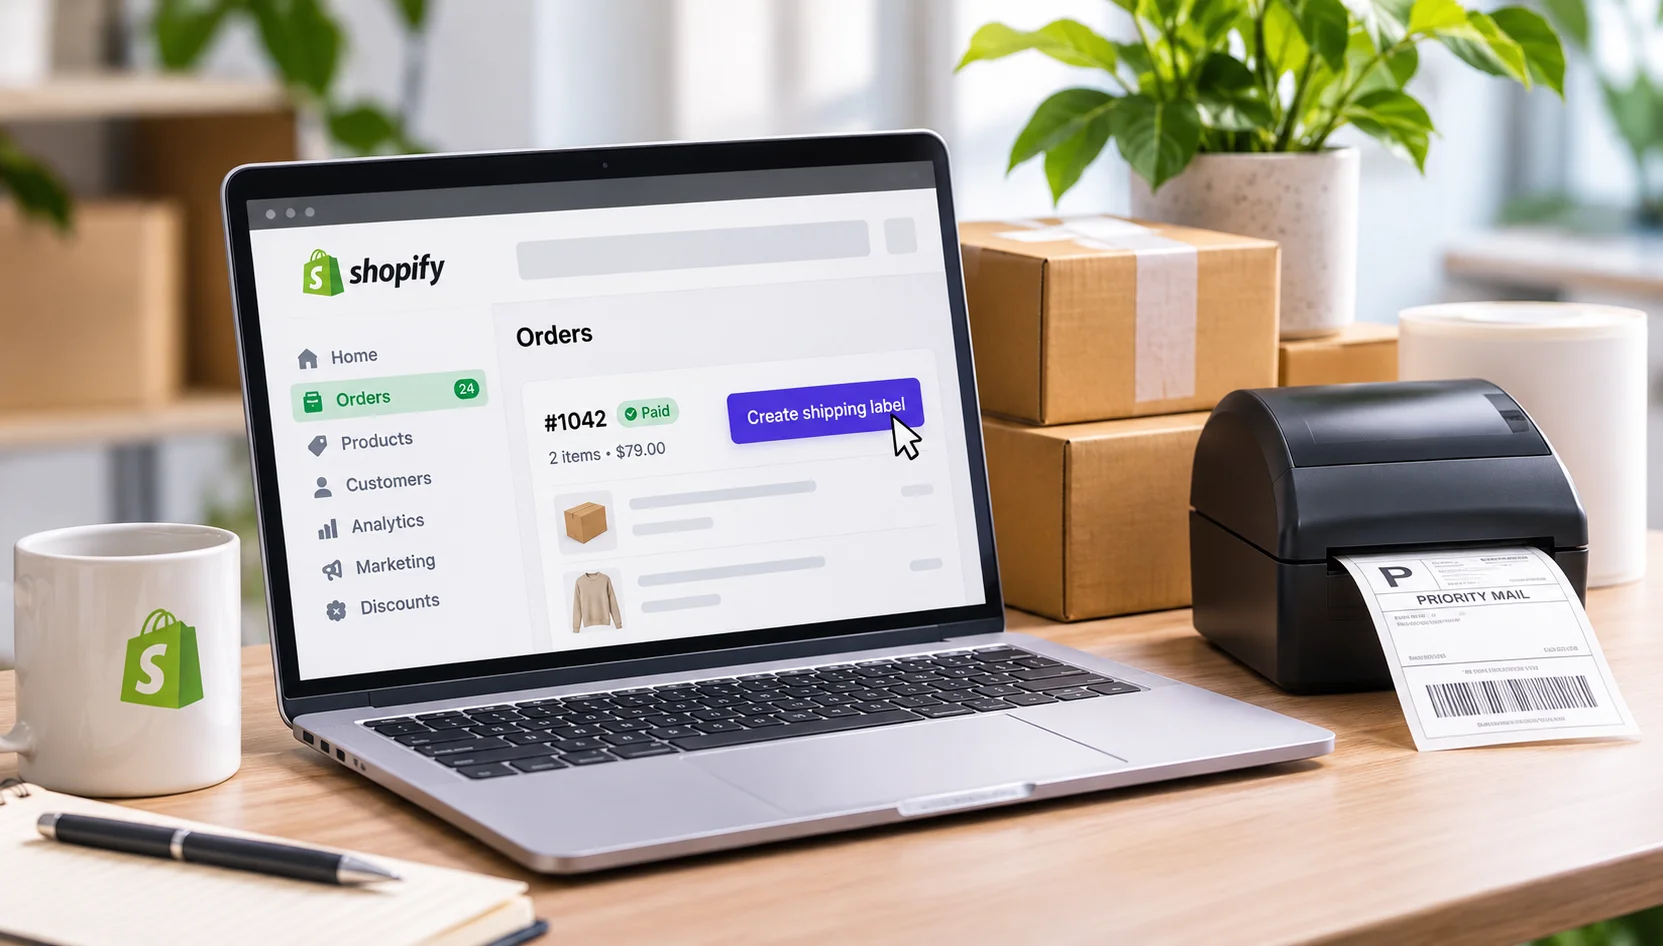
How to Create a Shipping Label on Shopify: Quick Steps
If your store is eligible for Shopify Shipping, you can create a shipping label by following these steps:
- Log in to your Shopify admin.
- Open Orders and select an eligible unfulfilled order.
- Click Create shipping label.
- Confirm the customer’s shipping address.
- Enter the package dimensions and weight.
- Choose an available shipping carrier and service.
- Review the shipping cost and purchase the label.
- Download or print the shipping label and attach it to your package.
Keep in mind that the Create Shipping Label option is only available for eligible fulfillment locations and supported carriers. If you don’t see it, you may need to use an alternative shipping provider.
What Is a Shopify Shipping Label?
A Shopify shipping label is a document attached to a package that contains the information a carrier needs to deliver an order. It typically includes the sender’s address, recipient’s address, tracking number, barcode, and selected shipping service.
Increase Trust & Sales with Social Proof
Boost trust, engagement, and conversions with Social Proof — tailored for any industry and easy to integrate. Seamlessly manage client access with our team portal.


When you purchase a shipping label through Shopify, the platform connects your order information with an eligible shipping carrier. This makes it easier to prepare packages, pay for postage, and provide customers with tracking details.
Shipping Label vs. Shipping Label Template
A purchased shipping label and a printable shipping label template are not the same thing.
Purchased Shipping Label
A prepaid shipping document purchased through a carrier or shipping platform. It includes postage for the selected service and can be used to send a package.
Shipping Label Template
A printable layout for displaying sender and recipient information. It does not include postage or pay for the delivery service.
If you want to ship an order, you need a valid shipping label or postage purchased from your carrier. Printing an address template alone does not pay for delivery.
What You Need Before Creating a Shipping Label on Shopify
Before learning how to create a shipping label on Shopify, prepare your shipment information and check whether your store can access the shipping service you want to use.
1. An Eligible Fulfillment Location
Shopify’s built-in shipping label service is available only to merchants with eligible fulfillment locations. Availability depends on your business location, fulfillment origin, and supported shipping carriers.
Some shipping providers may also require additional account verification before you can purchase labels.
2. Accurate Shipping Addresses
Prepare the sender’s and recipient’s complete addresses. Check the customer’s name, street address, city, state or province, postal code, and country.
Incorrect addresses can result in failed deliveries, additional charges, or returned packages.
3. Package Dimensions and Weight
Shipping carriers use package dimensions, weight, origin, and destination to calculate shipping rates.
Prepare the following information:
- Package length, width, and height.
- Total package weight, including packaging materials.
- Package type, such as a box or envelope.
Accurate measurements help prevent unexpected shipping charges and carrier adjustments.
4. A Compatible Printer
You can use a thermal label printer or a compatible inkjet or laser printer. A thermal printer is convenient for stores that process orders regularly, but it isn’t essential.
How to Create a Shipping Label on Shopify Step by Step
Once your store meets the shipping requirements and your package information is ready, follow these instructions to purchase and generate a shipping label.
Step 1: Log In to Your Shopify Admin
Open your Shopify store and log in to your admin dashboard. This is where you manage orders, products, inventory, shipping settings, and fulfillment activities.
Step 2: Open the Orders Section
Select Orders from your Shopify admin navigation menu. Find the order you want to ship and open its details.
Check that the payment and fulfillment information is correct before continuing.
Step 3: Click Create Shipping Label
For an eligible order and fulfillment location, select Create shipping label from the order’s fulfillment area.
Shopify will open the shipping label purchasing workflow, where you can review shipment information and select a delivery service.
If this option isn’t available, check whether your fulfillment location and shipping carrier support Shopify’s built-in label purchasing service.
Step 4: Confirm the Shipping Address
Review the sender and recipient information displayed in the shipping label details.
Make sure the customer’s delivery address is complete and accurate. Correct any errors before purchasing the label to avoid delivery problems.
Step 5: Enter Package Weight and Dimensions
Select a saved package or enter the package dimensions and weight manually, depending on the available options.
Use the measurements of the packed shipment rather than the product alone. Include the weight of the box, envelope, and protective materials.
Step 6: Choose a Shipping Carrier and Service
Shopify displays the available shipping services based on your fulfillment location, destination, package details, and supported carriers.
Compare the following before selecting a service:
- Shipping price: Compare the available rates.
- Delivery speed: Consider how quickly the customer expects the package.
- Tracking: Check whether shipment tracking is included.
- Additional services: Consider insurance or signature confirmation when needed.
Step 7: Review and Purchase the Shipping Label
Check the shipping address, package details, selected carrier, and total cost before completing the purchase.
Once everything is correct, follow Shopify’s instructions to purchase the label. The charge is billed according to Shopify’s shipping label billing process.
Step 8: Download or Print Your Shipping Label
After purchasing the label, open the available print option in Shopify. Select the appropriate format for your printer and download the document if necessary.
Check that the barcode, tracking number, and delivery address are clear and readable. Attach the label securely to your package without covering or folding the barcode.
How to Print Shipping Labels on Shopify
After purchasing a label, you need to print it before attaching it to your package. The process depends on your printer and the label format supported by your shipping carrier.
How to Print Using a Thermal Printer
A thermal label printer is a convenient option for merchants who regularly fulfill orders. It prints directly onto adhesive label rolls or sheets without traditional ink cartridges.
- Connect your thermal printer to your computer.
- Install the required printer driver or software.
- Load the correct label paper or roll.
- Open the purchased shipping label in Shopify.
- Select the correct paper format and print settings.
- Print the label and check the barcode.
How to Print Using a Regular Printer
You can also use a standard inkjet or laser printer if it supports the required label format.
- Download or open the purchased shipping label.
- Load compatible label sheets or regular paper.
- Check the paper size and print orientation.
- Make sure the document isn’t being resized incorrectly.
- Print the label and attach it securely to your package.
How to Download a Shopify Shipping Label as a PDF
Open the purchased shipping label in your Shopify admin and select the available download or print option.
If the label opens in your browser’s print dialog, select Save as PDF when available. You can save the document for future reference or reprinting.
What Is the Correct Shopify Shipping Label Size?
A 4 x 6-inch label is commonly used with thermal shipping label printers. However, the correct size depends on the carrier, printer, and available label format.
Check your shipping provider’s requirements before printing. Avoid resizing the document if doing so could distort the barcode or remove important shipping information.
How to Reprint a Shopify Shipping Label
If a label gets damaged or prints incorrectly, you may be able to print the existing purchased label again.
- Open your Shopify admin.
- Locate the order associated with the purchased label.
- Find the shipping label management or print option.
- Select the available reprint option.
- Check the new copy before attaching it to your package.
Reprinting an existing label is different from purchasing a replacement. Avoid buying another label unless the original needs to be voided or replaced.
How Much Does a Shopify Shipping Label Cost?
The cost of a Shopify shipping label depends on the carrier, delivery service, destination, package weight, and package dimensions.
Shopify may offer discounted shipping rates through supported carriers. However, available discounts and services vary by fulfillment location and account eligibility.
Factors That Affect Shipping Label Prices
Package WeightHeavier packages can cost more to ship.
Package DimensionsLarger packages may incur dimensional weight charges.
Delivery DestinationDomestic and international shipments have different rates.
Shipping SpeedExpress services generally cost more than standard delivery.
How to Find Cheaper Shipping Rates
- Compare available carrier services before purchasing a label.
- Use appropriately sized packaging.
- Maintain accurate product weights and package dimensions.
- Review available Shopify shipping discounts.
- Compare Shopify rates with external shipping providers.
- Consider consolidating shipments when appropriate.
Does Shopify Offer Free Shipping Labels?
No. Shipping labels generally require payment for postage. You may have access to discounted rates through Shopify, but the actual delivery service isn’t free.
Offering free shipping to customers at checkout also doesn’t mean your shipping label is free. Your business still needs to pay the carrier to deliver the package.
How to Create a Shipping Label on Shopify Without Shopify Shipping
If you can’t find the Create Shipping Label option in your Shopify admin, your fulfillment location may not be eligible for Shopify’s built-in service.
For example, merchants fulfilling orders from the Philippines aren’t currently included in Shopify’s documented list of supported shipping label purchasing locations. However, they can still manage Shopify orders and create shipping labels using external providers.
Option 1: Use a Third-Party Shipping App
Third-party shipping apps connect Shopify with external shipping providers and fulfillment services.
Depending on the integration, these tools can help you:
- Import Shopify orders automatically.
- Generate shipping labels using order information.
- Compare shipping services and rates.
- Print labels individually or in bulk.
- Sync tracking numbers with Shopify orders.
- Send shipment updates to customers.
Before installing an app, check its supported countries, carriers, pricing, and integrations.
Option 2: Purchase Shipping Labels Directly From a Carrier
You can visit your preferred shipping carrier’s website or local shipping office to purchase postage.
Provide the recipient’s address, sender information, package weight, dimensions, and preferred delivery service. After purchasing the label, download or print it using the carrier’s instructions.
Keep the tracking number so you can update the corresponding Shopify order.
Option 3: Add Tracking Information to Shopify Orders
If you purchase a shipping label outside Shopify, the tracking information may not automatically appear in your order.
- Open Shopify admin and select Orders.
- Find and open the shipped order.
- Locate the fulfillment section.
- Enter the tracking number.
- Select the appropriate carrier when available.
- Save the tracking information and complete the fulfillment process.
When tracking notifications are enabled, Shopify can send the customer a shipping confirmation containing the tracking details.
How to Create Shipping Labels for Multiple Shopify Orders
If your store receives many orders daily, creating labels individually can take considerable time. Bulk shipping label purchasing can make fulfillment more efficient for eligible merchants.
How to Buy Shipping Labels in Bulk
- Open your Shopify admin and navigate to Orders.
- Select the eligible orders you want to fulfill.
- Choose the available bulk shipping label action.
- Review the shipment details for each order.
- Confirm package information and shipping services.
- Review the charges and purchase the labels.
- Print the labels and match each one with the correct package.
Shopify supports purchasing and printing up to 250 shipping labels in one bulk workflow for eligible merchants, subject to applicable limitations.
How to Organize Bulk Shipping Documents
Organize orders by destination, package type, or fulfillment location before printing a large batch of labels.
Use accurate product weights and saved package presets to reduce manual work. Check that every label corresponds to the correct order before attaching it to a package.
How to Manage Shopify Shipping Labels
After learning how to create a shipping label on Shopify, it’s also important to understand how to manage purchased labels when an order changes or a customer requests a return.
How to Cancel or Void a Shipping Label
If you purchased a label but no longer need it, Shopify allows eligible unused labels to be voided.
- Open the order associated with the label.
- Locate the purchased shipping label.
- Select the available void or cancel option.
- Follow the confirmation instructions.
- Check the label status and refund information.
Refund eligibility and processing times depend on the carrier and applicable shipping label policies.
How to Change Shipping Label Information
Once a label has been purchased, you generally can’t simply edit the existing label to change important shipment details.
If you discover an incorrect address, package weight, or shipping service, check whether the original label can be voided. You may need to purchase a replacement with the corrected information.
How to Create Return Shipping Labels
Return shipping labels help customers send unwanted, damaged, or incorrect products back to your business.
Eligible merchants in supported locations can create return labels through Shopify. If your store doesn’t have access to this feature, you can arrange returns through a third-party shipping app or directly with your carrier.
How to Track Shipments After Printing Labels
Most tracked shipping services provide a tracking number when a label is purchased. Customers can use this number to follow their package during delivery.
Make sure the tracking information is connected to the correct Shopify order. If you purchase labels outside Shopify, add the tracking details manually.
Common Shopify Shipping Label Problems and How to Fix Them
Merchants may encounter problems when generating, purchasing, or printing shipping labels. Here are common issues and their solutions.
Create Shipping Label Button Not Showing
Possible causes: Your fulfillment location isn’t eligible, the order is assigned to an unsupported location, or the fulfillment method doesn’t support label purchasing.
Solution: Check your fulfillment location and carrier eligibility. Confirm that the order is assigned to the correct location. If Shopify Shipping isn’t available, use an external shipping provider.
Shopify Shipping Label Not Generating
Possible causes: Missing shipping information, incorrect package dimensions, unsupported destinations, or temporary carrier issues.
Solution: Review the order details, confirm the addresses and package measurements, and try another available shipping service if necessary.
Unable to Purchase Shipping Labels
Possible causes: Unsupported fulfillment locations, incomplete account verification, or carrier restrictions.
Solution: Check Shopify’s eligibility requirements and the selected carrier’s policies. Complete any required verification and confirm that the shipment meets carrier requirements.
Shipping Label Printing Incorrectly
Possible causes: Incorrect paper size, wrong print orientation, unwanted scaling, or printer connection problems.
Solution: Check the label format and printer settings. Disable unwanted resizing and print a test copy to ensure the barcode and address are visible.
Incorrect Shipping Rates
Possible causes: Incorrect product weights, wrong package dimensions, incorrect fulfillment locations, or carrier surcharges.
Solution: Update your product weights and package details. Confirm the origin and destination addresses, then compare available shipping services.
Missing or Incorrect Tracking Numbers
Possible causes: The label was purchased outside Shopify, the tracking number wasn’t added, or the wrong carrier was selected.
Solution: Check the tracking number provided by the carrier. Add or correct the tracking information in the corresponding Shopify order.
What to Do After Creating a Shipping Label on Shopify
Purchasing and printing a shipping label doesn’t complete the entire fulfillment process. You still need to prepare the package, hand it over to the carrier, and keep your customer informed.
1. Attach the Label to Your Package
Place the label on a flat, visible area. Avoid covering the barcode, folding the label, or placing it over package seams.
2. Schedule a Carrier Pickup or Drop Off Your Package
Follow your carrier’s instructions for handing over the shipment. Depending on the service, you may be able to schedule a pickup or visit an authorized drop-off location.
3. Mark the Order as Fulfilled
Update the order’s fulfillment status in Shopify once you’ve completed the appropriate fulfillment steps. If you purchased the label externally, make sure the tracking details are added before completing the fulfillment action.
4. Send Tracking Information to Your Customer
Customers want to know when their orders have shipped and when they can expect delivery. Shopify can send shipping confirmation notifications containing tracking information when the relevant settings are enabled.
You can also explore customer engagement and post-purchase experience strategies to improve communication and build customer confidence after checkout.
5. Monitor Delivery Status and Customer Updates
Check shipment tracking regularly, especially for delayed or international deliveries. If a package encounters a problem, communicate with the customer and provide updates as soon as possible.
Clear communication after checkout helps reduce uncertainty, builds trust, and creates a more positive shopping experience.
Frequently Asked Questions About How to Create a Shipping Label on Shopify
How do I create a shipping label on Shopify?
Log in to Shopify admin, navigate to Orders, and select an eligible unfulfilled order. Click Create Shipping Label, confirm the shipping address and package details, choose a supported carrier, purchase the label, and print it.
Can I create a shipping label on Shopify for free?
No. Purchasing a shipping label generally requires paying for postage. Shopify may offer discounted shipping rates, but the actual delivery service is not free.
Does Shopify automatically generate shipping labels?
No. Shopify doesn’t automatically purchase a prepaid shipping label for every incoming order. You generally need to open an eligible order, select the shipping label option, choose a carrier service, and complete the purchase.
Can I create shipping labels without Shopify Shipping?
Yes. You can purchase labels through third-party shipping apps or directly from a carrier. After purchasing the label, add the tracking number to the corresponding Shopify order.
How do I print a Shopify shipping label?
After purchasing a label, open its print option in Shopify admin. Select a compatible printer and paper format, check the print settings, and print the document.
Can I create shipping labels using my phone?
You can manage Shopify orders and fulfillment activities using the Shopify mobile app, depending on the available features. However, printing physical labels requires a compatible printing setup.
What size should Shopify shipping labels be?
A 4 x 6-inch format is commonly used with thermal shipping label printers. However, the correct size depends on the shipping carrier and printer format.
Can I create multiple shipping labels at once?
Yes. Eligible merchants can purchase and print shipping labels in bulk through Shopify admin. The bulk workflow supports up to 250 labels at a time, subject to applicable limitations.
How do I cancel a Shopify shipping label?
Open the associated order, locate the purchased label, and select the available void or cancel option. Refund eligibility and processing time depend on the carrier’s policies.
Why can’t I create a shipping label on Shopify?
The most common reason is that your fulfillment location isn’t eligible for Shopify’s built-in shipping label service. Other reasons include unsupported carriers, incomplete shipment information, and fulfillment restrictions.
Can I create international shipping labels on Shopify?
Yes, if your fulfillment location and selected carrier support international shipping. You may need customs information, including product descriptions, declared values, and Harmonized System codes.
Do I need a special printer for Shopify shipping labels?
No. A thermal shipping label printer is convenient but not essential. You can also use a compatible inkjet or laser printer with the correct paper or label sheets.
Key Takeaways
Creating shipping labels on Shopify is an important part of managing orders and delivering products to customers. Understanding the process can help you prepare shipments more efficiently and keep your fulfillment workflow organized.
- Check shipping eligibility first: Shopify’s built-in label purchasing service is available only for eligible fulfillment locations and supported carriers.
- Prepare accurate shipment details: Correct addresses, package weights, and dimensions help prevent shipping errors.
- Follow the label creation process: Open an eligible order, select Create Shipping Label, choose a carrier, purchase the label, and print it.
- Compare shipping services: Review delivery speeds, rates, and tracking options before purchasing postage.
- Use alternatives when necessary: Third-party apps and carrier websites allow merchants to create labels when Shopify Shipping isn’t available.
- Keep customers informed: Add tracking information, update fulfillment statuses, and communicate delivery progress after an order ships.
Ultimately, an efficient shipping process involves more than printing a label. By combining accurate fulfillment information, reliable shipping services, and consistent customer communication, you can create a smoother experience from checkout to delivery.
For the latest shipping label eligibility requirements and instructions, visit the official Shopify Shipping Labels Help Center.

Increase your sales and sign-ups by up
to 15% from $9/mo. only with our Social Proof & FOMO App
Add to Shopify
