With Nudgify, you can pass JavaScript Variables from your site in your Custom Nudge messages using braces { }. This gives developers the opportunity to add dynamic content to Custom Nudges, and create messages such as:
- Search hundreds of deals on flights from {city}
- {percentage}% discount on all {category}
- We have stores in {location-number} locations across {country}
- We offer a {warrantyyears}-year warranty on all {category}
The possibilities are (almost) endless.
How can I pass JavaScript Variables in Custom Nudges?
To pass JavaScript Variables into a Custom Nudge, you need to:
- define the variables in your Nudgify Pixel
- push the variables in your Custom Nudge message with braces { }
Read how to do this below alongside the example “Search hundreds of deals on flights from {city}“.
Step 1: Pass the variables in your Nudgify Pixel
If you use JavaScript variables on your website, you can pass these to Nudgify by adding them to your Nudgify Pixel.
You should add a line of code to your Pixel with the name and value of the variable(s) that you would like to push. Use the name and value you have given this variable on your website.
NOTE: if you add a variable in a Custom Nudge that is not actually available on the page where you are trying to show this Nudge, the Custom Nudge won’t show at all.
What code do I add to the Pixel?
In this example we show how you could pass the variable ‘city’ in your Nudgify Pixel.
Add the following line of code to your pixel and replace the ‘variable name’ and ‘variable value’ by the name and value you use for the visitor’s city on your site.
window.nudgify = {variables: {variable name: variable value}};
This can for example be “city: visitorCity”. In this case, the line of code you add to the Pixel should be:
window.nudgify = {variables: {city: vistorCity}};
If you want to push variables that are not yet implemented on your website, you will need to do some coding to implement the variables you want on you site first.
Where in the Pixel do I add the extra line?
You add the extra line directly below <script> and above the function, which starts with (function(w){.
![]()
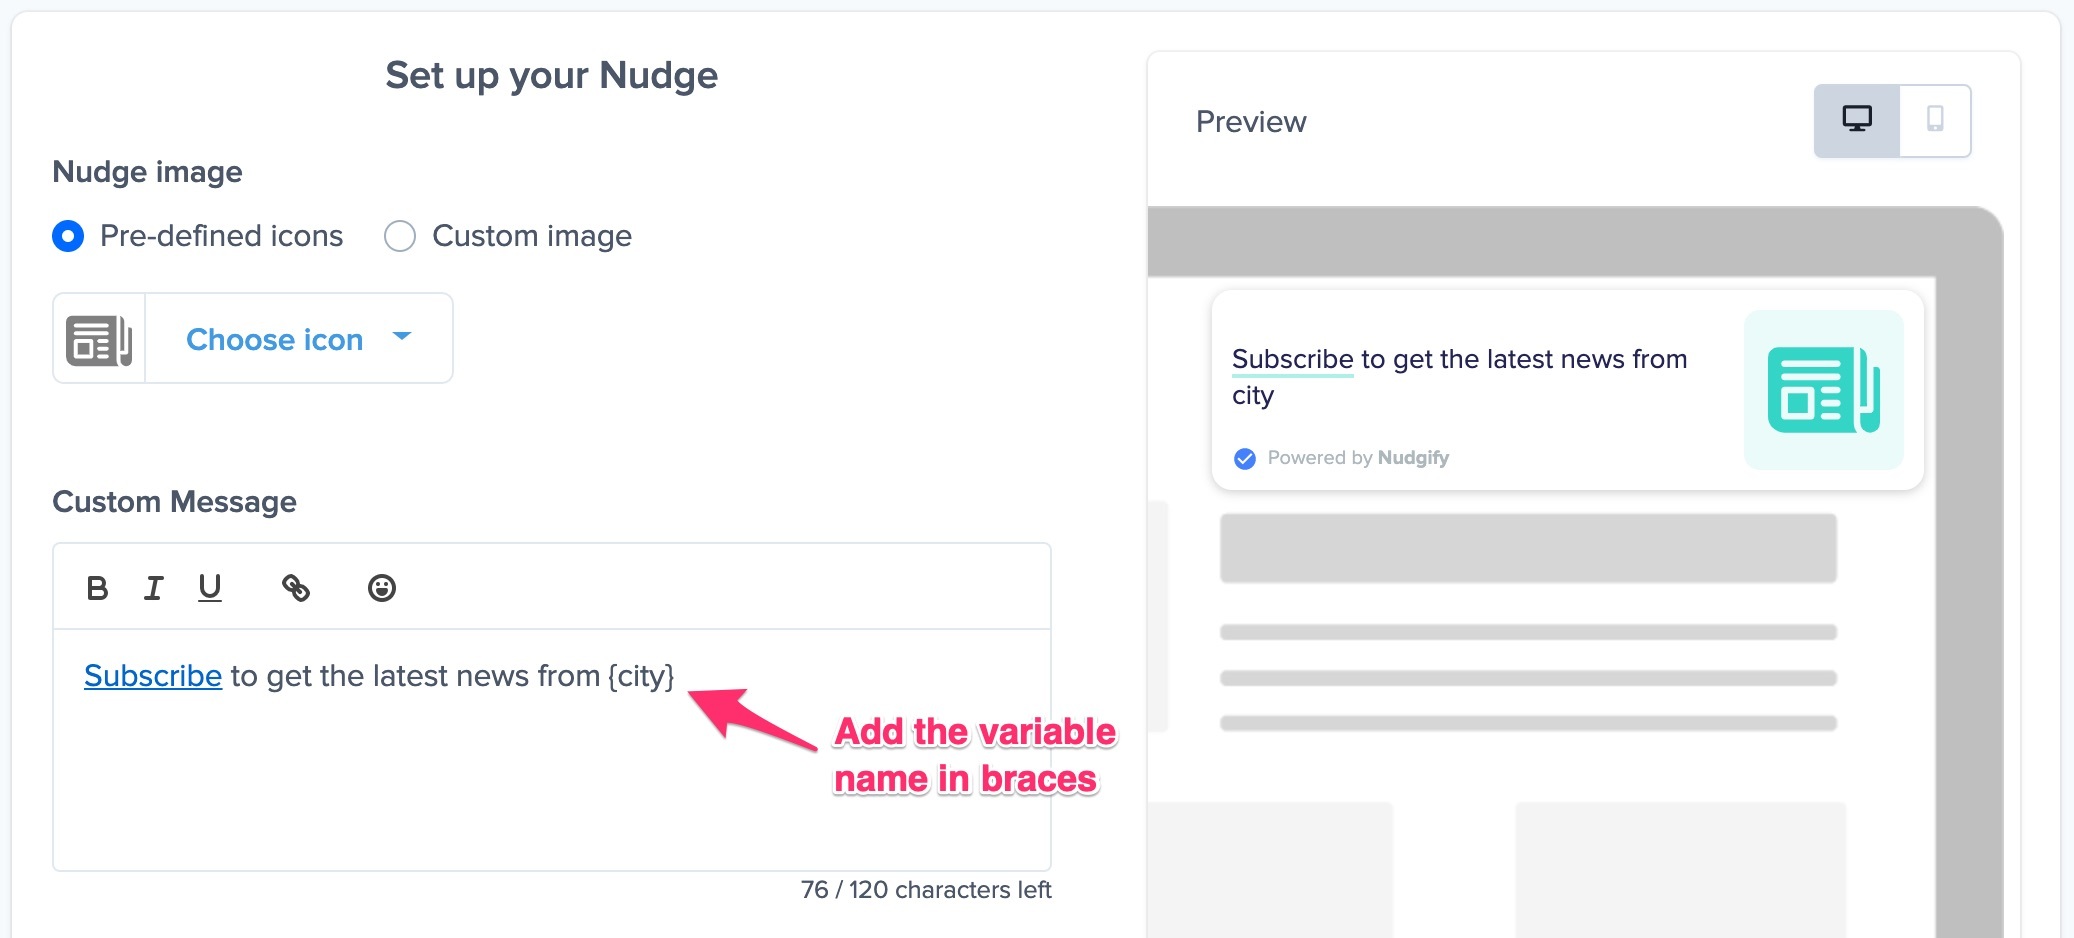
Step 2: Push the variables in your Custom Nudge message
Once the variable is added to your Pixel, you can push it in your Custom Nudge message by adding the variable name in braces. For example: “Search hundreds of deals on flights from {city}” or “Subscribe to get the latest news from {city}”.
Depending on the location of the visitor of your site, the actual message in your Nudge will then show for example “Search hundreds of deals on flights from London” or “Search hundreds of deals on flights from Paris”.
As you can see in the screenshot above, the preview on the right shows the plain text you typed in, ‘city’. Only when the Nudge is live, it will capture and show the live data you push in the variable.