A Selling Fast Nudge shows how quickly a product might sell out. By creating a Fear Of Missing Out (FOMO), Selling Fast Nudges encourage your customers to take action immediately.

How does the Selling Fast Nudge work?
The Selling Fast Nudge is a Nudge for your product pages. It displays the product image and shows how quickly the product is likely to sell out. To calculate this, the Selling Fast Nudge uses two pieces of live data:
- Recent sales data
- Stock room data
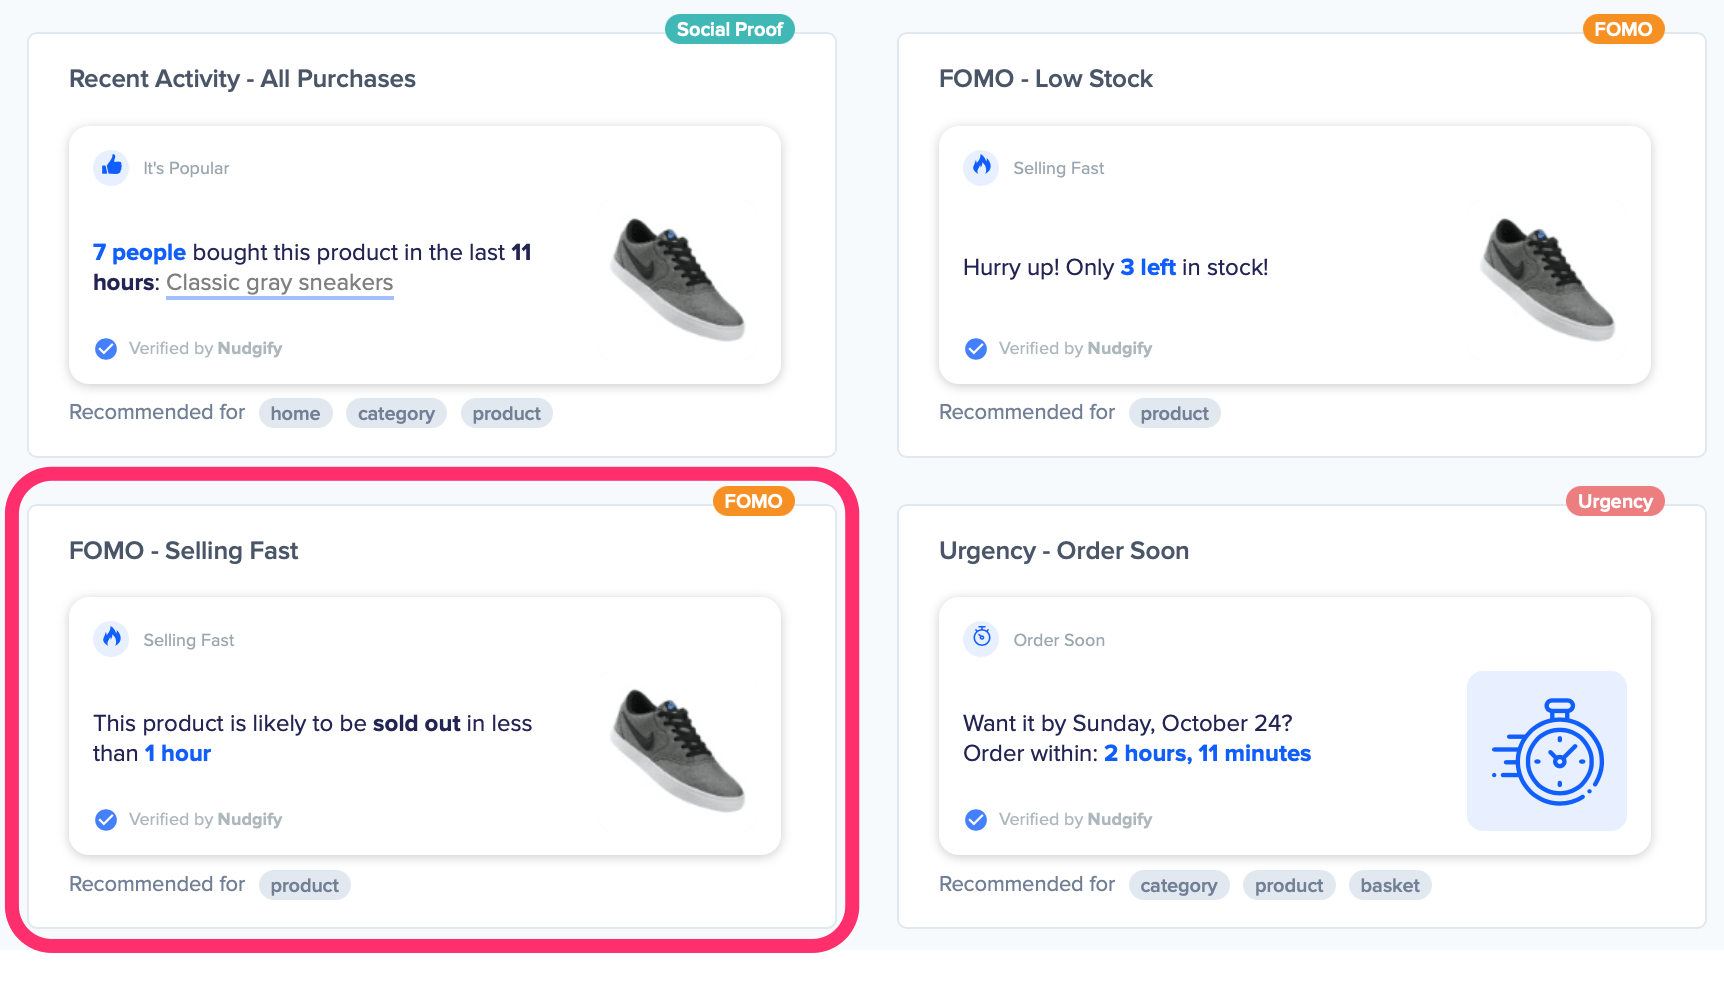
Depending on the number of items left in stock and on the amount of times the product has been sold recently, Selling Fast Nudges can display 3 different messages:
If a product is likely to sell out in less than 12 hours, the time shows in hours.
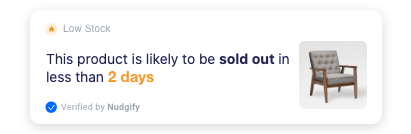
If it is likely to sell out between 12 hours and 5 days, the time shows in days.

When a product is likely to sell out between 5 days and 2 weeks, the time shows in weeks.
When does the Selling Fast Nudge not show?
- If there are no items left in stock, the Selling Fast Nudge does not show.
- If the item is not likely to sell out within 2 weeks, the Selling Fast Nudge does not show.
- The Selling Fast Nudge relies on stock management. Therefore the Nudge does not show for products that do not have stock management.
- The Selling Fast Nudge uses information about recent sales. If the product has not been sold at least twice since you added the Nudge, the Selling Fast Nudge won’t show yet for that product.
- Because the Selling Fast Nudge only shows on pages where stock information is available, it only shows on product pages and not on, for example, your home page.
Step 1: Add a Selling Fast Nudge from the Nudge library
To add a Selling Fast Nudge to create a FOMO effect, follow the steps below.
- Go to your Streams page
- Click on the Streams you want to add a Nudge to or create a new Stream
- Click ‘Add a Nudge’
- In the Nudge Library, select “eCommerce & Retail”
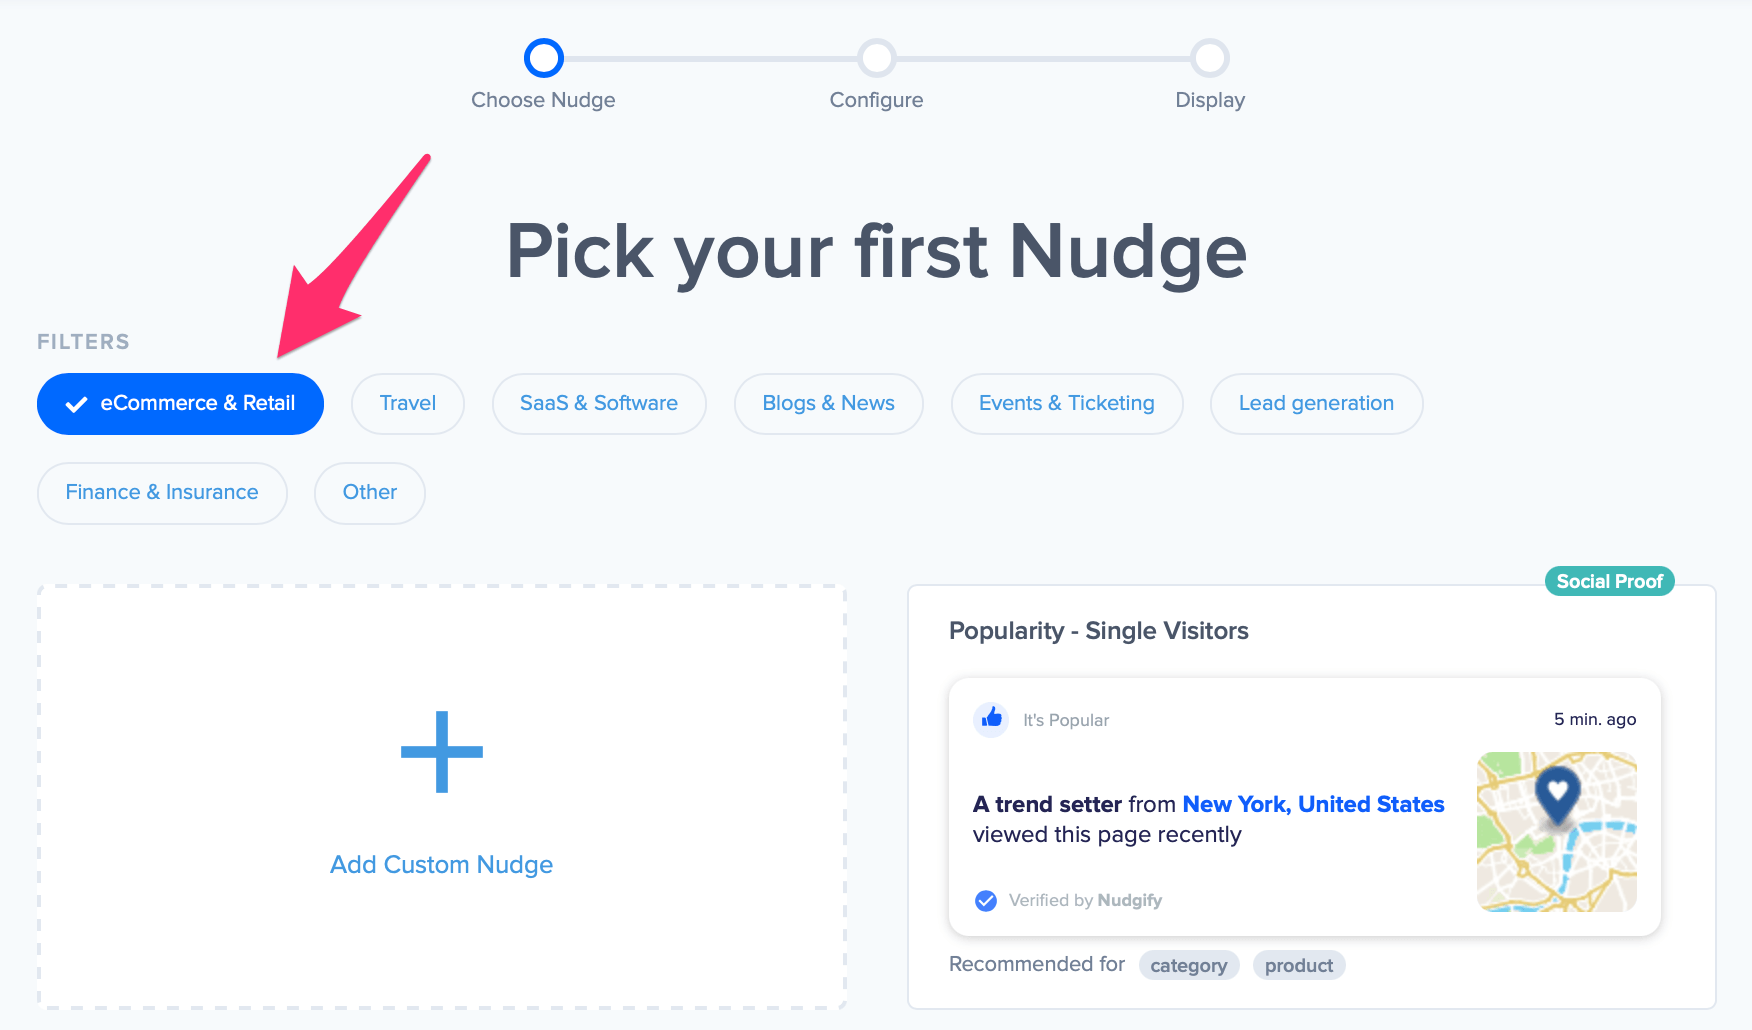
- Scroll down and select the Selling Fast Nudge
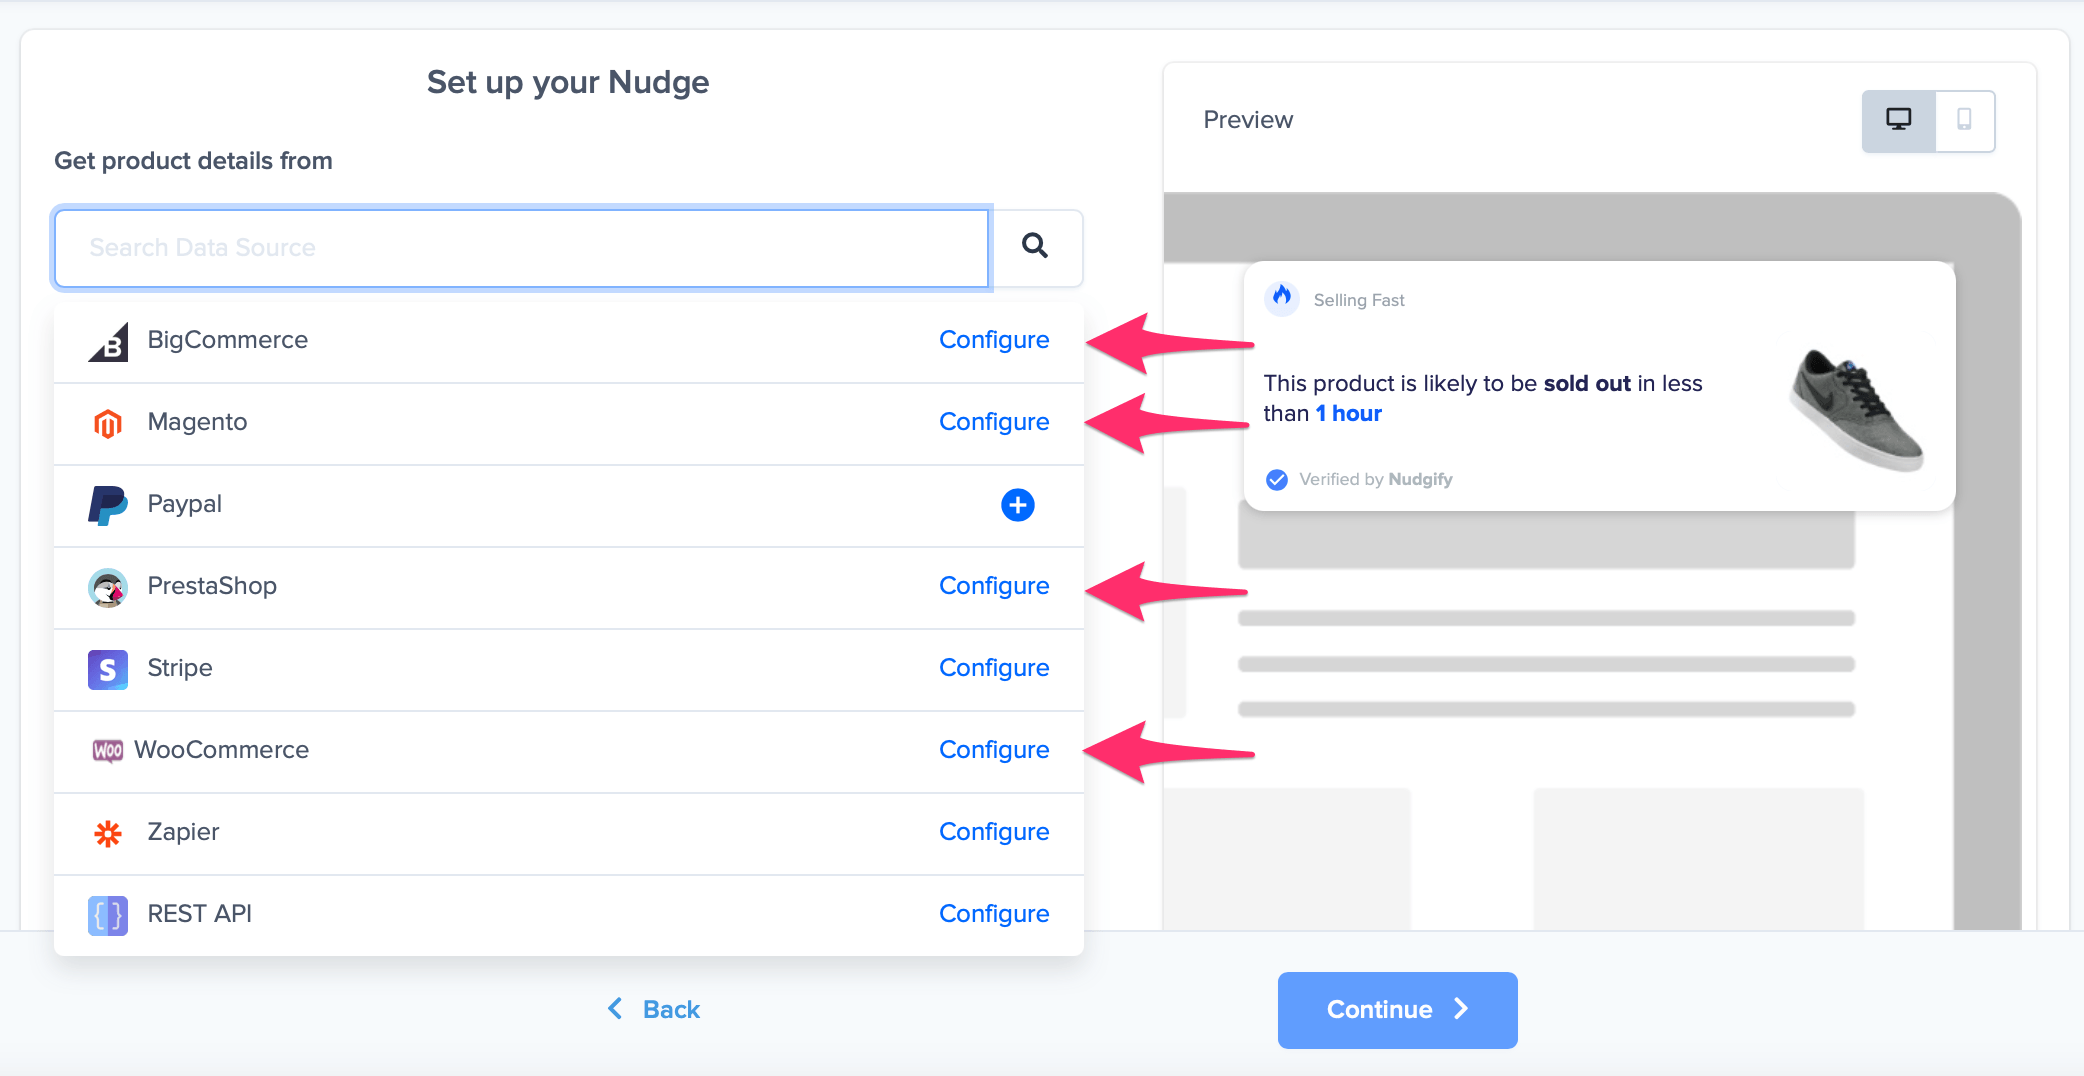
- A configuration box now opens, in which you are asked to select a source for your purchase & stock room data. Read below how to connect this data.
Step 2: Connecting Your Data
Because the Selling Fast Nudge relies on 1) information about recent purchases and 2) stock room information, both these types of data need to be connected to the Nudge.
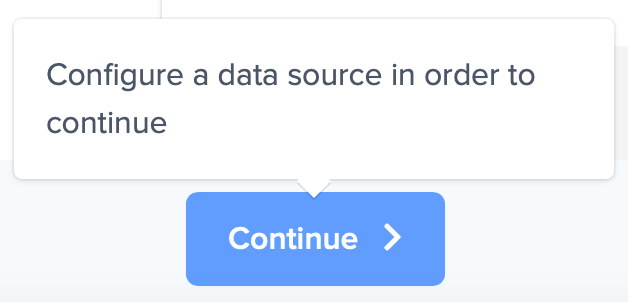
Until you connect both your product and stock data, the Continue button will not work.
There are 2 options for connecting your data:
A) Connect both types of data in one go with the:
- WooCommerce integration
- Wix integration
- BigCommerce integration
- Magento integration
- PrestaShop integration
B) Connect the purchase data with one of the integrations below and the stock data with JavaScript:
Option A: Connect both types of data with an e-commerce platform
- When configuring the Selling Fast Nudge, click one of the data sources listed above under option A) and click “Configure” to continue.
- Each platform is connected to a link that will lead you to a detailed explanation on how to connect your plug-in to your Nudge.
- A step-by-step guide will pop up and ask you to follow the instructions. If you need any help, go to the documentation of your integrations via one of the according links above.
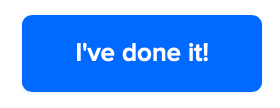
- After having worked through the instructions, press the “I’ve done it!” button.
- The Nudge configuration screen now shows that your e-commerce platform (WooCommerce in this example) is connected, and the continue button is now enabled. Click “Continue” to add the Selling Fast Nudge.

That’s it! Now you’ve added Selling Fast Nudges to create FOMO and encourage your visitors to buy sooner! Remember: they will only show on your product pages.
Option B: Connect the purchase and stock data separately with the help of JavaScript
The Selling Fast Nudge that creates an urge to buy and FOMO effect relies on 1) information about recent purchases and 2) stock room information. Both these types of data need to be connected to the Nudge individually in this case.
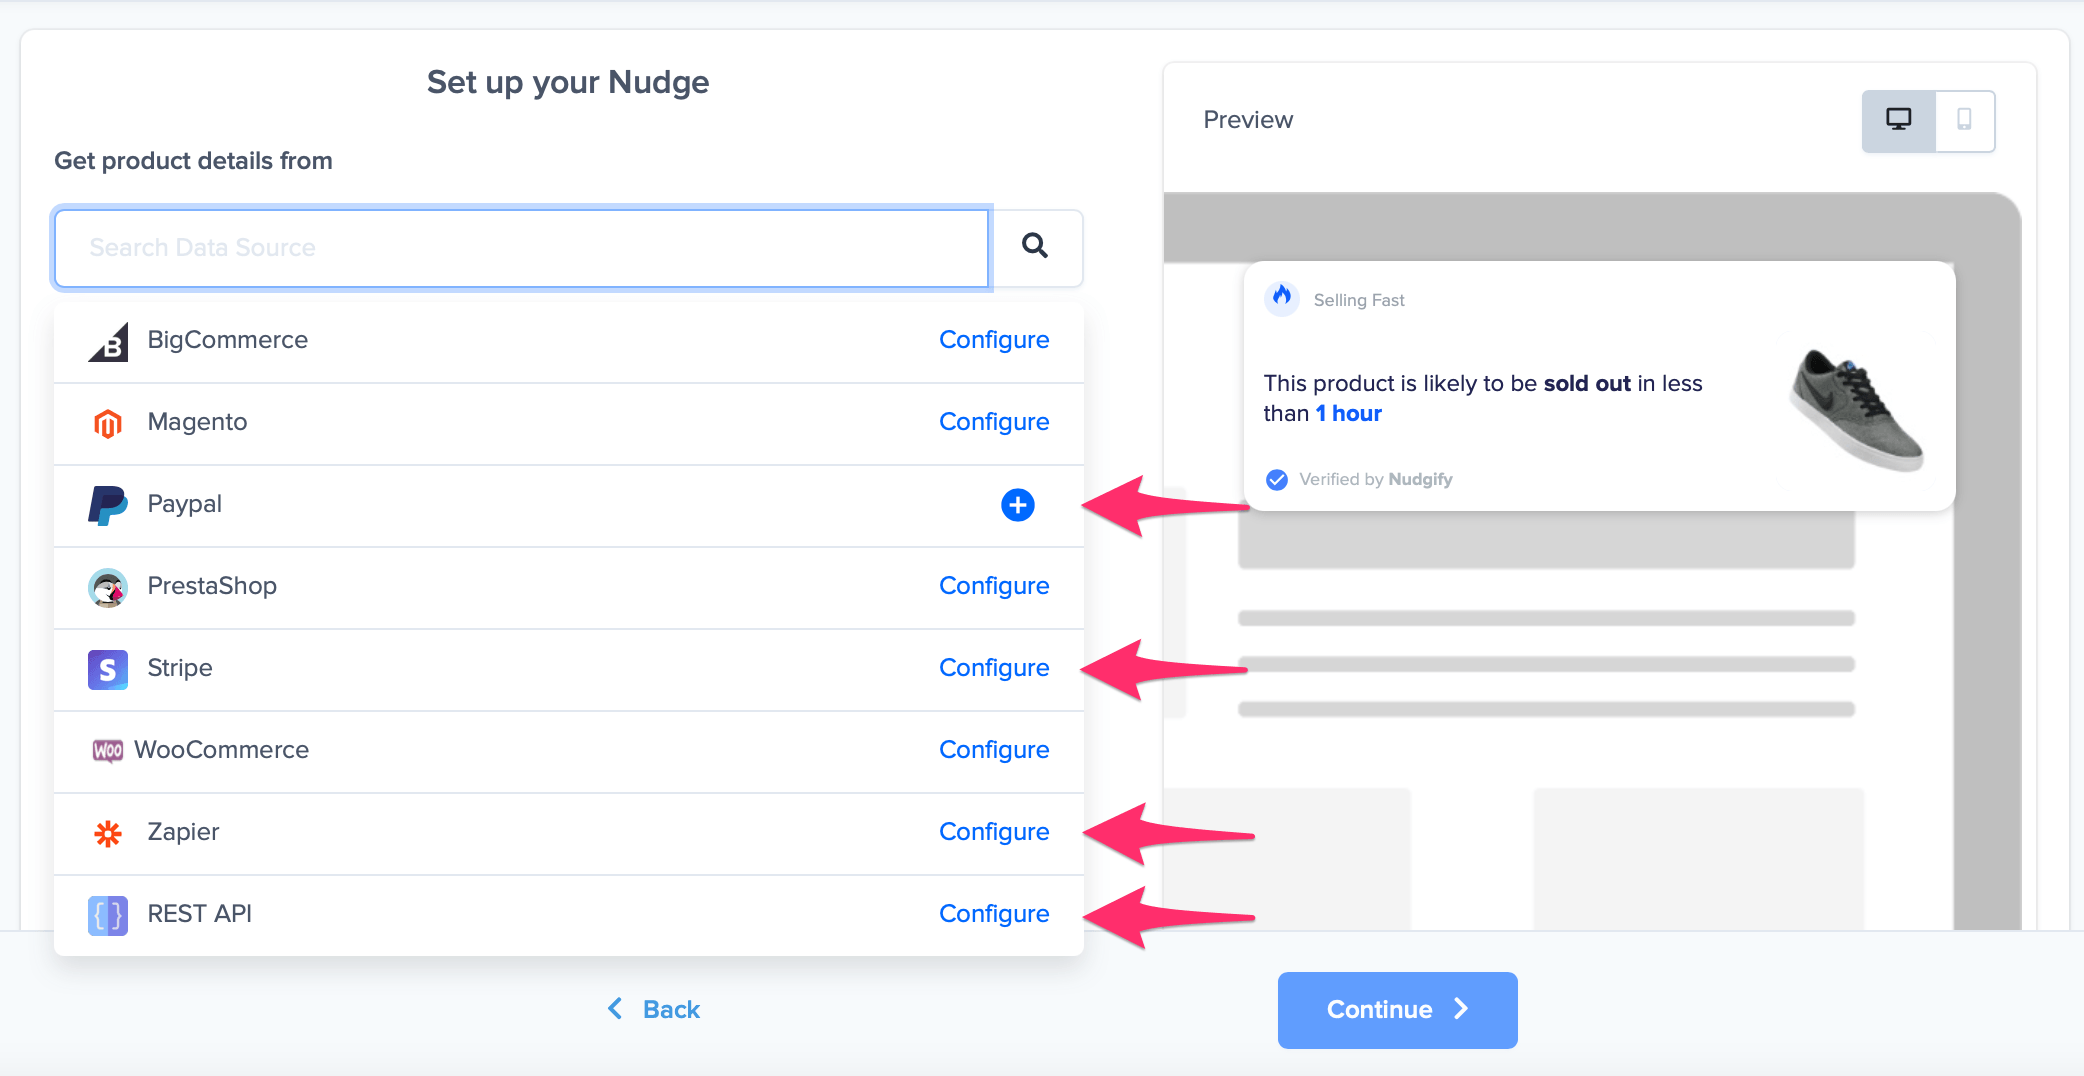
Step 1: Connect recent purchases with Paypal, Zapier, Stripe or REST API
- If you don’t have a site that lets you connect your purchase and stock data in one go, you need to connect this data separately: your purchases with one of the data sources listed above under option B) and your stock levels with JavaScript.
- Select a data source and press the Configure button.
- Each platform is connected to a link that will lead you to a detailed explanation on how to connect your plug-in to your Nudge.
- A step-by-step guide will pop up and ask you to follow the instructions. If you need any help, go to the documentation of your integrations via one of the according links above.
- After having worked through the instructions, press the “I’ve done it!” button.
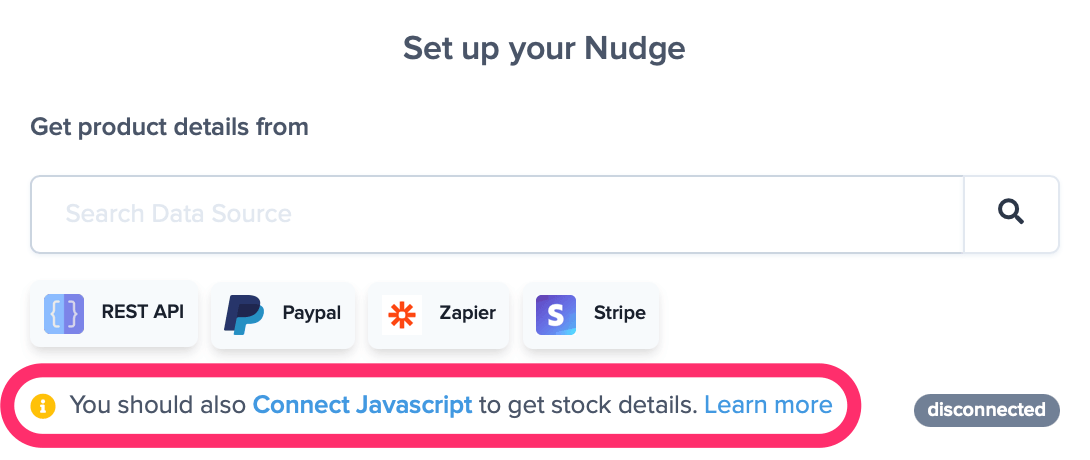
If you have configured one of the available integrations but haven’t yet connected JavaScript, the continue button will not work. You must connect your purchase data with a data source provided and the stock details with JavaScript to continue.
Now, move on to Step 2 to connect your stock data with JavaScript.
Step 2: Connect your stock data with JavaScript
To Connect your stock data via JavaScript, click “Connect JavaScript”.
Connecting your stock data via JavaScript requires some coding. If you are a developer or otherwise familiar with JavaScript, you can connect your Nudgify Stock data with JavaScript variables following the instructions below. If not, you may share these instructions with your developer.
In order to connect your stock information with JavaScript, you need to pass the following product variables into the Nudgify Pixel: “image” (= the product image), “stock” (= the product’s stock level) and “id” (= the product ID).
You can add the line of code below to your Nudgify Pixel. The values of the variables are set to “null” by default, but you can change them to pass the product data from your website to the Selling Fast Nudge.
window.nudgify = {"product": {"image": null, "stock": null, "id": null}};
- Replace “null” for the image variable with the value you use on your website for your product images, e.g. “productURL” or however else you have named it.
- Replace “null” for the stock variable with the value you use on your website for the number of items left in stock, e.g. “stockNumber” or however else you have named it.
- Replace “null” for the id variable with the value you use on your website for the identification of a specific product
- As soon as you have added this to the Pixel on your website, go back to Nudgify and click “Enable JavaScript”
- JavaScript as data source is now connected to your Selling Fast Nudge and the continue button will be enabled.
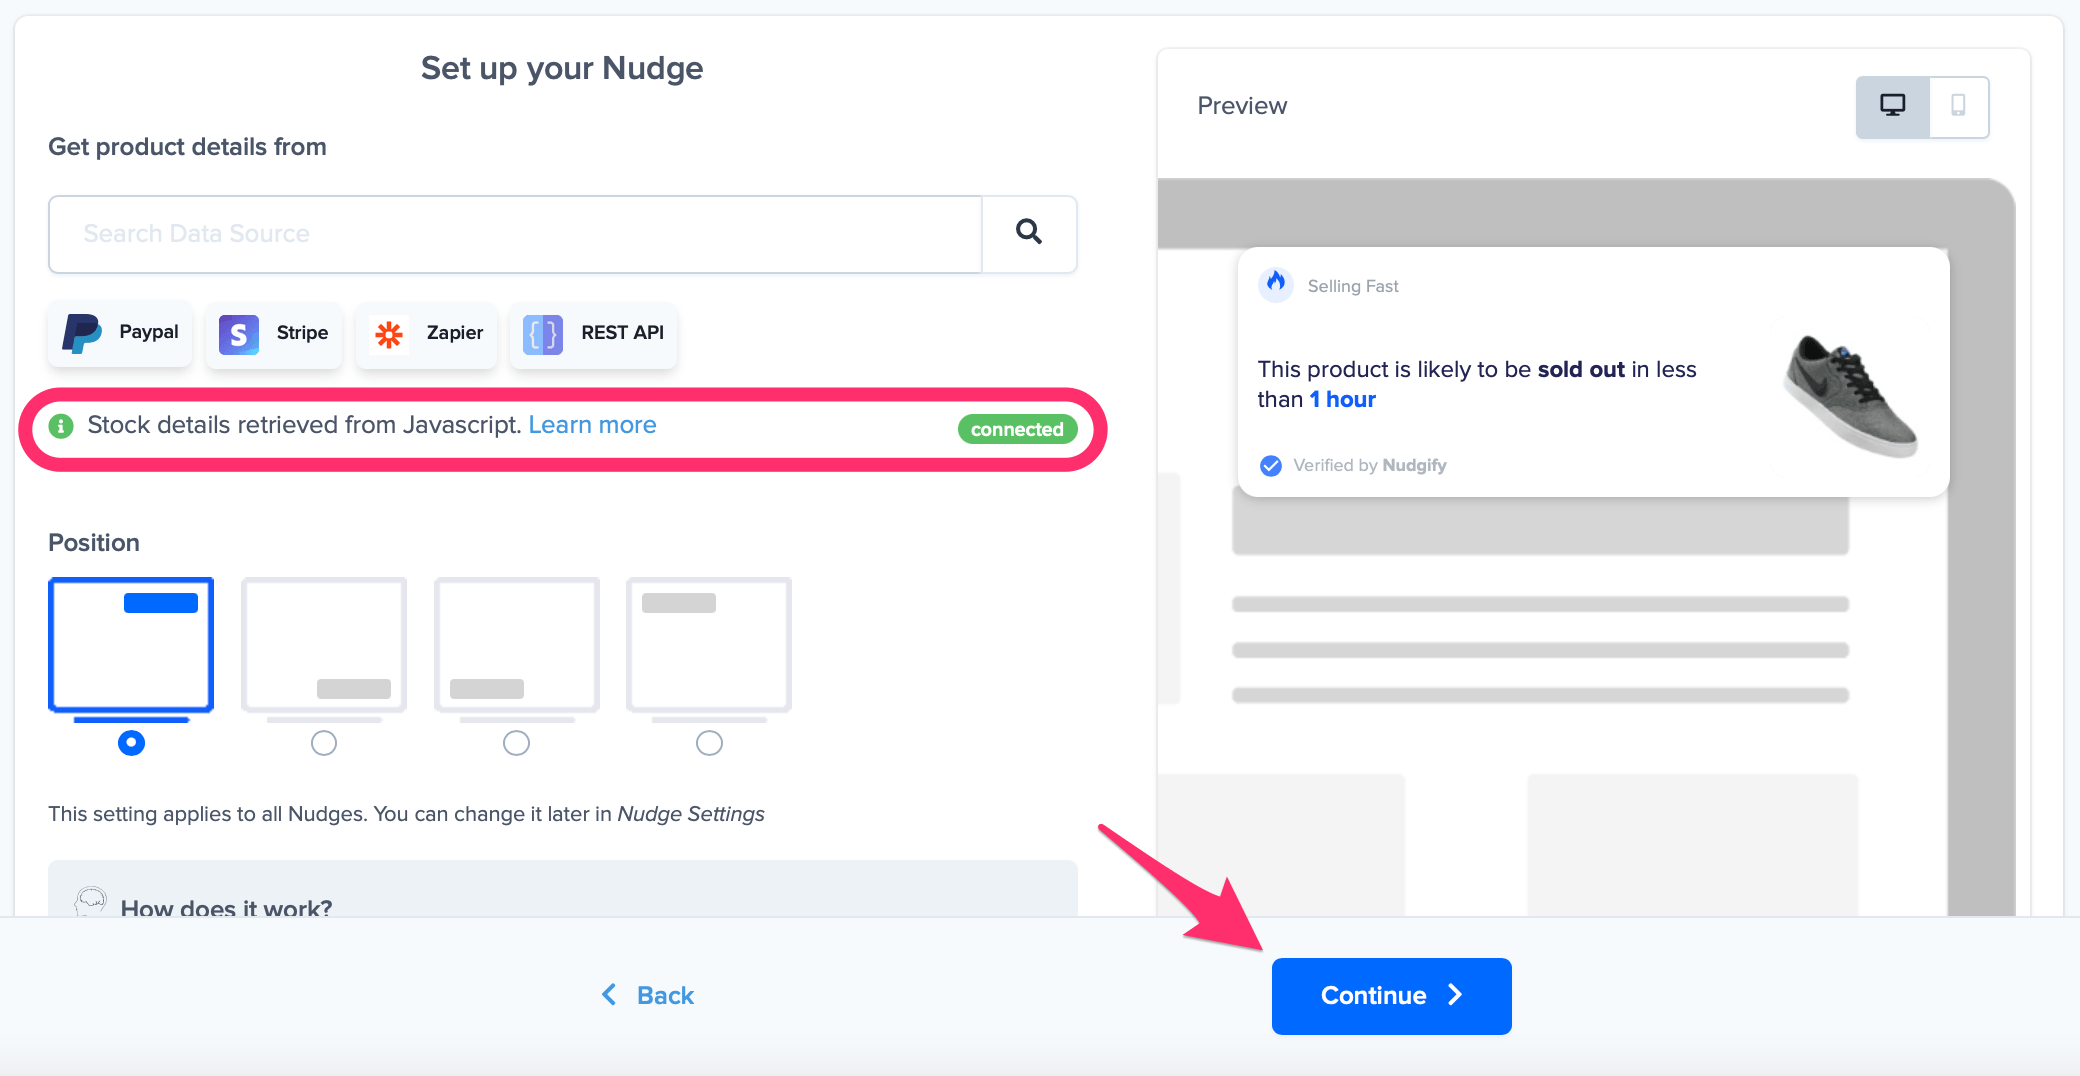
- Click “Continue” to add the Selling Fast Nudge.
That’s it! Now you’ve added Selling Fast Nudges to create FOMO and encourage your visitors to buy sooner! Remember: they will only show on your product pages.